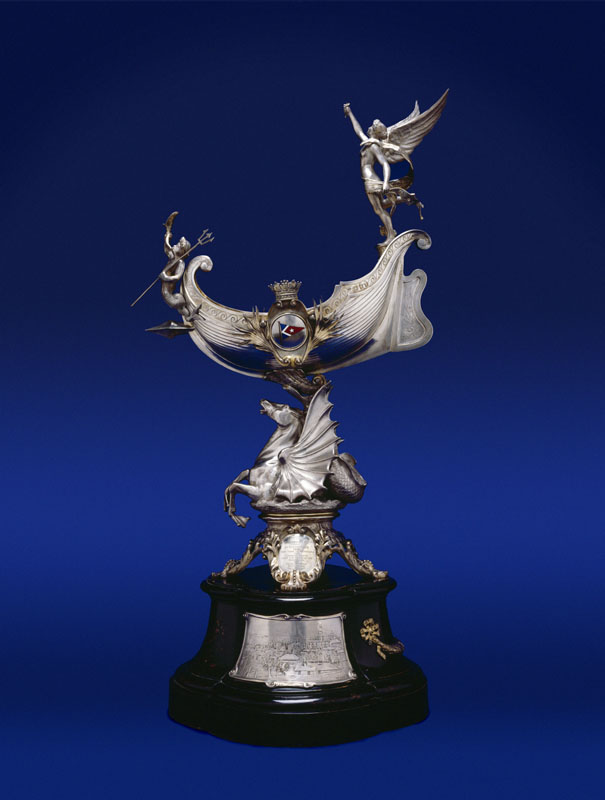
In this post, I thought I would give you a deep look behind-the-scenes to see a process museum staff frequently undertake, but most people don’t get to see: what’s involved in packing an object for travel. In this instance, the object is the 1906 Lipton Cup for the first Ocean Race to Bermuda. You might remember the Lipton Cup was one of the winners of the 2017 Bronze Door Society annual dinner. The Bronze Door Society sponsored the conservation of the Lipton Cup to the tune of $30,000.00.
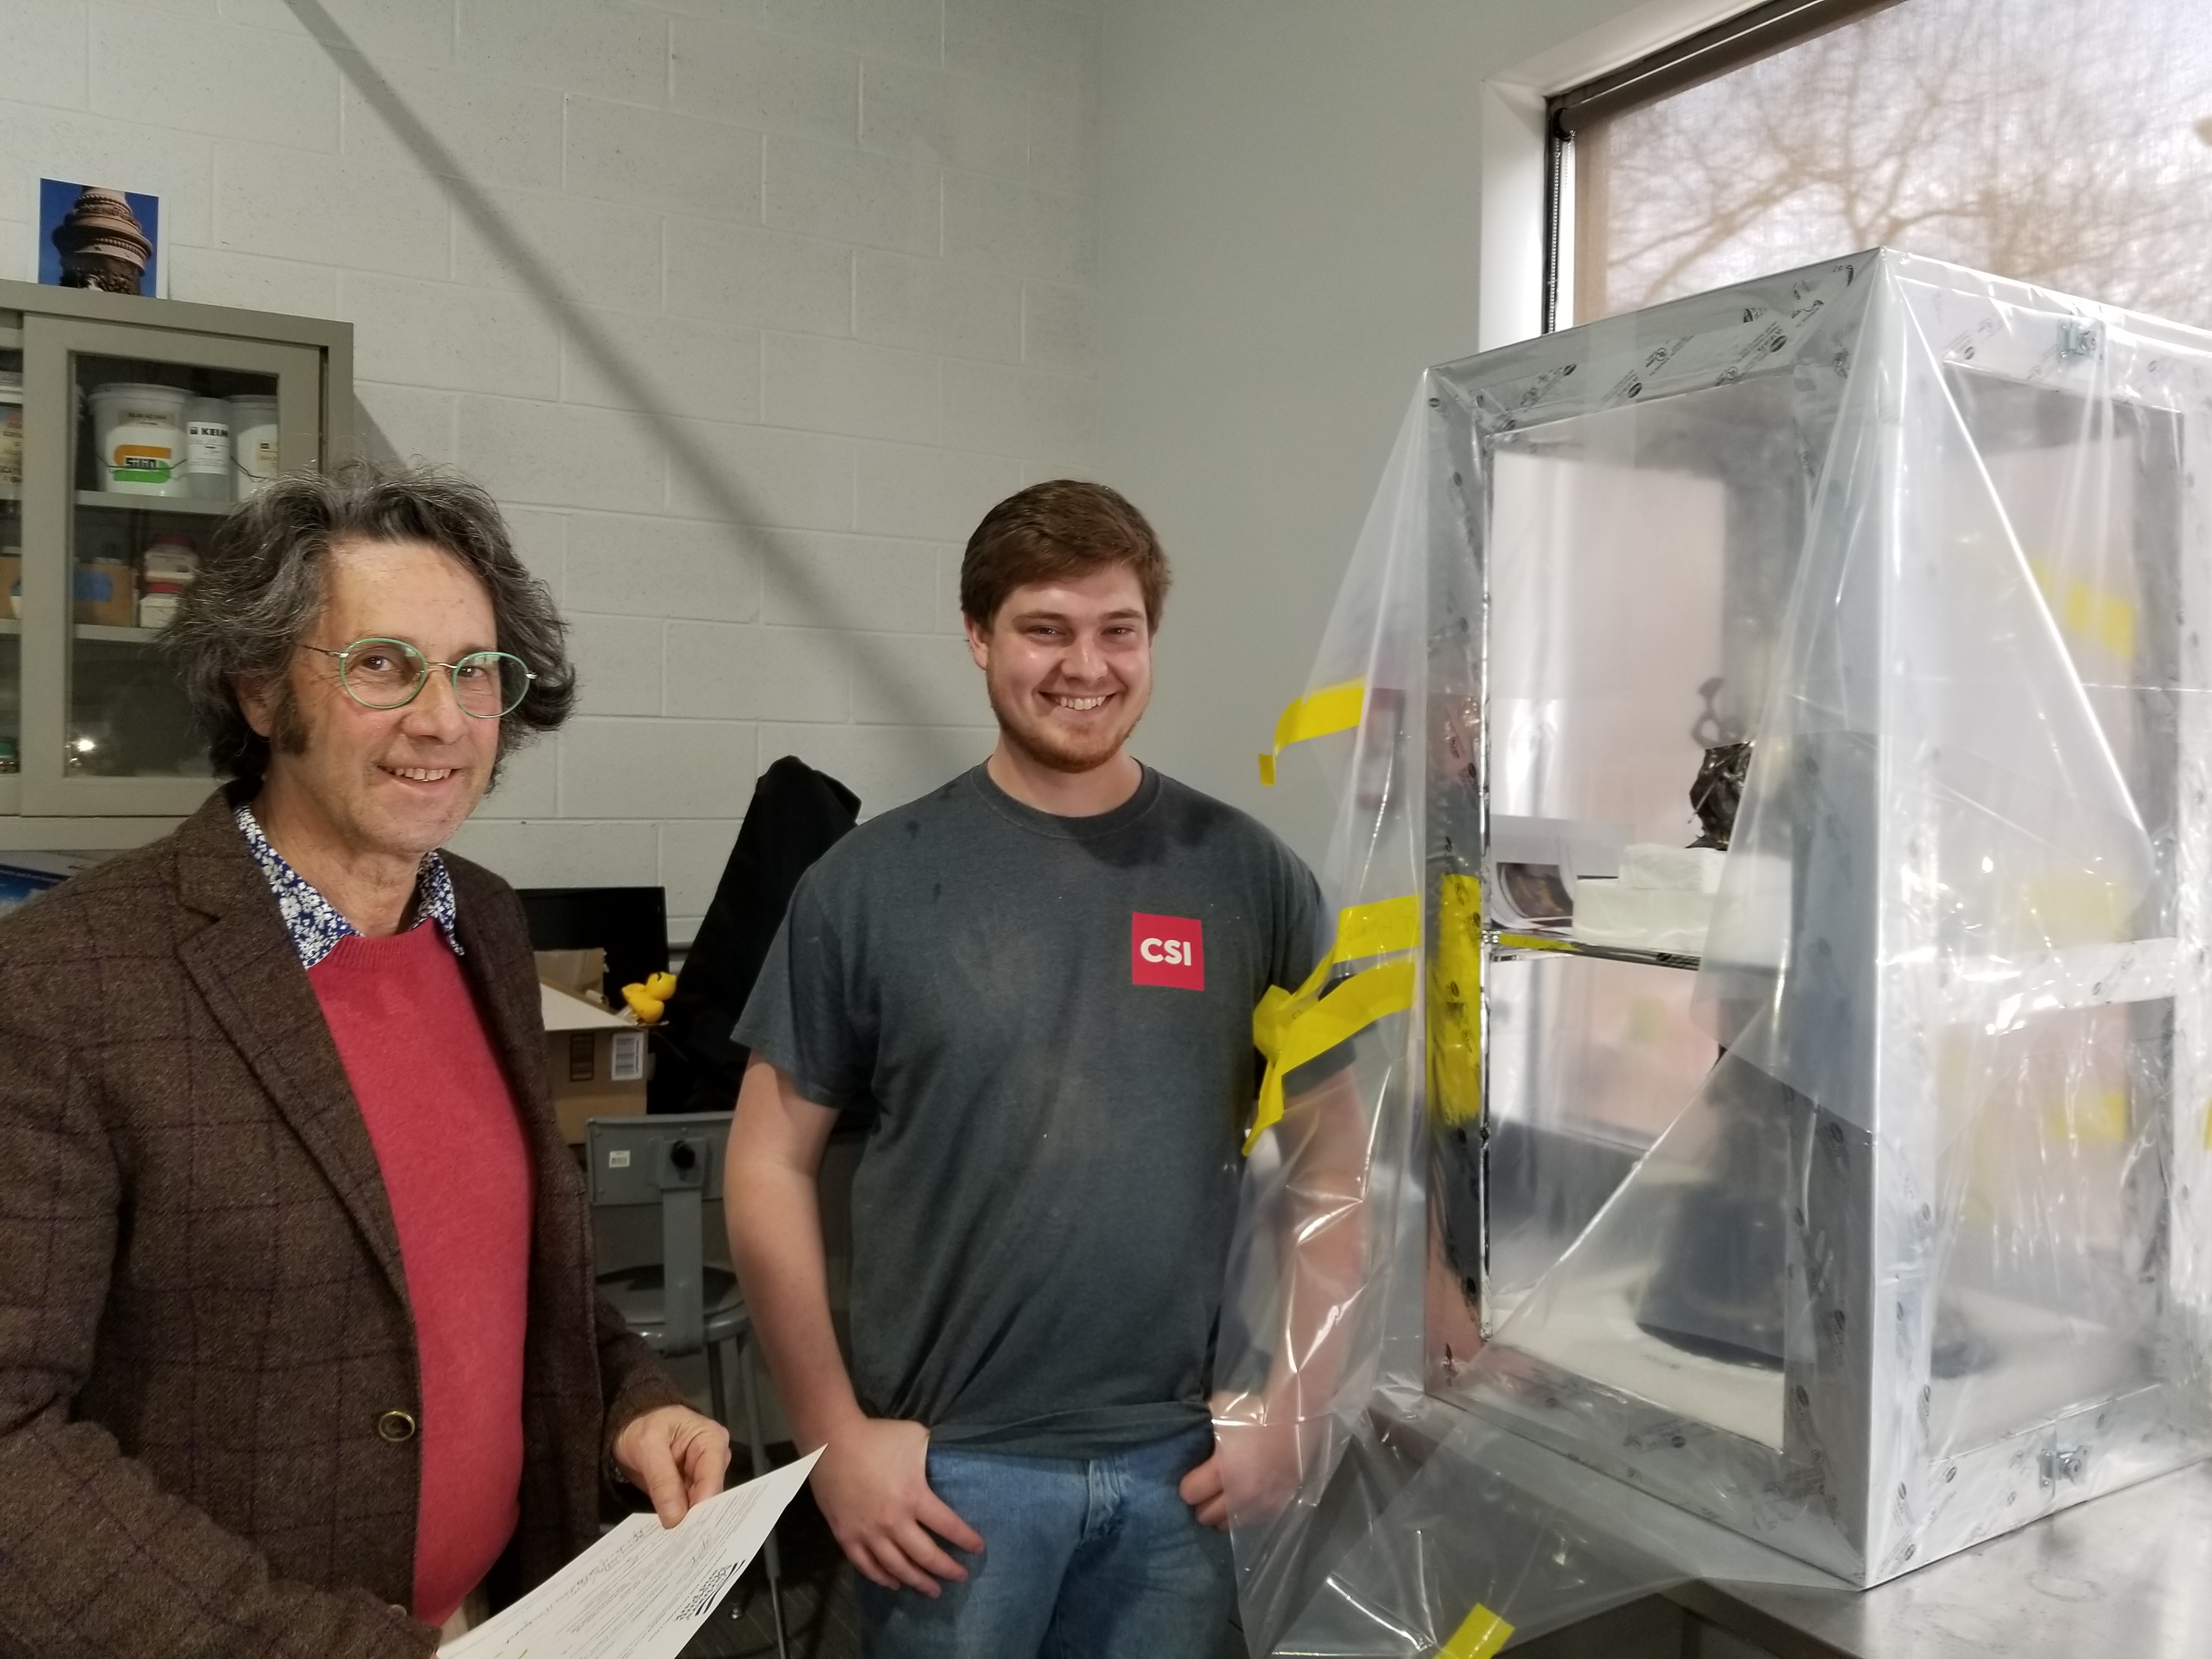
It took several months to find a conservator (we chose Conservation Solutions, Inc.) and finalize the contract for the work, which will take most of the money budgeted for the project: $29,290. Once this part of the process was complete our next task was to troubleshoot how to transport the trophy to the CSI. You’ve seen the thing—with all those delicate frilly bits and the crack in the main spindle we couldn’t just wrap it in a little padding and lay it on its side in a box (we’d need another $30,000 to repair the damage that caused!). Unfortunately, we only had $700.00 left in the budget to cover the packing expenses—which is a pittance when it comes to packing art. Creating a customized crate usually costs anywhere from $1,000.00 to $10,000.00 or more depending on the object and its size or complexity. As an example, Peabody Essex Museum just spent $12,281 to crate our Kronprinz Wilhelm painting for travel between Newport News, Massachusetts, London and Dundee, Scotland. Granted, the 1906 Lipton Cup isn’t as big, but it gives you an idea of what it costs to crate a complex object.
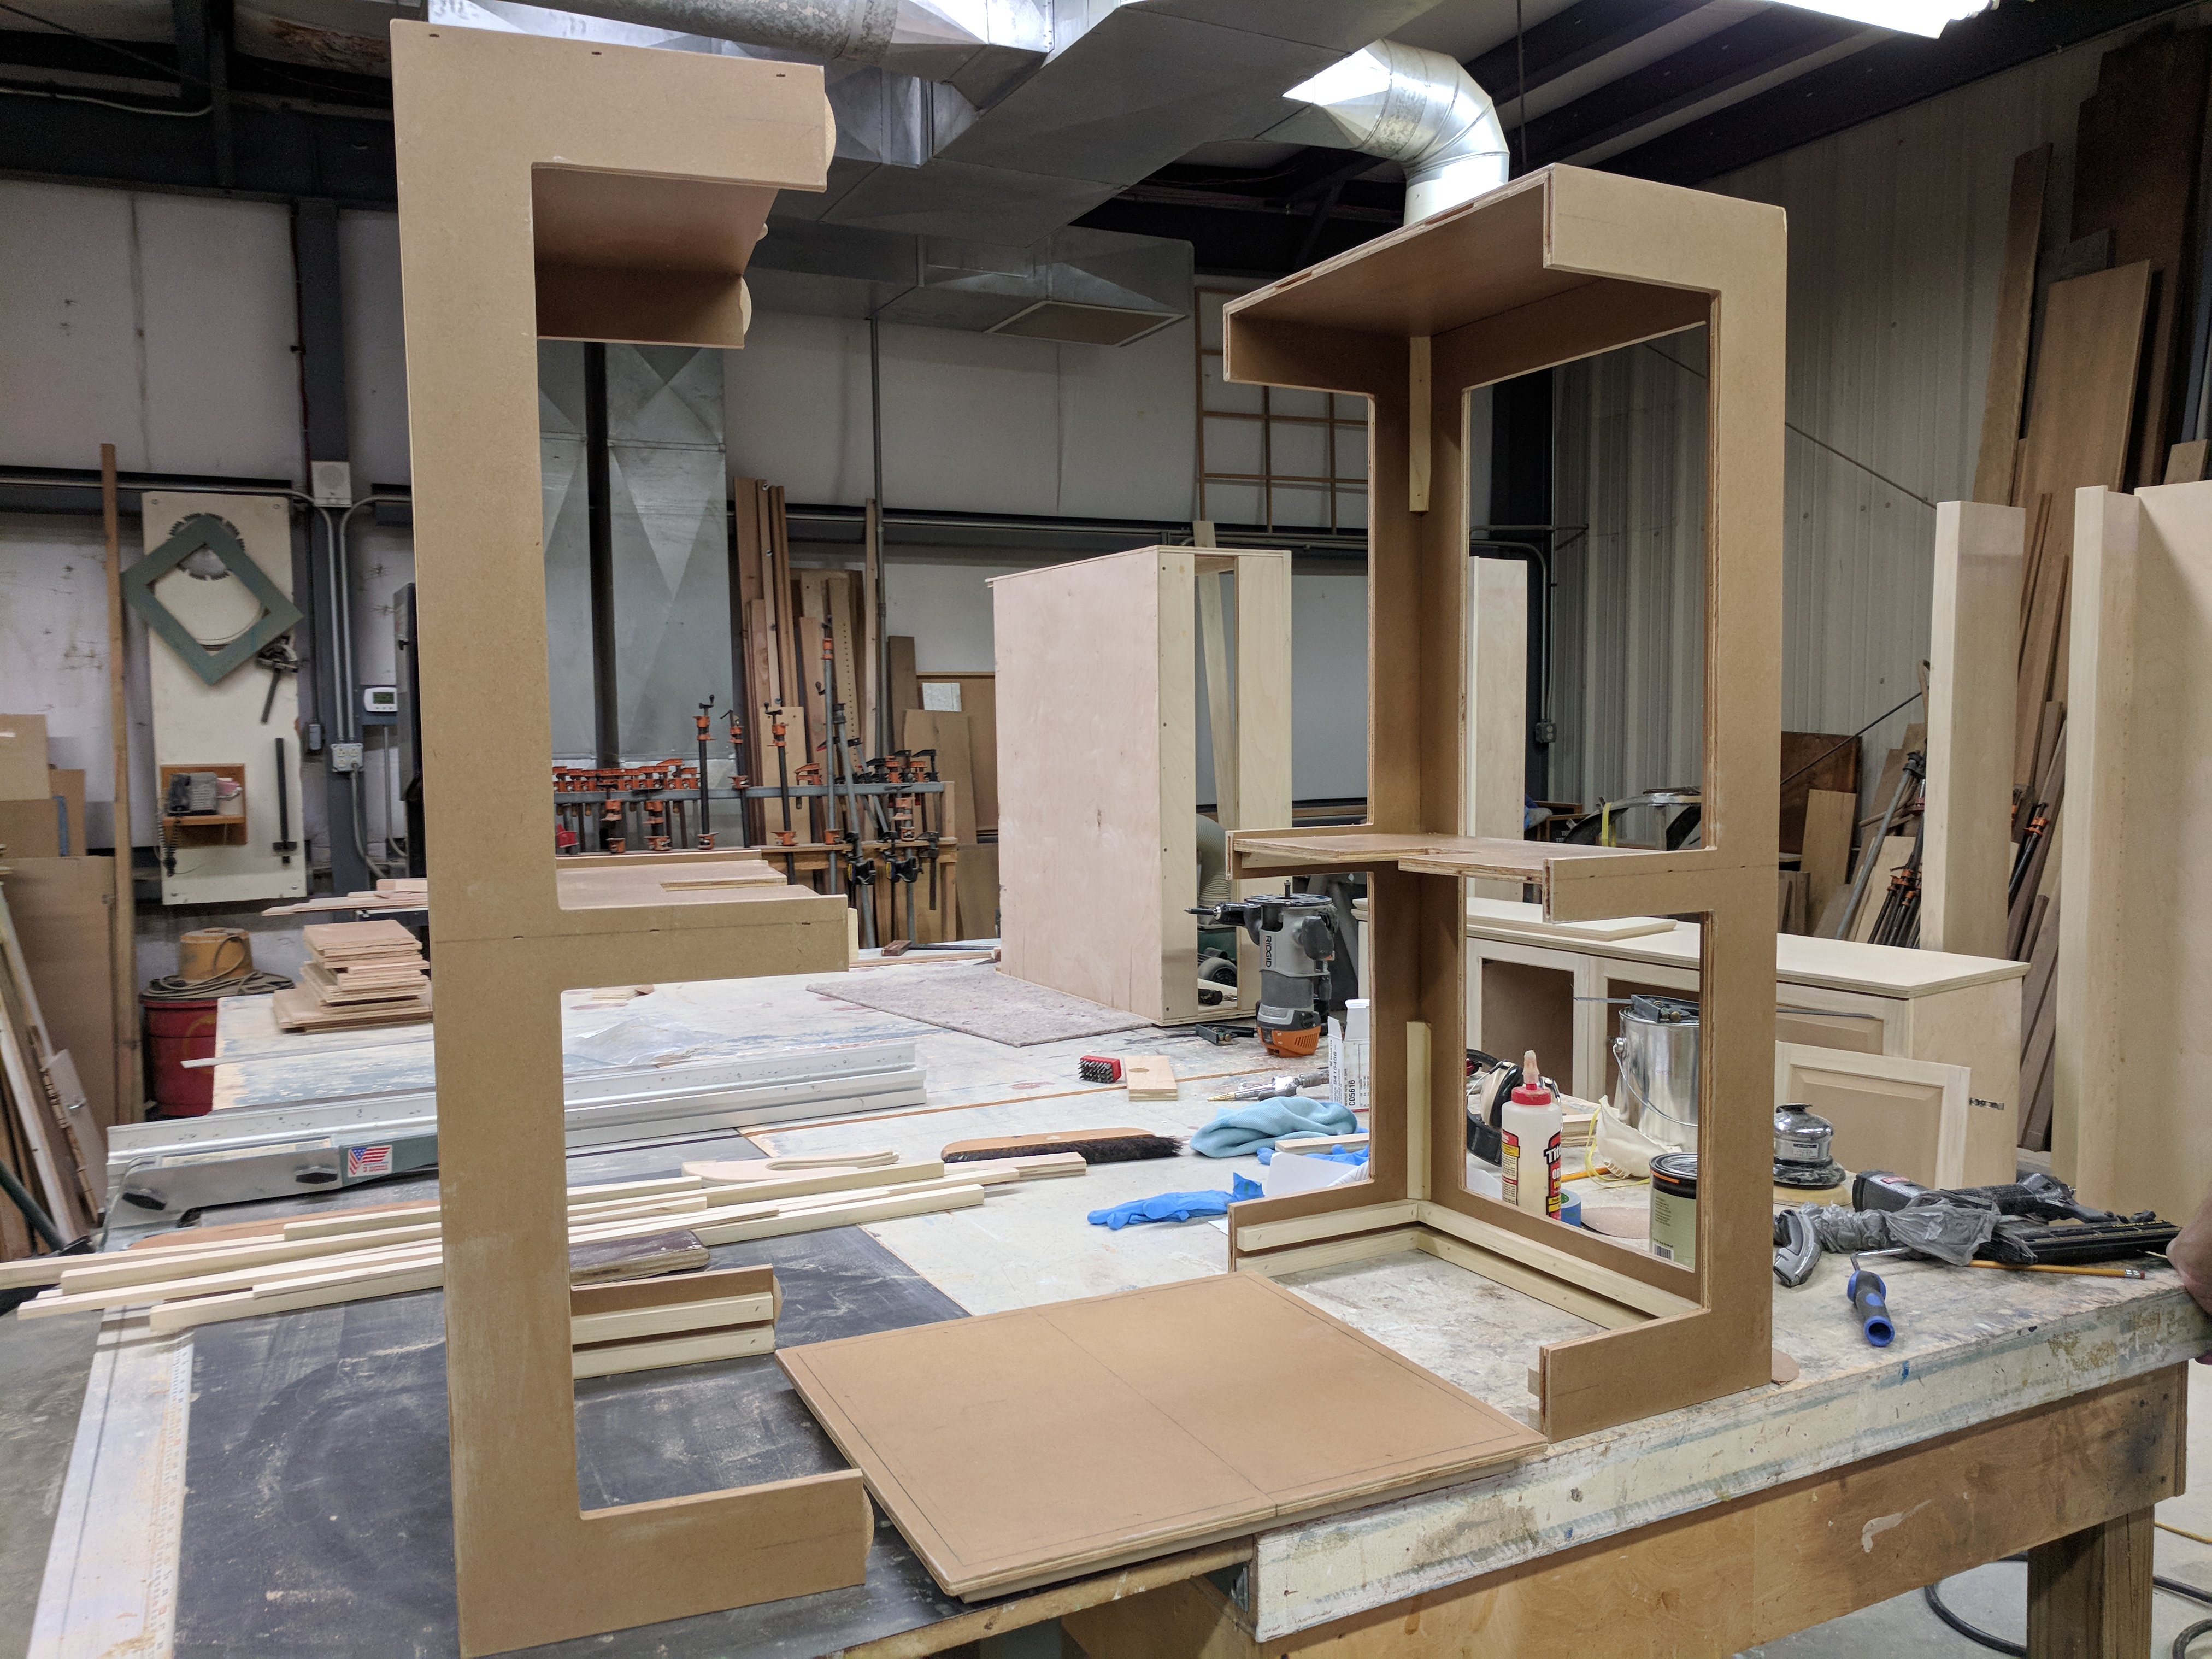
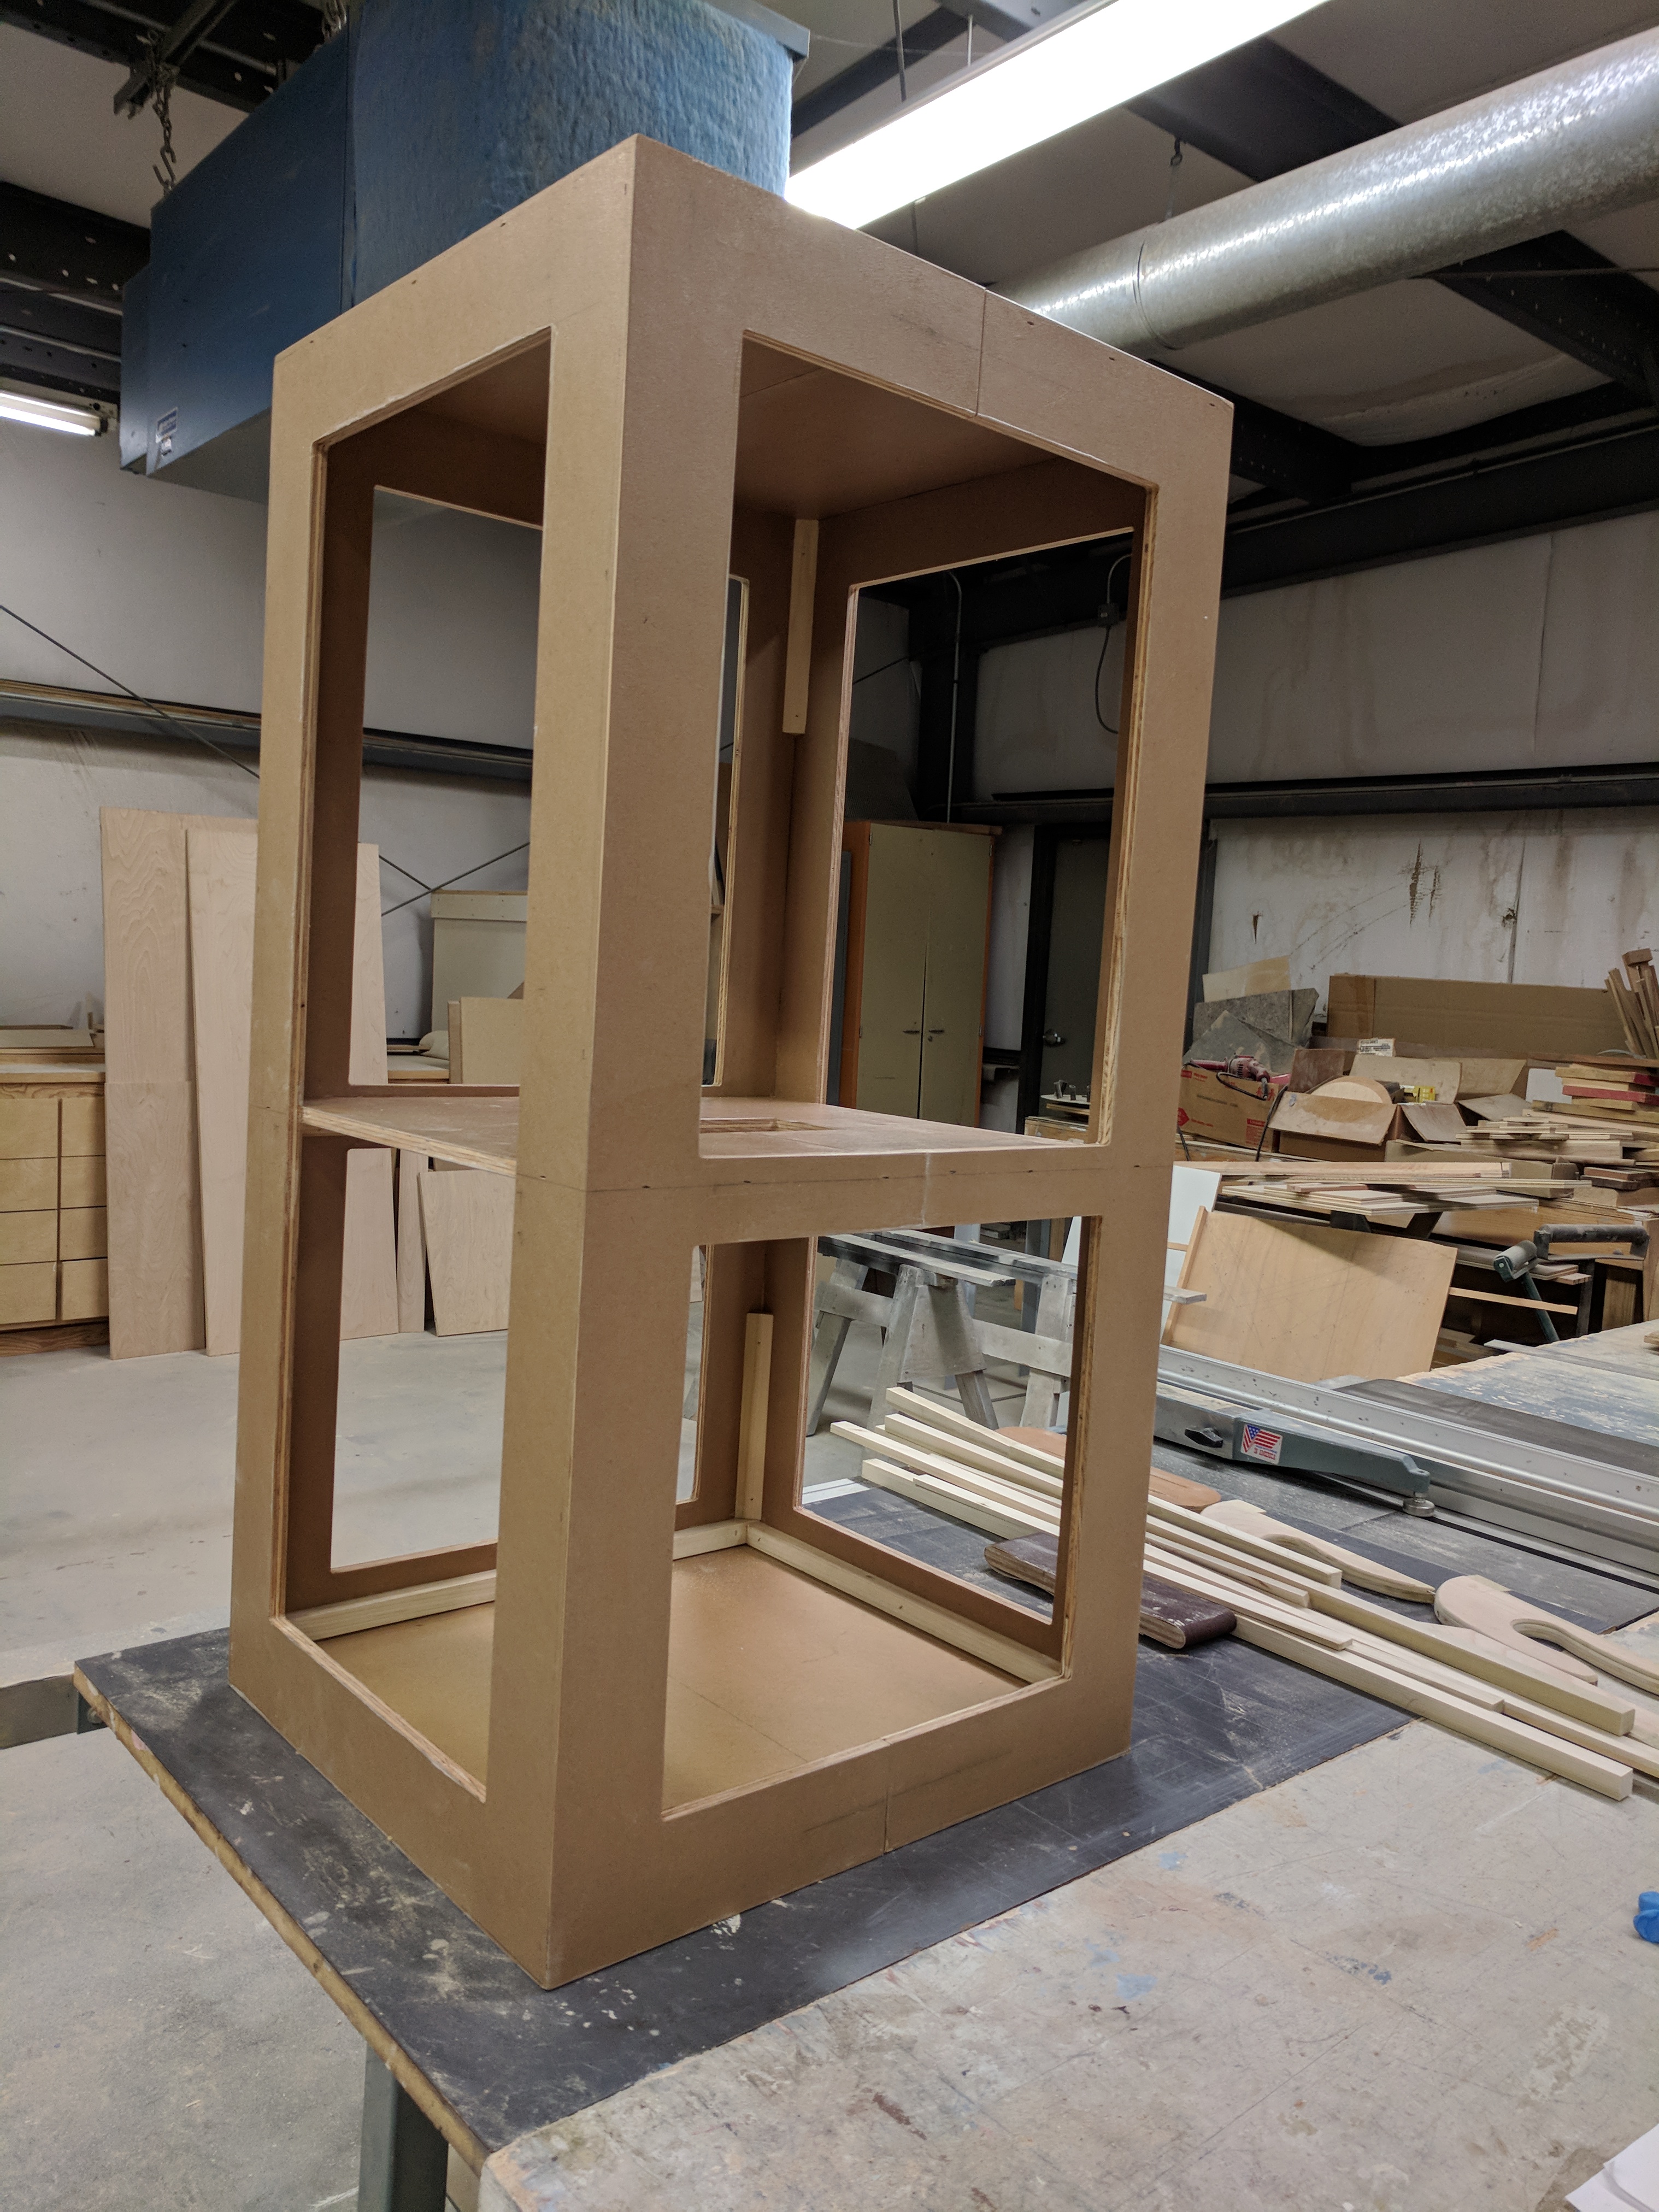
I checked through our stockpile of crates hoping to find one to house the trophy but everything was either too big or too small. Obviously a cardboard box wouldn’t cut it so I started looking at my next option—a Pelican case. These cases are great. They are hard plastic and come in a wide variety of sizes and shapes, can be customized in a wide variety of ways, and are designed to handle any sort of abuse you can throw at them. They are expensive, but worth every penny. I found a couple of possibilities and worked with the staff at Pelican and Chris Voll in our exhibit design department to figure out exactly which case would best suit our project. Chris and I settled on a custom Pelican Tower case (AL2221-2814AC) which we would actually use upside down (i.e. the lid serves as the case base).

With the interior dimensions of the case in hand, Chris and I brainstormed the design of an interior cage that held the trophy in the upright position and supported the bowl to minimize the chances of having that fragile central spindle fracture during transport. Chris devised a two-part cage that could easily slide around the Cup and a separate platform for mounting the trophy. Besides supporting the trophy, the interior cage allows the trophy to be safely handled during the packing and unpacking process.


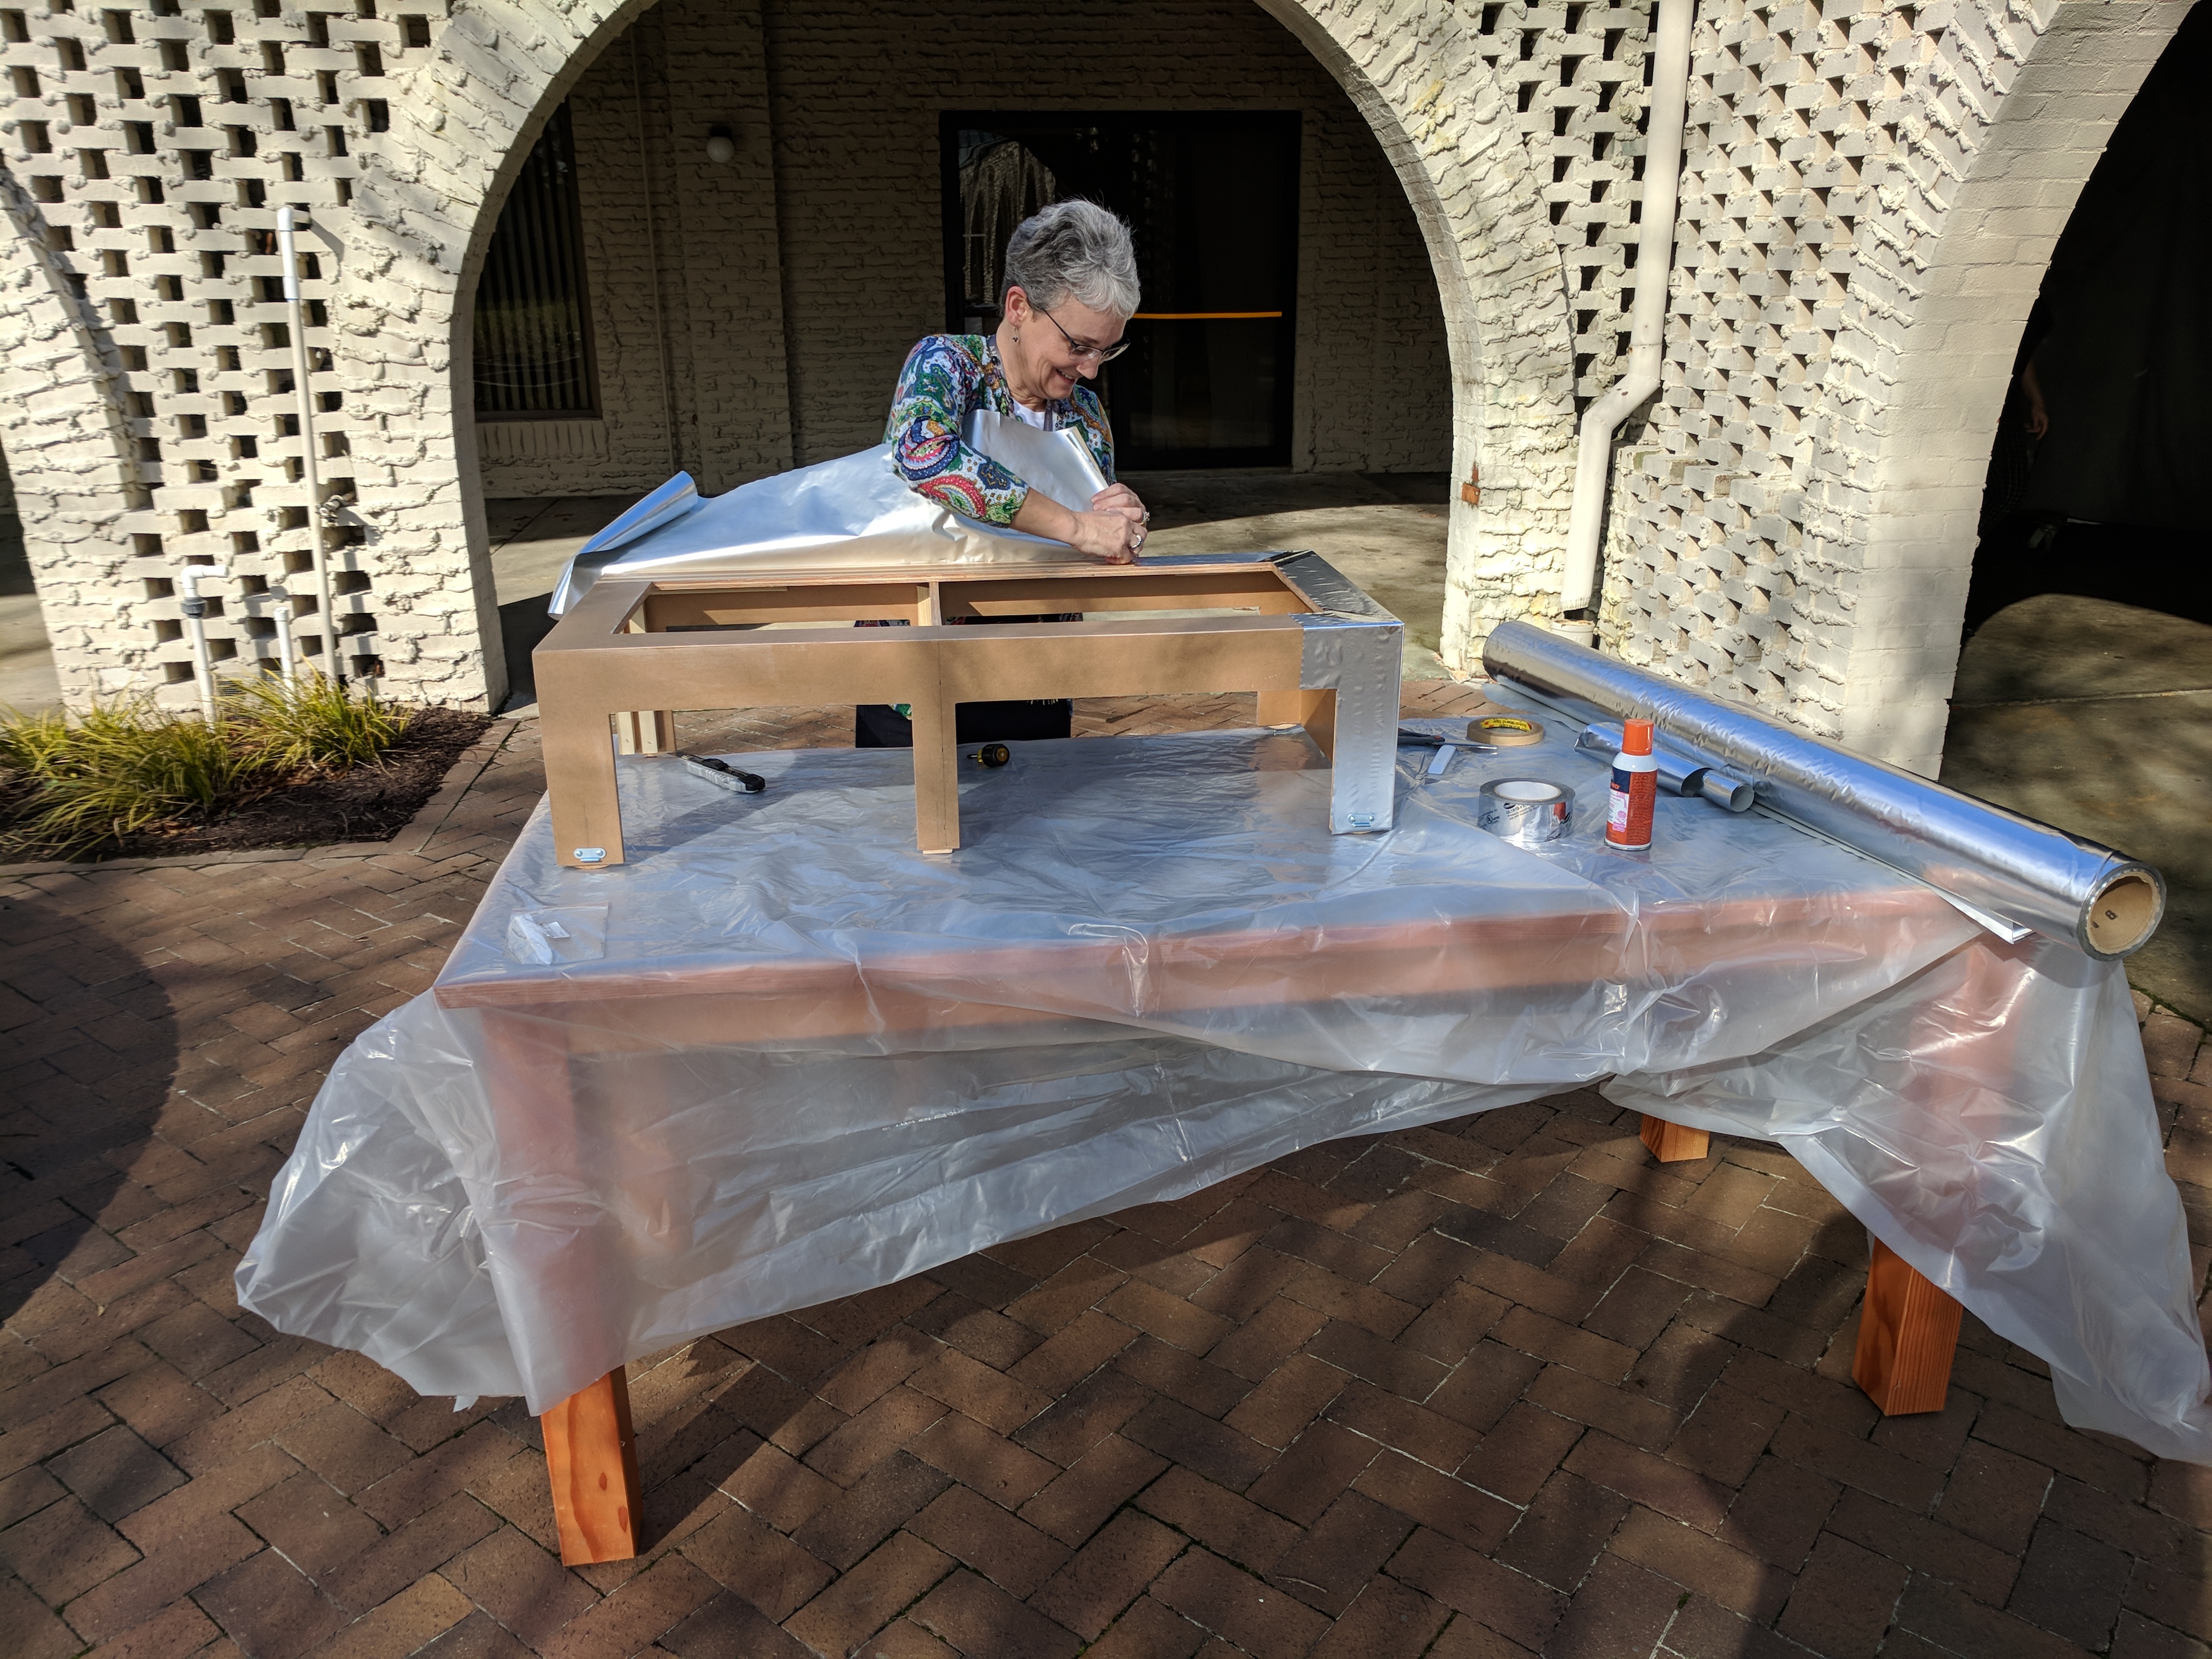
To ensure museum objects are preserved for the future in the best condition possible, museums must be very careful to house objects in materials that won’t cause corrosion or tarnishing or damage to the object’s surface so Chris fabricated the cage from 1/2” exterior-grade sign board. Using this type of board meant we weren’t introducing formaldehyde into the packing case environment (formaldehyde can cause silver to tarnish). To make doubly sure we eliminated as much off-gassing as possible, Chris sealed the board with Camger (a sealant safe for museum applications) and I covered the cage with a layer of Marvelseal 470 (sort of like a sturdy foil). Hopefully, all of these efforts mean we have eliminated the introduction of an abundance of chemicals into the case environment.
My efforts also included stabilizing the winged figure at the top and devising a way to temporarily secure the trophy to its base. I also had to figure out how to prevent the Cup from moving around inside the cage and support the spindle/bowl. For the first two steps I went with the easiest, safest options available—I tied the figure down with Teflon so it couldn’t wiggle around and securely tied the trophy to its base with cotton tape.

Once Chris finished the cage base, I fabricated an Ethafoam mount with Tyvek barrier for the base of the trophy. This mount prevents the trophy from moving from side-to-side in the cage. To stop the trophy from lifting, I installed a set of custom-made tie-downs that run between the trophy and its base that also secure the trophy to the cage base. Normally I use these mounts to tie down ship models so I knew they were a good, safe option for holding down the trophy.
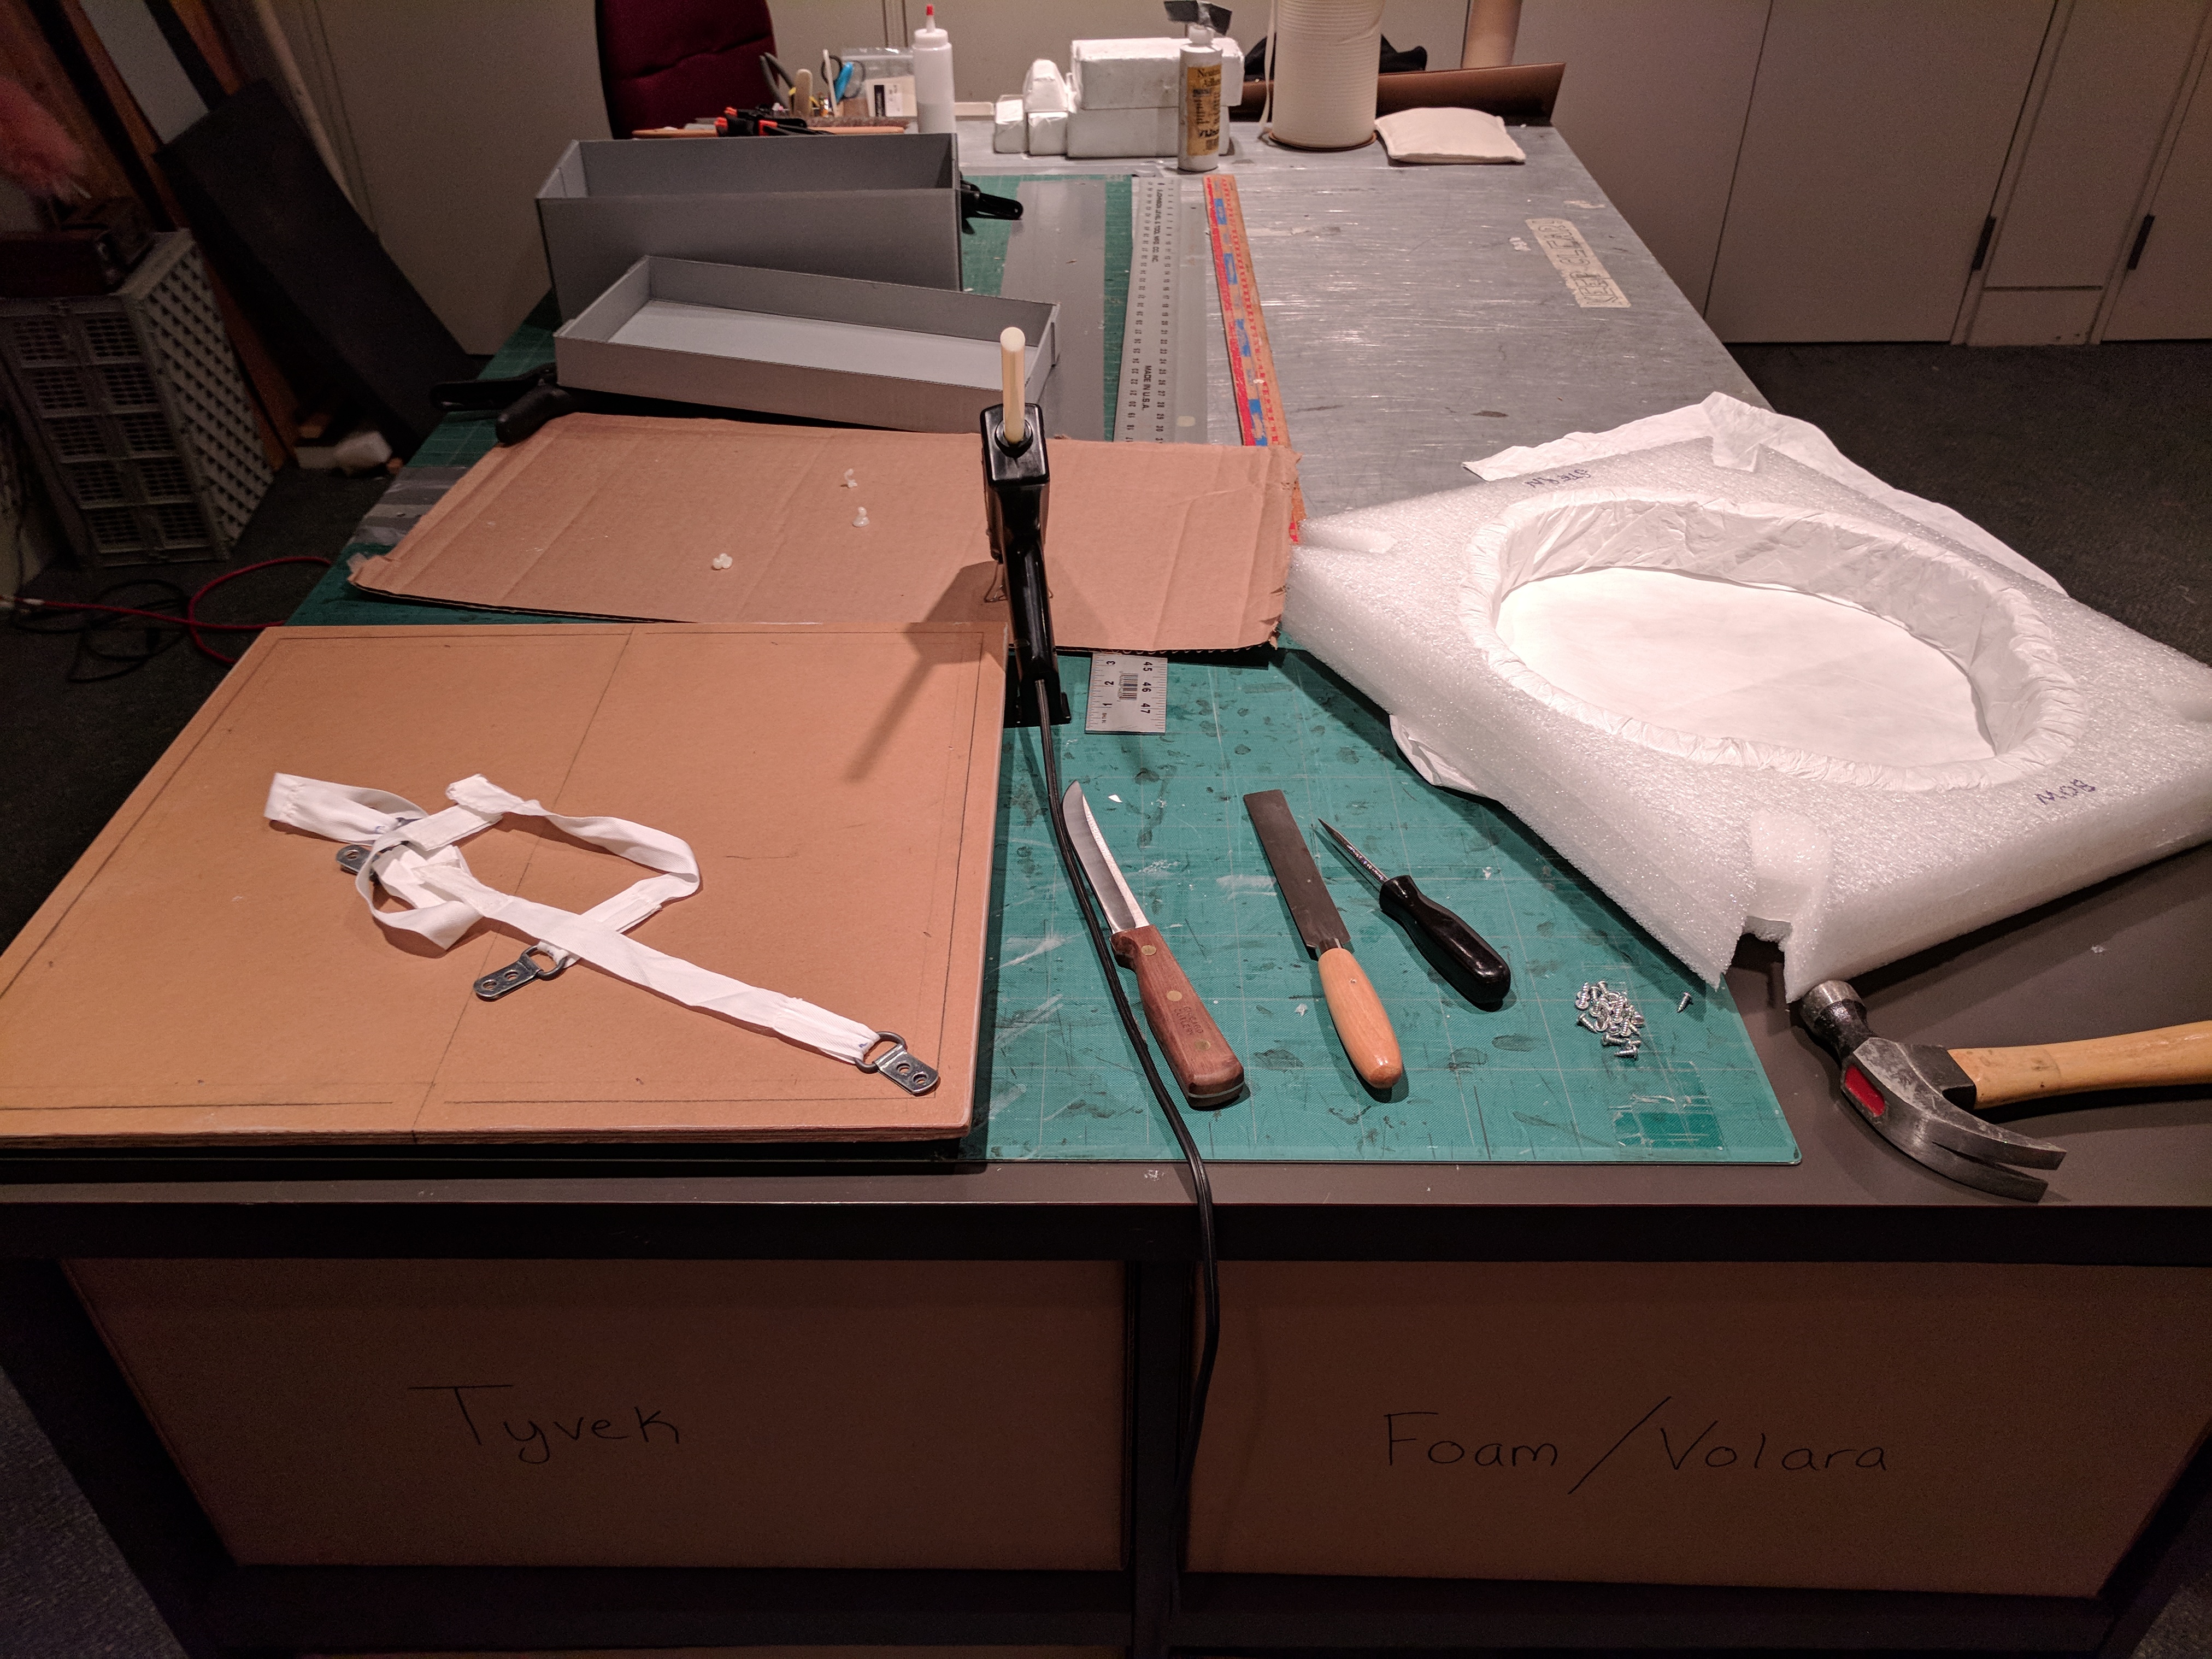
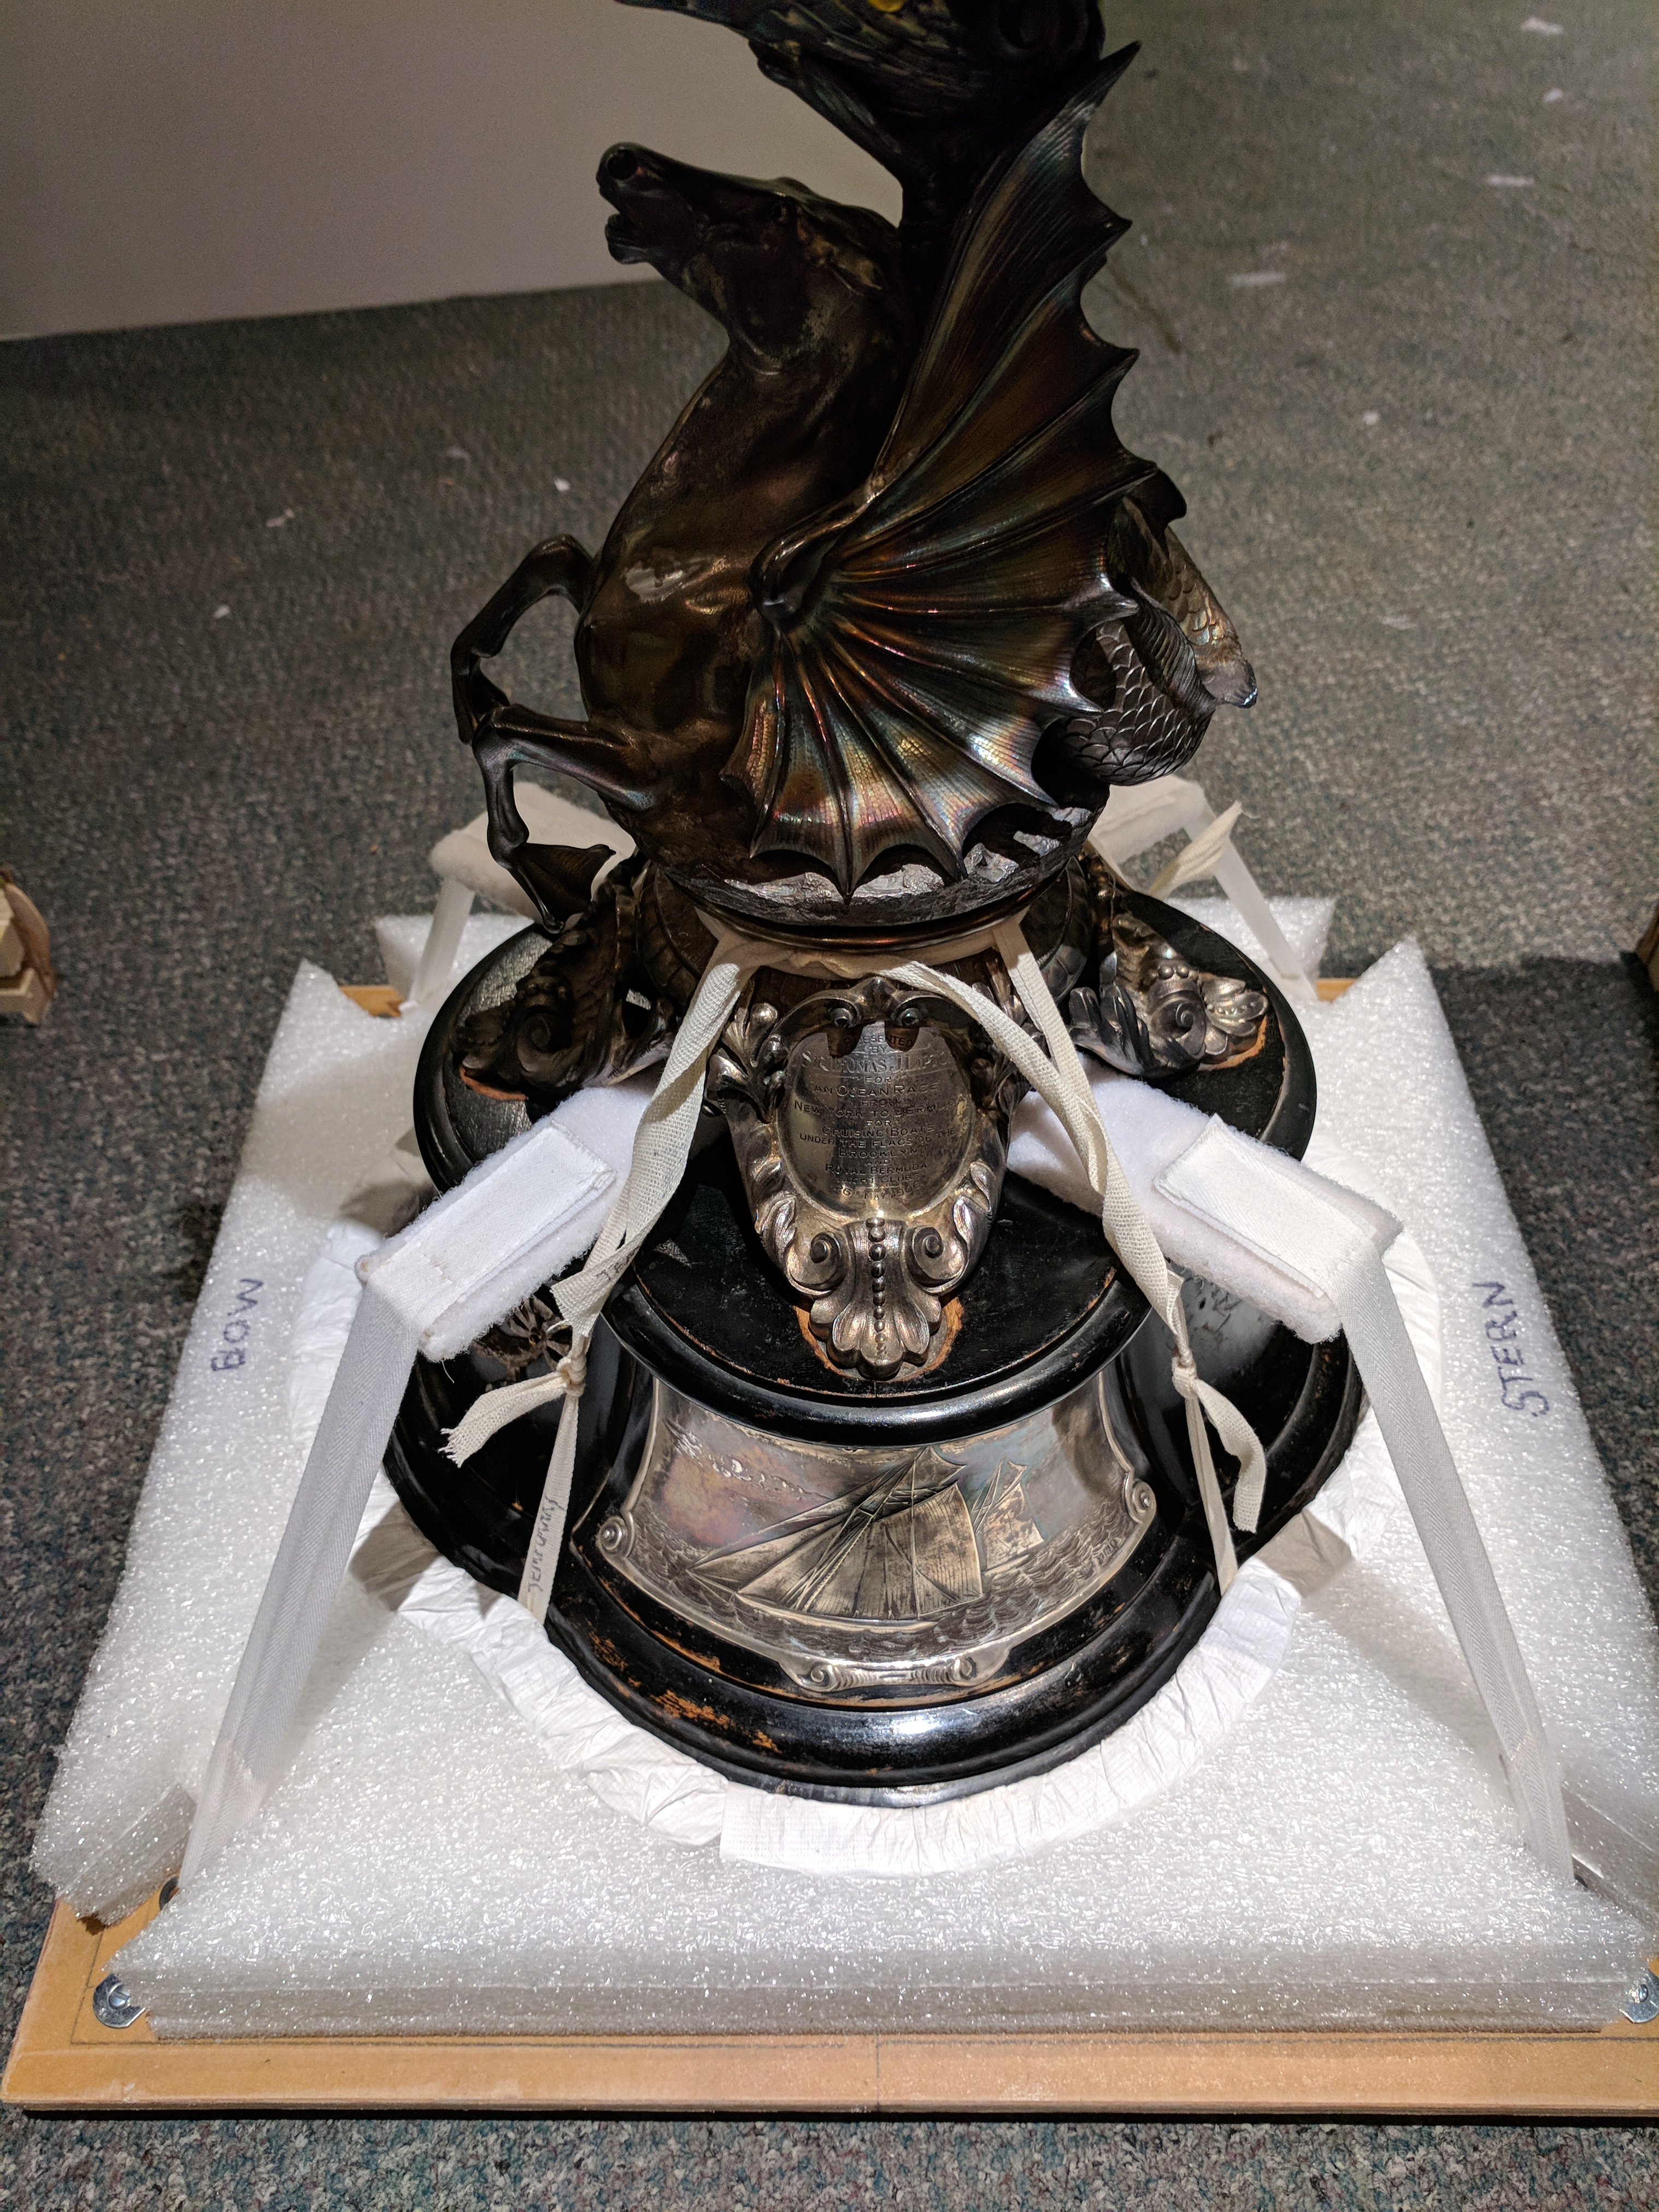
Finally, I created a custom-fitted Ethafoam mount with Tyvek cover to support the bowl and take some of the stress off the cracked spindle. The support includes Velcro straps to hold the two sides of the support together.

We didn’t have to make any modifications to the Pelican case other than modifying and securing the interior foam. On the first test fit we discovered the tolerances between the cage and case foam were so tight we had trouble sliding the cage into the foam support. Luckily, this was easily remedied by wrapping the cage in virgin polyethylene which made sliding the cage in and out of the foam padding much easier.


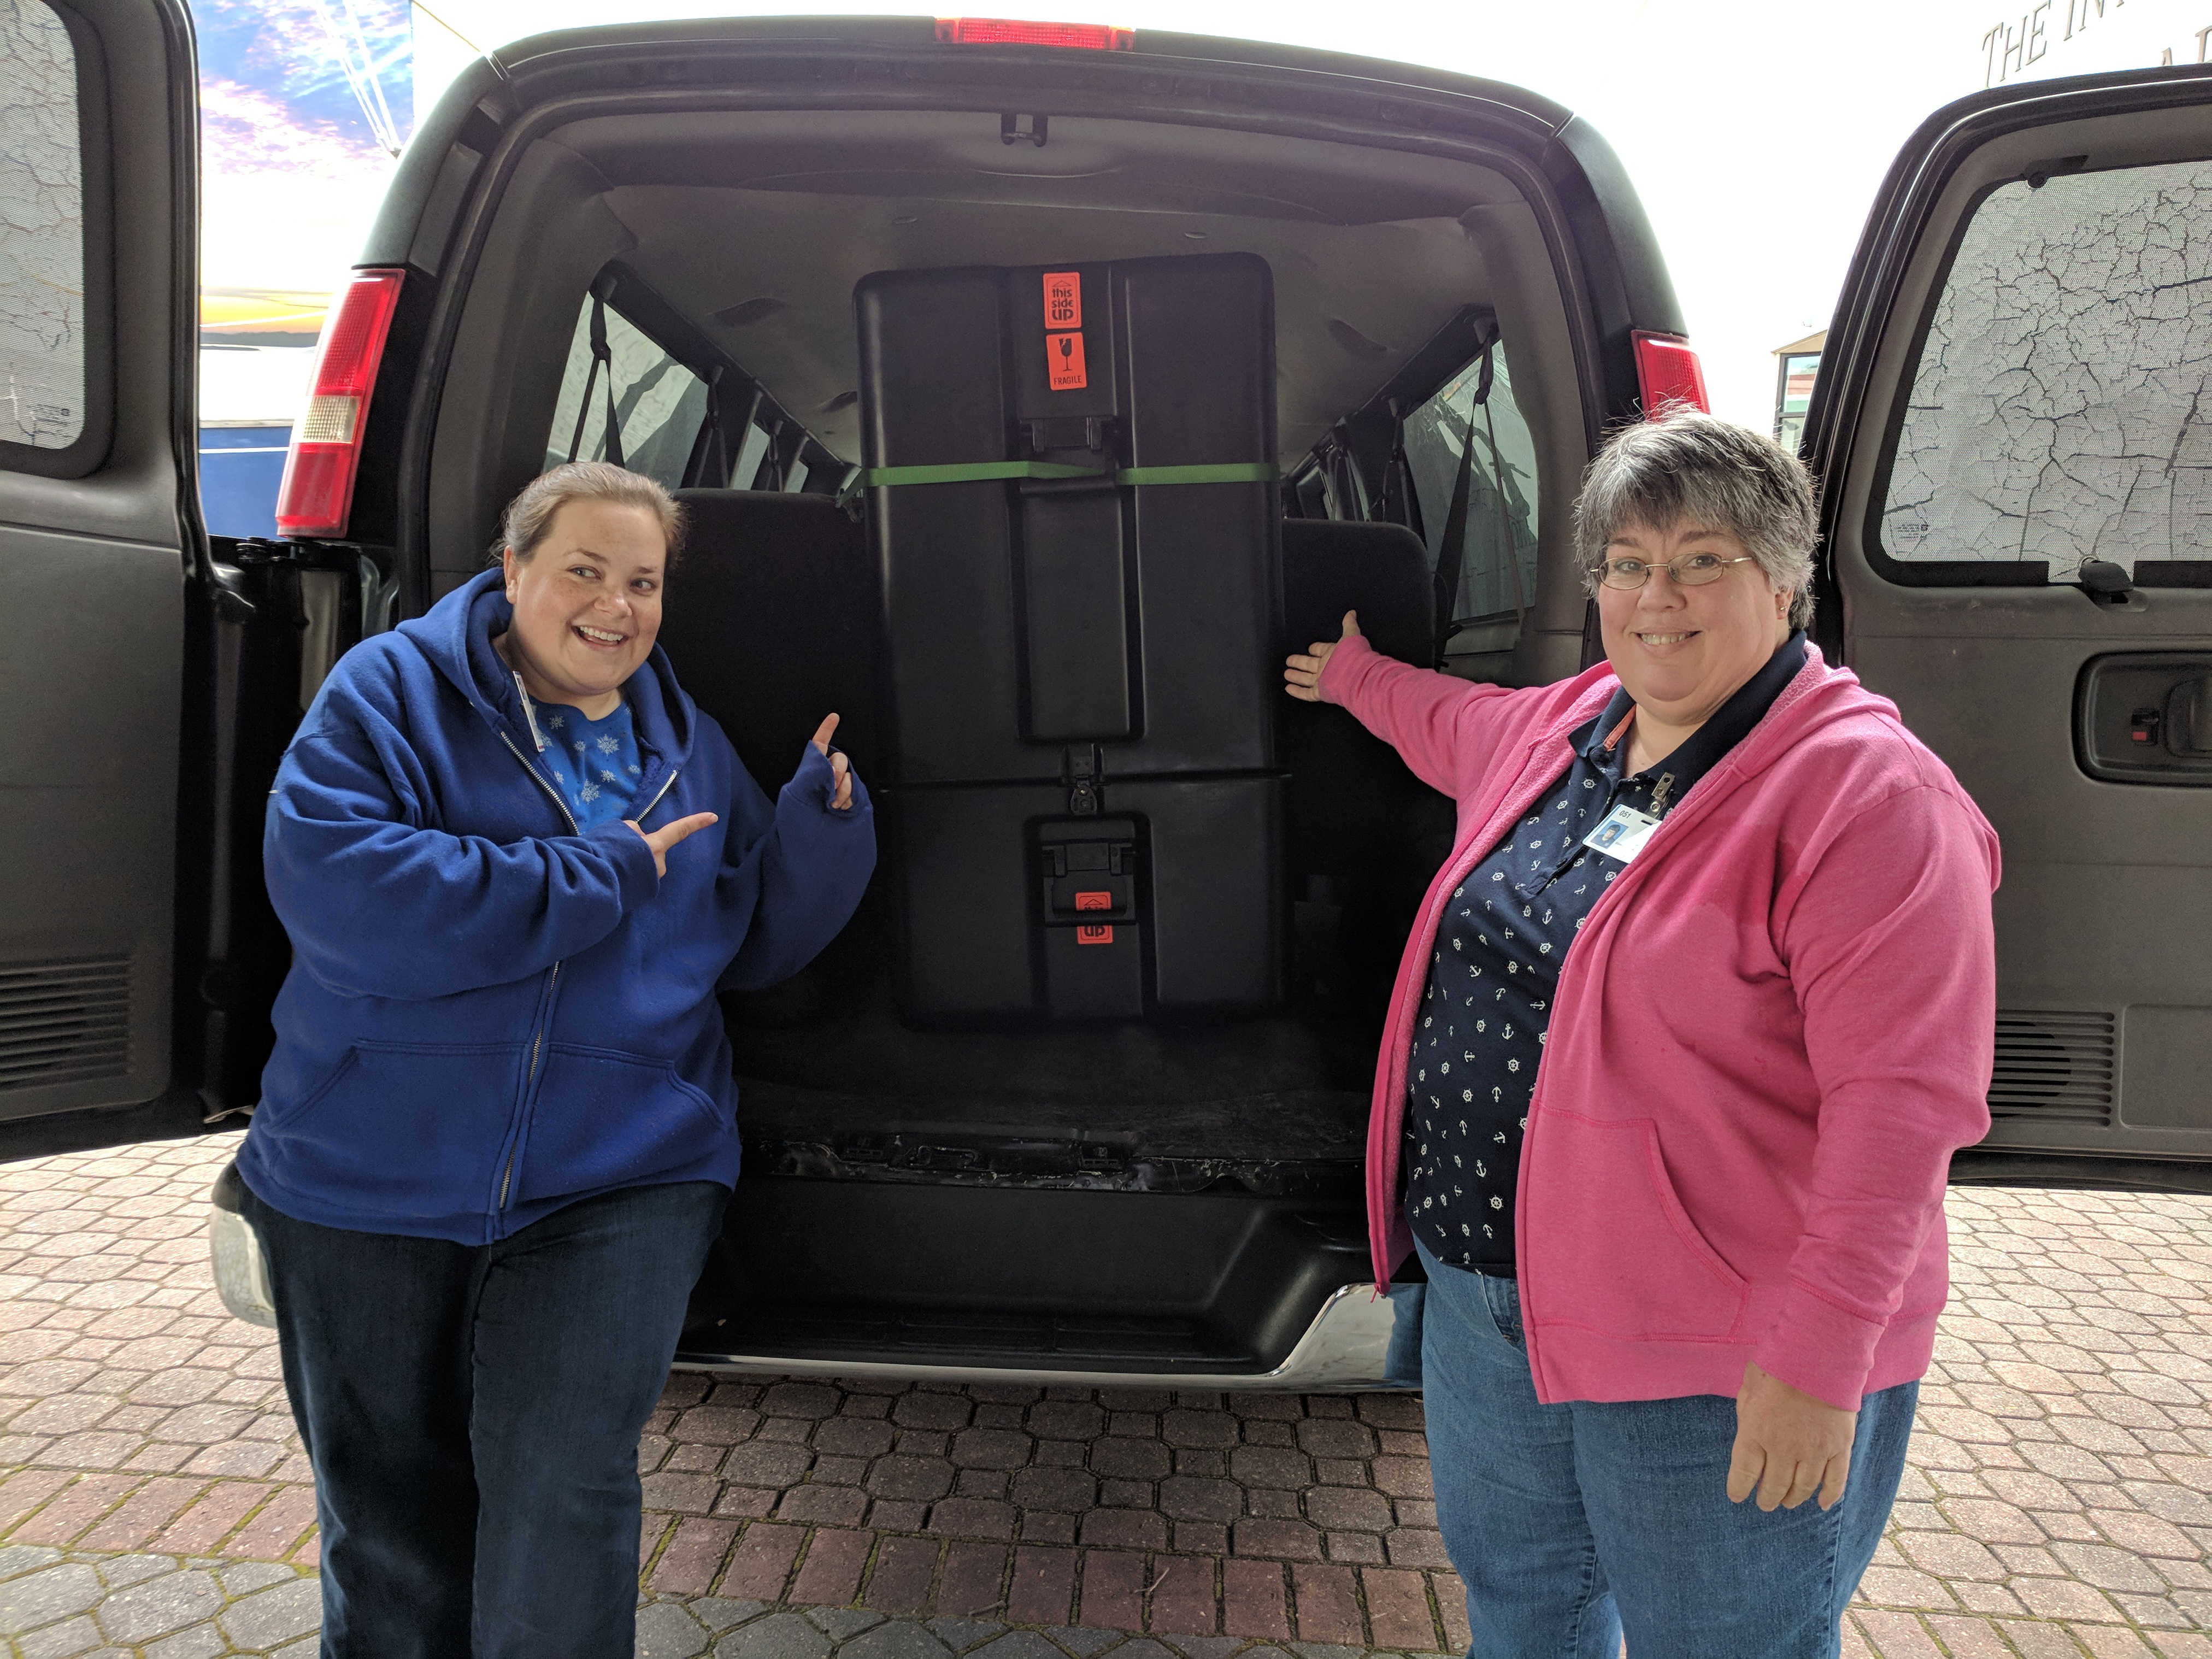
All in all, Chris and I spent about $963 and about forty working hours to pack the trophy. This morning, Rachel and Cindi packed the case into the van and headed to Maryland and I’m happy to report it has been safely delivered to the conservators.