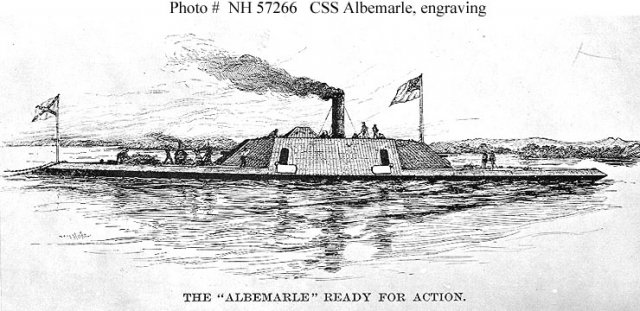
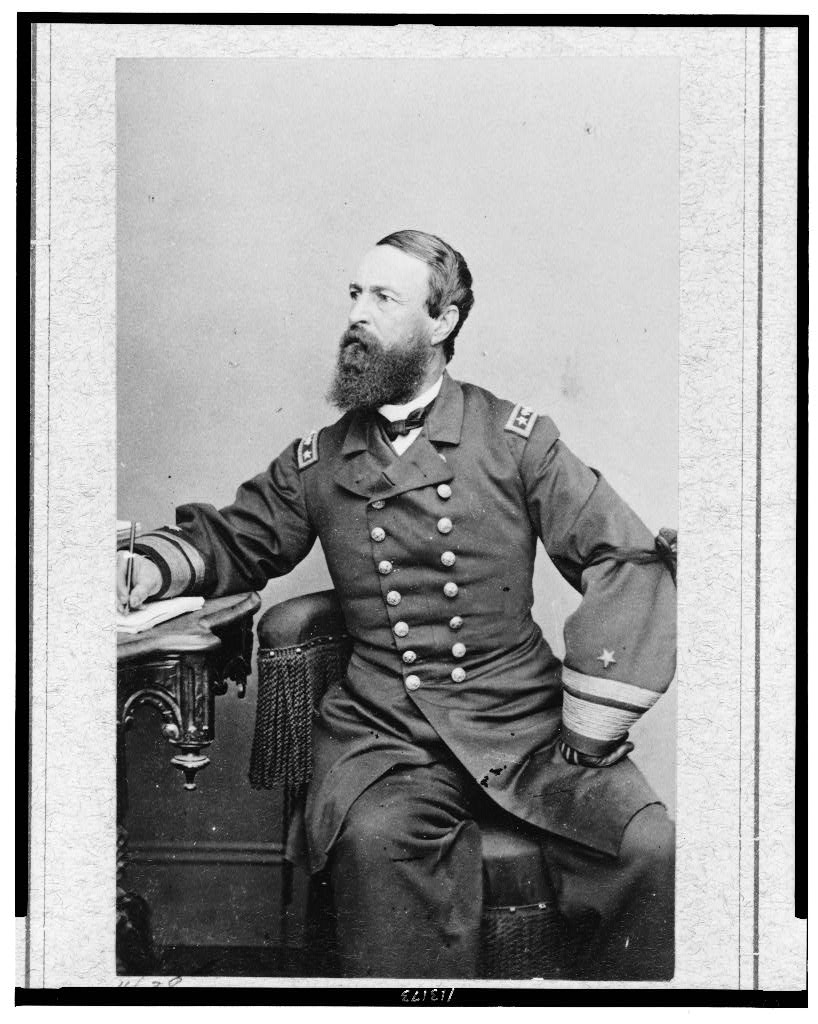
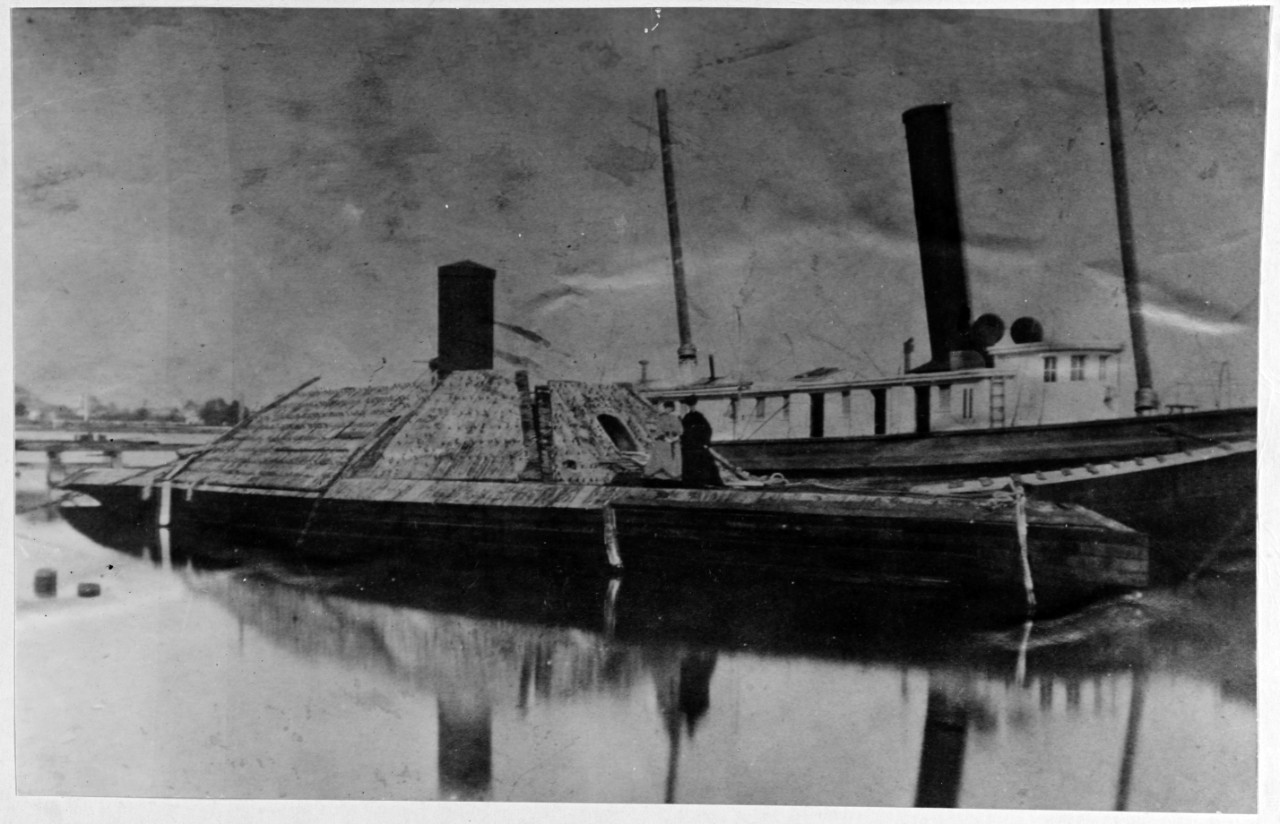
CSS Albemarle remained a thorn in the side of the Union at its dock in Plymouth, North Carolina. Rear Admiral David Dixon Porter had replaced Rear Admiral Samuel Lee as the commander of the North Atlantic Blockading Squadron. And Porter was determined to destroy the Confederate ram.
How to Attack a Defiant Ironclad Ram
Admiral Porter wrote his commanders:
“There is but one chance for wooden vessels in attacking an ironclad. You will make a dash at her with every vessel you have, and ‘lay her onboard,’ using canisters to fire into her ports, while the ram strikes her steering apparatus and disables her. You will see that every vessel Is provided with proper grapnels, to hold on by while going along side, and a boarding party will be appointed to lash the vessels together. Even if half of your vessels are sunk you must pursue this course.”
Other schemes were suggested; however, Lieutenant William Cushing submitted two daring plans. Porter believed that one might prove successful. Cushing, expelled from the US Naval Academy for bad grades and for being a prankster, had previously fought with distinction during the Battle of Hampton Roads.
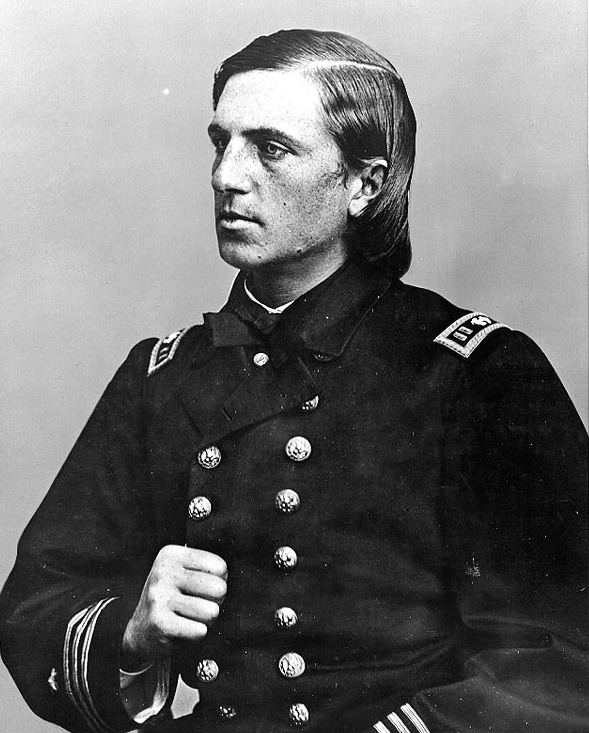
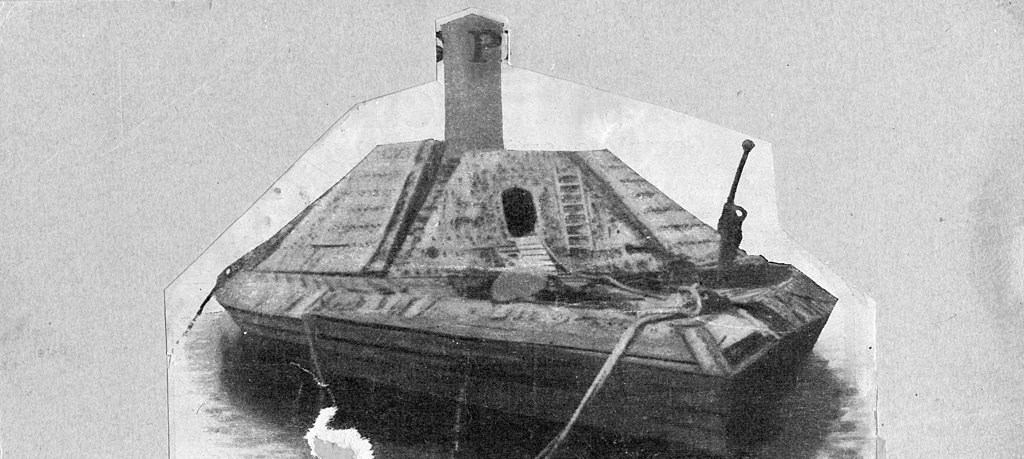
Lieutenant Cushing had purchased two 30-foot boats (some accounts claim these boats were 40- to 47-feet in length) in New York. Each of these launches were armed with one 12-pounder Dahlgren boat howitzer and one 14-foot-long spar torpedo. These boats were known as Picket Boat No.1 and Picket Boat No. 2. Cushing’s plan was to steam up to CSS Albemarle and detonate the spar torpedo beneath the ram’s hull — a dangerous and daring plan, indeed.
The trip from New York down to the North Carolina sounds resulted in the loss of Picket Boat No. 2. That launch had run aground and was captured by the Confederates in Wicomico Bay, Virginia. But Picket Boat No.1 arrived in the Albemarle Sound on October 24, 1864.
How to Use the Ram Albemarle
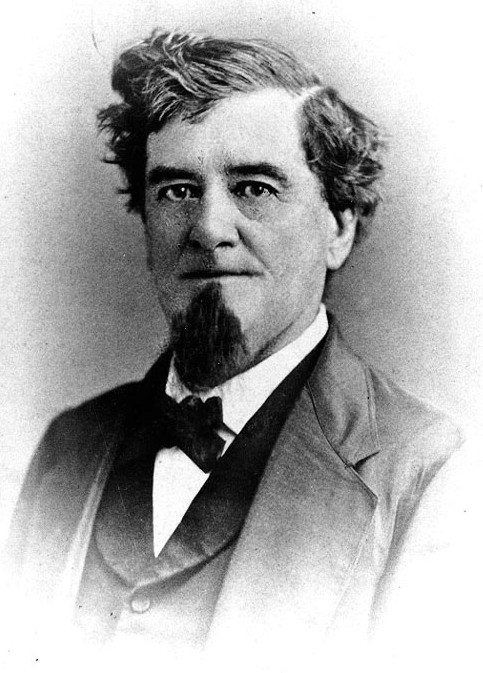
Lieutenant John Newland Maffitt, former commander of the commerce raider CSS Florida, had replaced James Cooke as commander of the ironclad. Maffitt had a reputation for decisive and audacious leadership. Accordingly, the ironclad’s new commander immediately decided to attack the Union naval forces in North Carolina’s sounds. When his superiors learned of Maffitt’s planned offensive, they advised that no aggressive actions should be taken against the Federal fleet.
Cooke, the ram’s former commander, believed Albemarle could be destroyed or captured if the ironclad once again ventured out into the sounds. The Confederate high command knew that the loss of Albemarle would also mean the loss of the important towns of Plymouth, Washington, and Edenton. It was thought that while Albemarle was still in service, the Confederacy could hold this valuable agricultural region. Since the powers that be had squashed Maffitt’s hopes of aggressive actions, he requested reassignment. Lieutenant Alexander F. Warley, former commander of CSS Manassas, replaced him.
The Approach
On October 26, Lt. Cushing left the Union North Carolina Squadron. His goal: to destroy or capture CSS Albemarle. Admiral Porter had approved this expedition with some misgivings. He advised Commander William H. Macomb: “I have directed Lieutenant Cushing to go down in a steam launch, and if possible, destroy this ram with torpedoes. I have not great confidence in his success, but you will afford him all the assistance in your power and keep boats ready to pick him up in case of failure.”
At 10:30 PM, Cushing’s launch ran aground on a sandbar. The next day at about 2 AM, the torpedo launch was freed with the rising tide. Cushing and his 14-man crew got underway. The launch towed a cutter containing seven men. These men were brought along to silence any Confederate lookouts that might be stationed on the sunken USS Southfield. The wreck’s superstructure remained above the river. It was rumored that the Confederates had even placed a small howitzer on the ship as a sentry post to block any attempt to reach Albemarle. Just before midnight, Cushing’s expedition entered the Roanoke River.
The Attack
Cushing hoped to capture Albemarle ‘live’; however, as the picket boat steamed past Southfield into its approach to the ram’s wharf, a sentry discovered Cushing’s advance. A bonfire was lit, and a fusillade rang out. Rifles and revolvers were focused on the launch. (Cushing later recalled that his coat was pierced by at least four bullets and his hand was grazed by a minie ball.)
Cushing cast off the cutter, ordering full steam. As he neared the ironclad, he noticed a log boom — an anti-torpedo protection — surrounded the ram. He also noticed that the logs were covered with slime as they had been in the water so long. So, he circled the launch to gain momentum. The launch lurched ahead through a hail of fire at full head of steam, crashing over the log boom. The bonfire and gunsmoke made it a desperate scene.
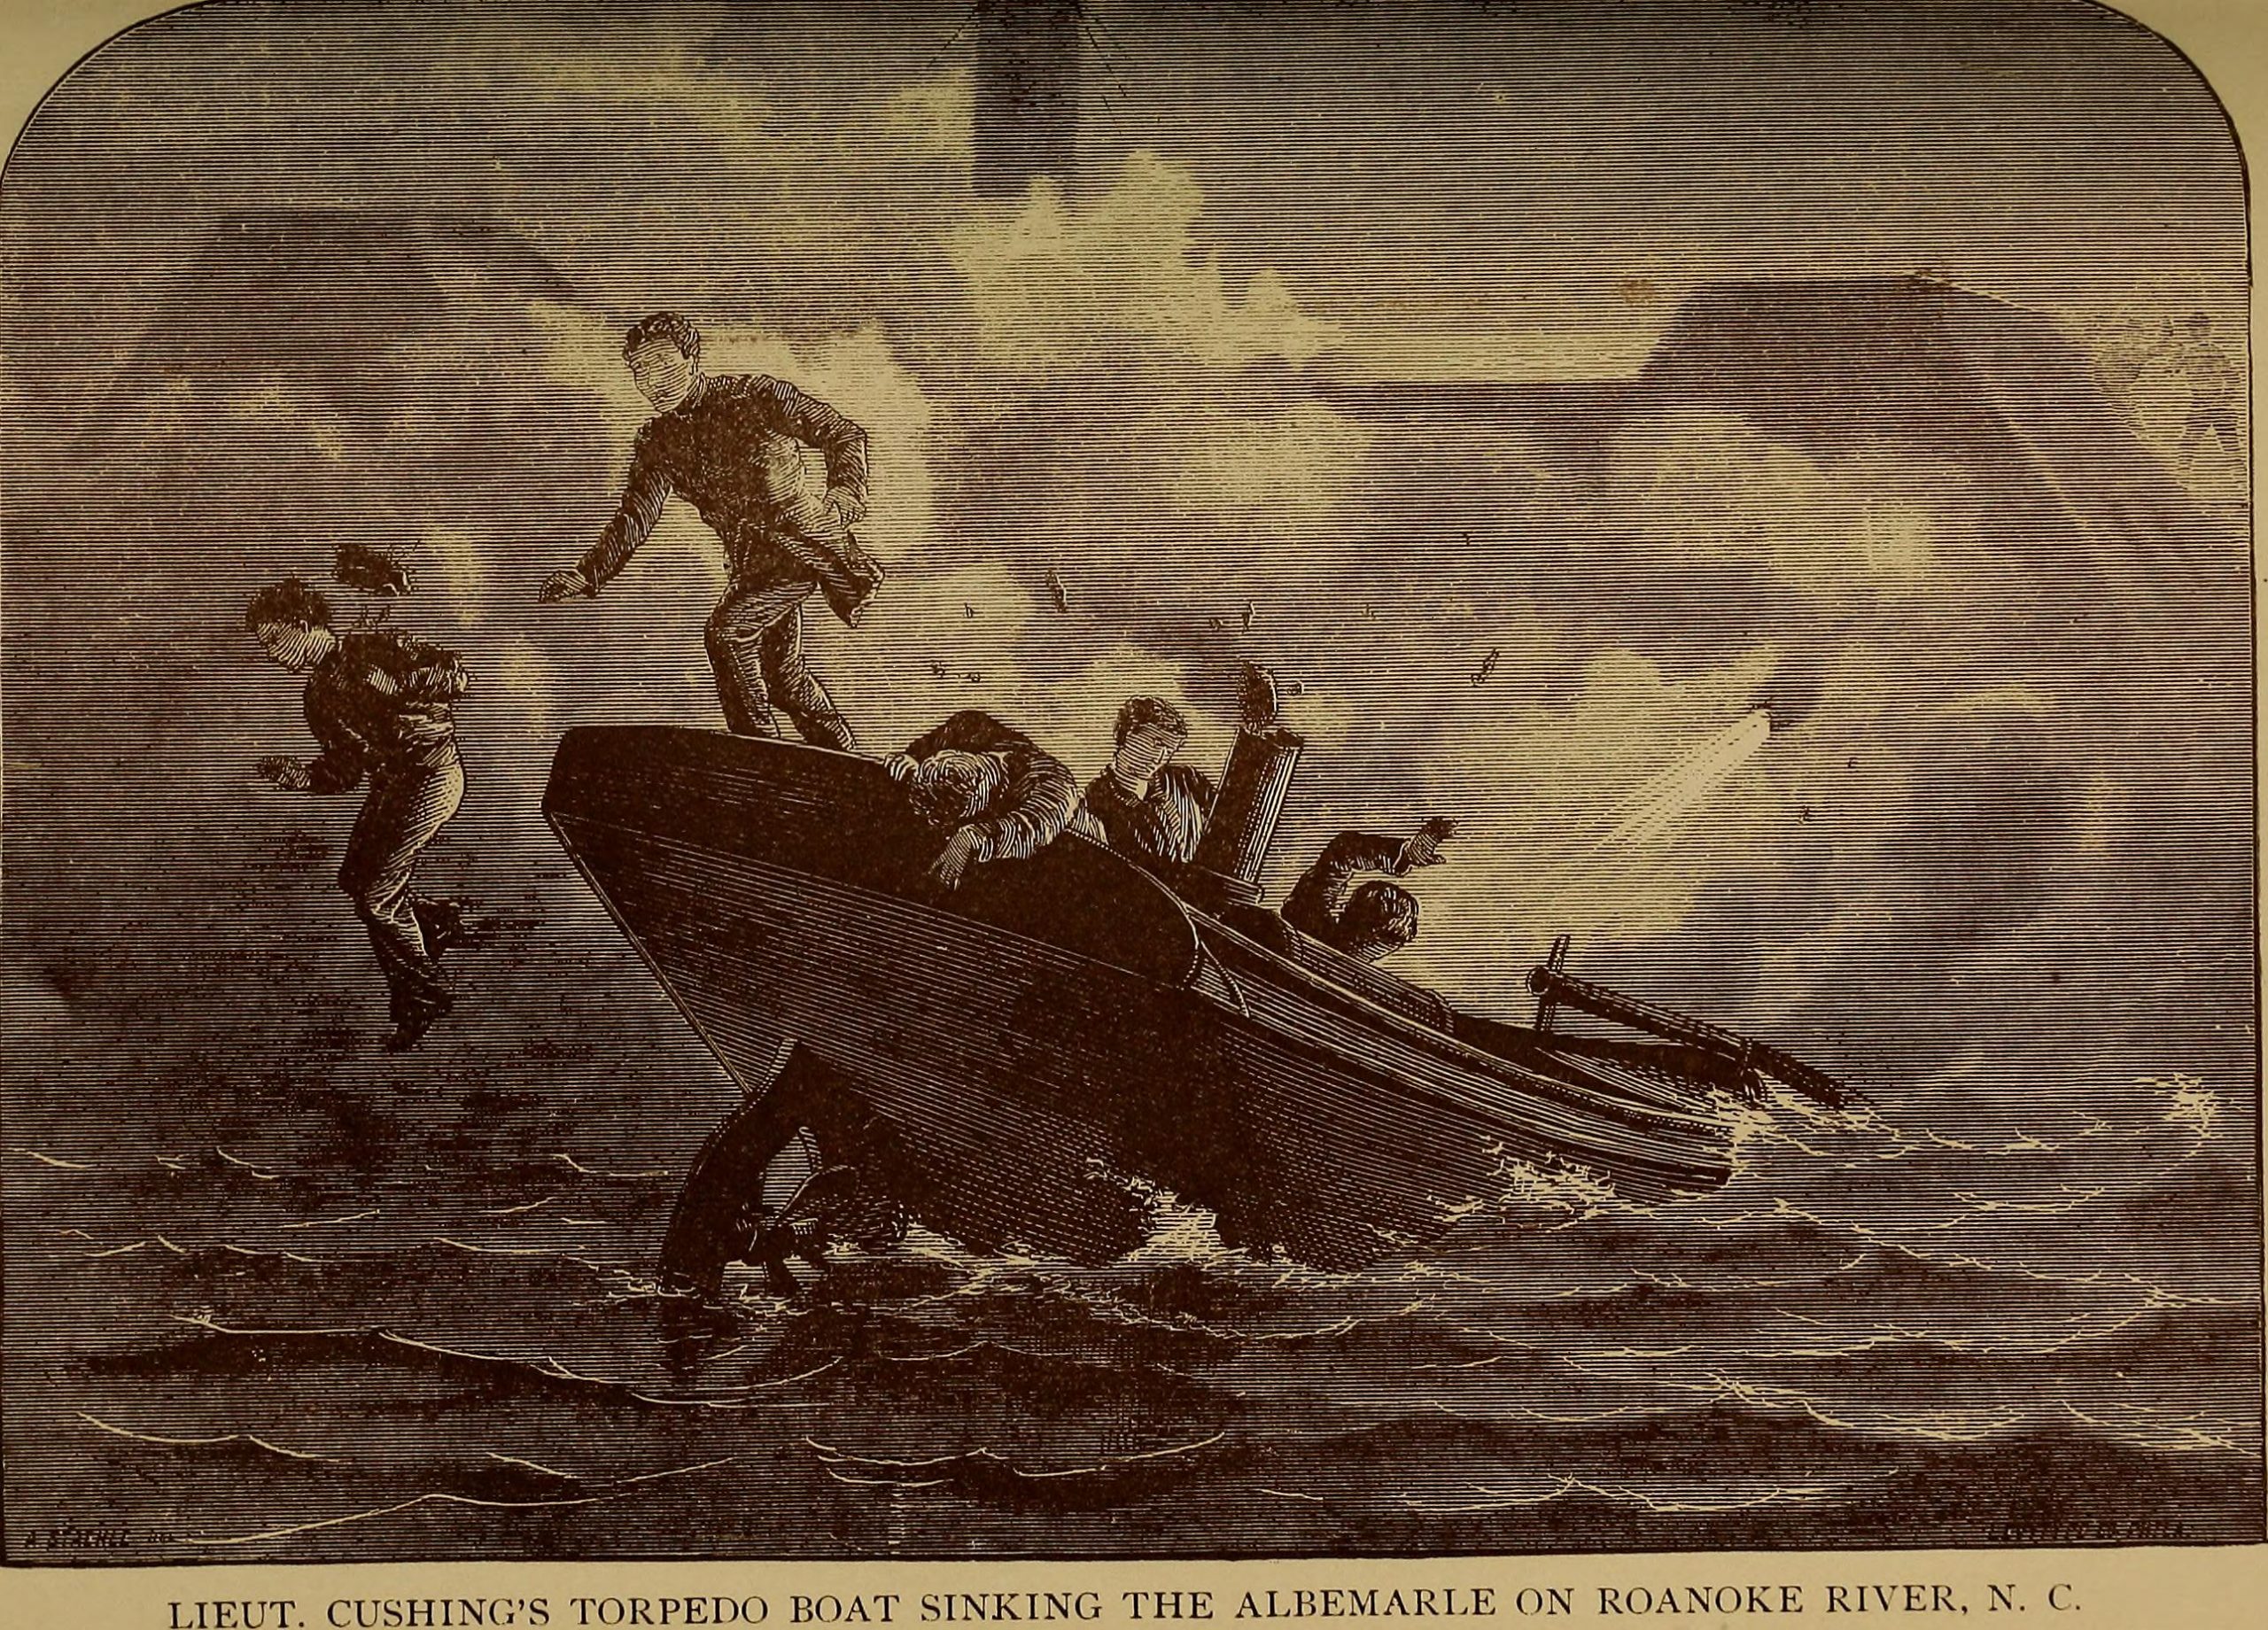
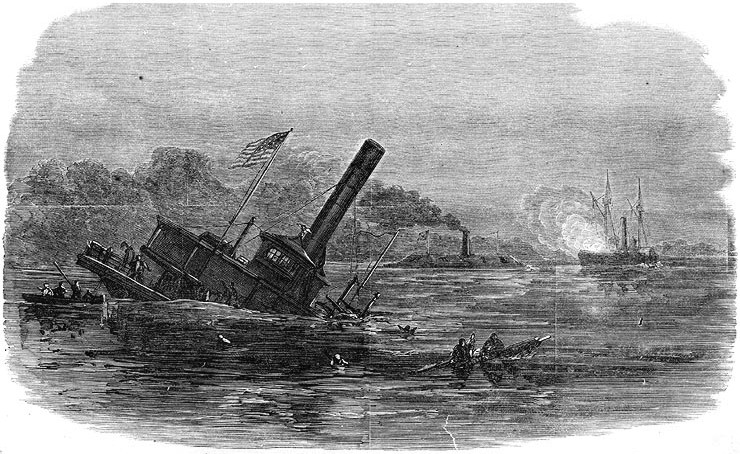
Yet, Cushing calmly stood at the launch’s bow and lowered the spar, releasing the torpedo under Albemarle. Just as he pulled the lanyard to explode the device, a point-blank range shot from the ironclad’s 6.4-inch Brooke rifle smashed the launch, throwing Cushing’s men into the river. Albemarle now had a gaping hole in its port quarter. The ram immediately began to sink in eight feet of water.
Lieutenant Warley later reported, “water gained on us so fast that all exertions were fruitless merely leaving her shield and smokestack out.” A sad scene was witnessed the next morning: The Stainless Banner (the second national flag of the Confederacy) laid limp on Albemarle’s flag staff. It was now clear that the Confederates would soon have to abandon eastern North Carolina.
The Aftermath
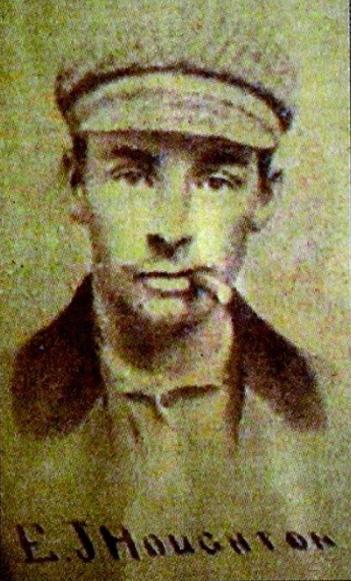
Meanwhile, Cushing found himself alone in the water. He took off his coat and shoes and swam for shore; he was able to steal a skiff and hand-paddled down the Roanoke to the sound. Almost captured twice, Cushing came close to drowning. When he was retrieved by a Union ship, all rejoiced and labeled him a hero for all times. Seaman Edward Houghton also escaped.
Eleven of Cushing’s crew members were captured and sent to the infamous Andersonville Prison, a Confederate prisoner-of-war camp in Georgia. Two others were reported missing, presumed dead.
Without CSS Albemarle, Plymouth still needed to be defended against the anticipated Federal naval advance. Lt. Warley removed the two Brooke rifles from the ram’s wreck and mounted them along the town’s waterfront. The Union North Carolina Squadron quickly came up the Roanoke and bombarded the town, beginning October 29, 1864. The Confederates abandoned Plymouth on October 31, 1864, leaving behind the wreck of their high hopes of regaining and retaining the North Carolina sounds.
Excerpted from A History of Ironclads: The Power of Iron Over Wood, John V. Quarstein. Charleston, SC: The History Press, 2006. Available in the Museum’s Web Shop: https://shop.marinersmuseum.org/a-history-of-ironclads.html