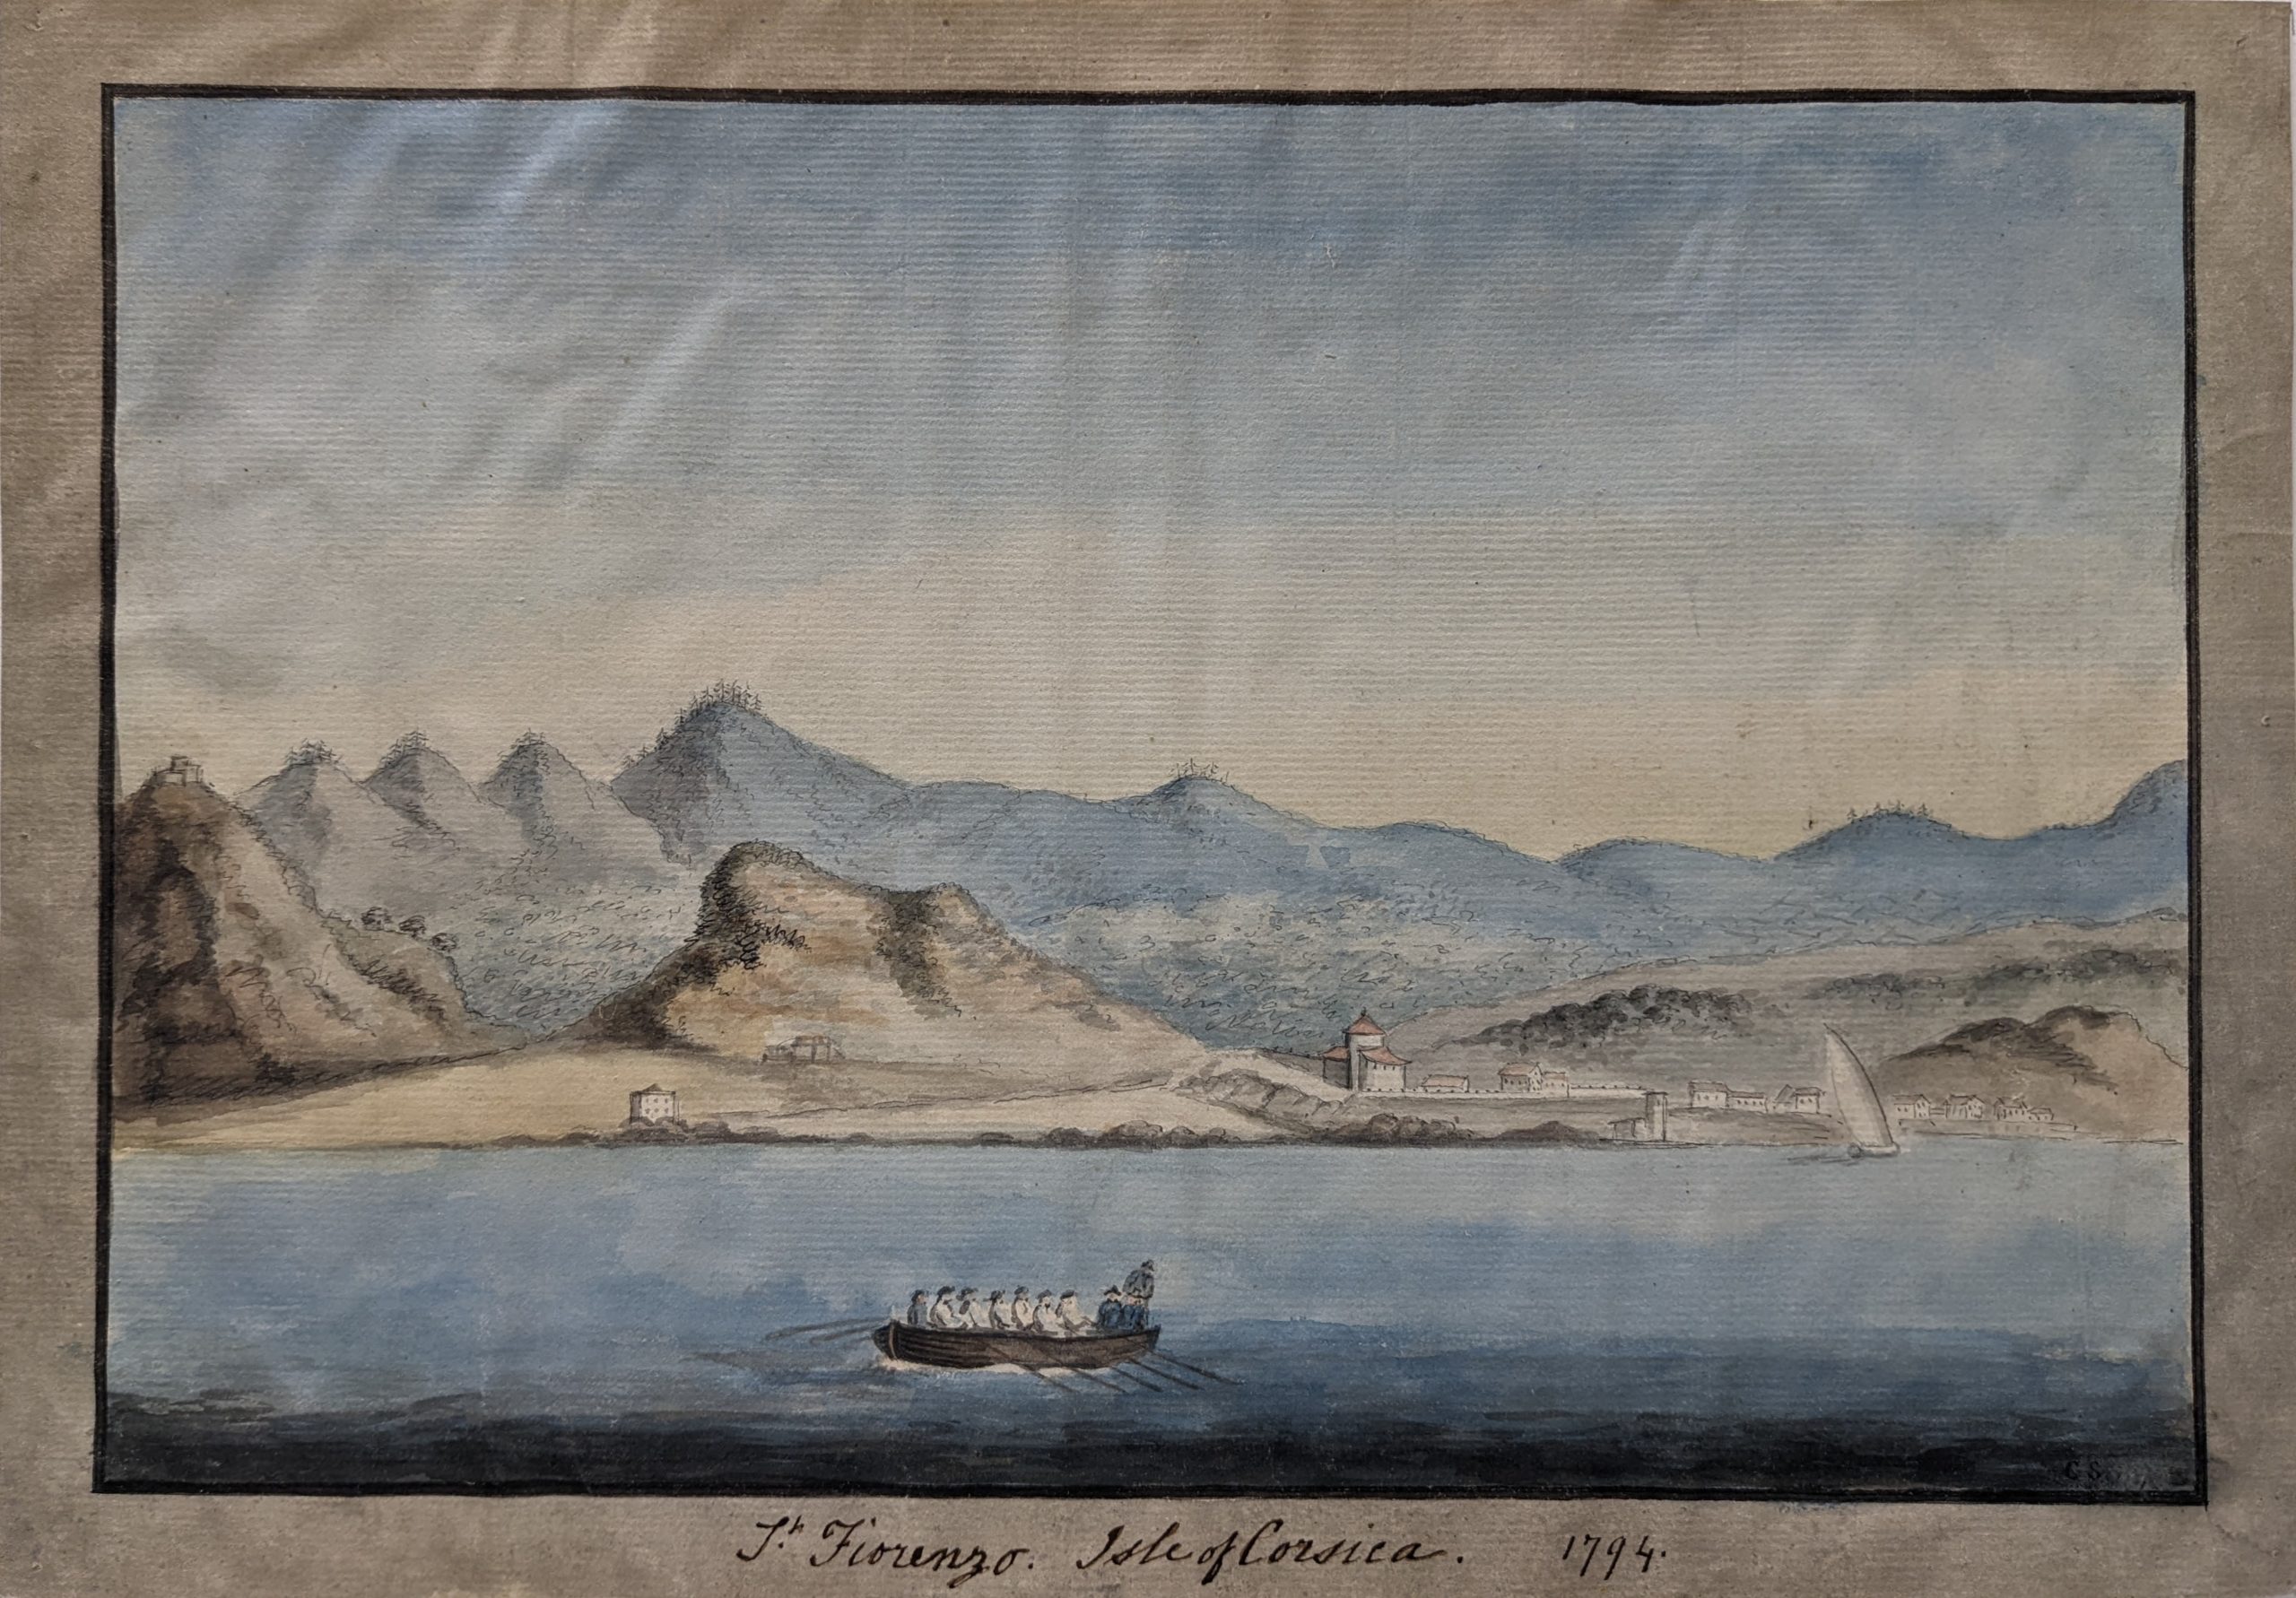
Sometimes the quirks of technology can reveal something really interesting! While compiling a list of objects in our Collection related to submarines, our Collections Management System threw me a curveball. For some unknown reason, my search caught a watercolor showing British ships anchored in Saint-Florent bay in Corsica around 1795. While I’m no expert, I’m pretty confident the Royal Navy didn’t use submarines during the French Revolutionary War.1 If they did, then this image shows them submerged and without periscopes! At any rate, I was intrigued that the object record contained so little information despite the specificity of the scene. I began researching the story behind the image and it ended up being really interesting!
It all started on February 1, 1793, when revolutionary France declared war on Great Britain. The British immediately began assembling the various fleets they would need to fight the French. Throughout May and June, Lord Hood, commander-in-chief of the Mediterranean fleet, gathered 15 ships-of-the-line and nine frigates at Gibraltar. On June 27, Hood sailed the fleet to Toulon, France, and instituted a blockade to lure the French Mediterranean fleet out for a fight. A short time later, the British blockade was joined by 24 Spanish ships-of-the-line under Admiral Juan de Langara. Faced with such a powerful force, it’s no surprise the 17 French ships (including two 100-gun vessels) weren’t willing to leave the safety of the port.
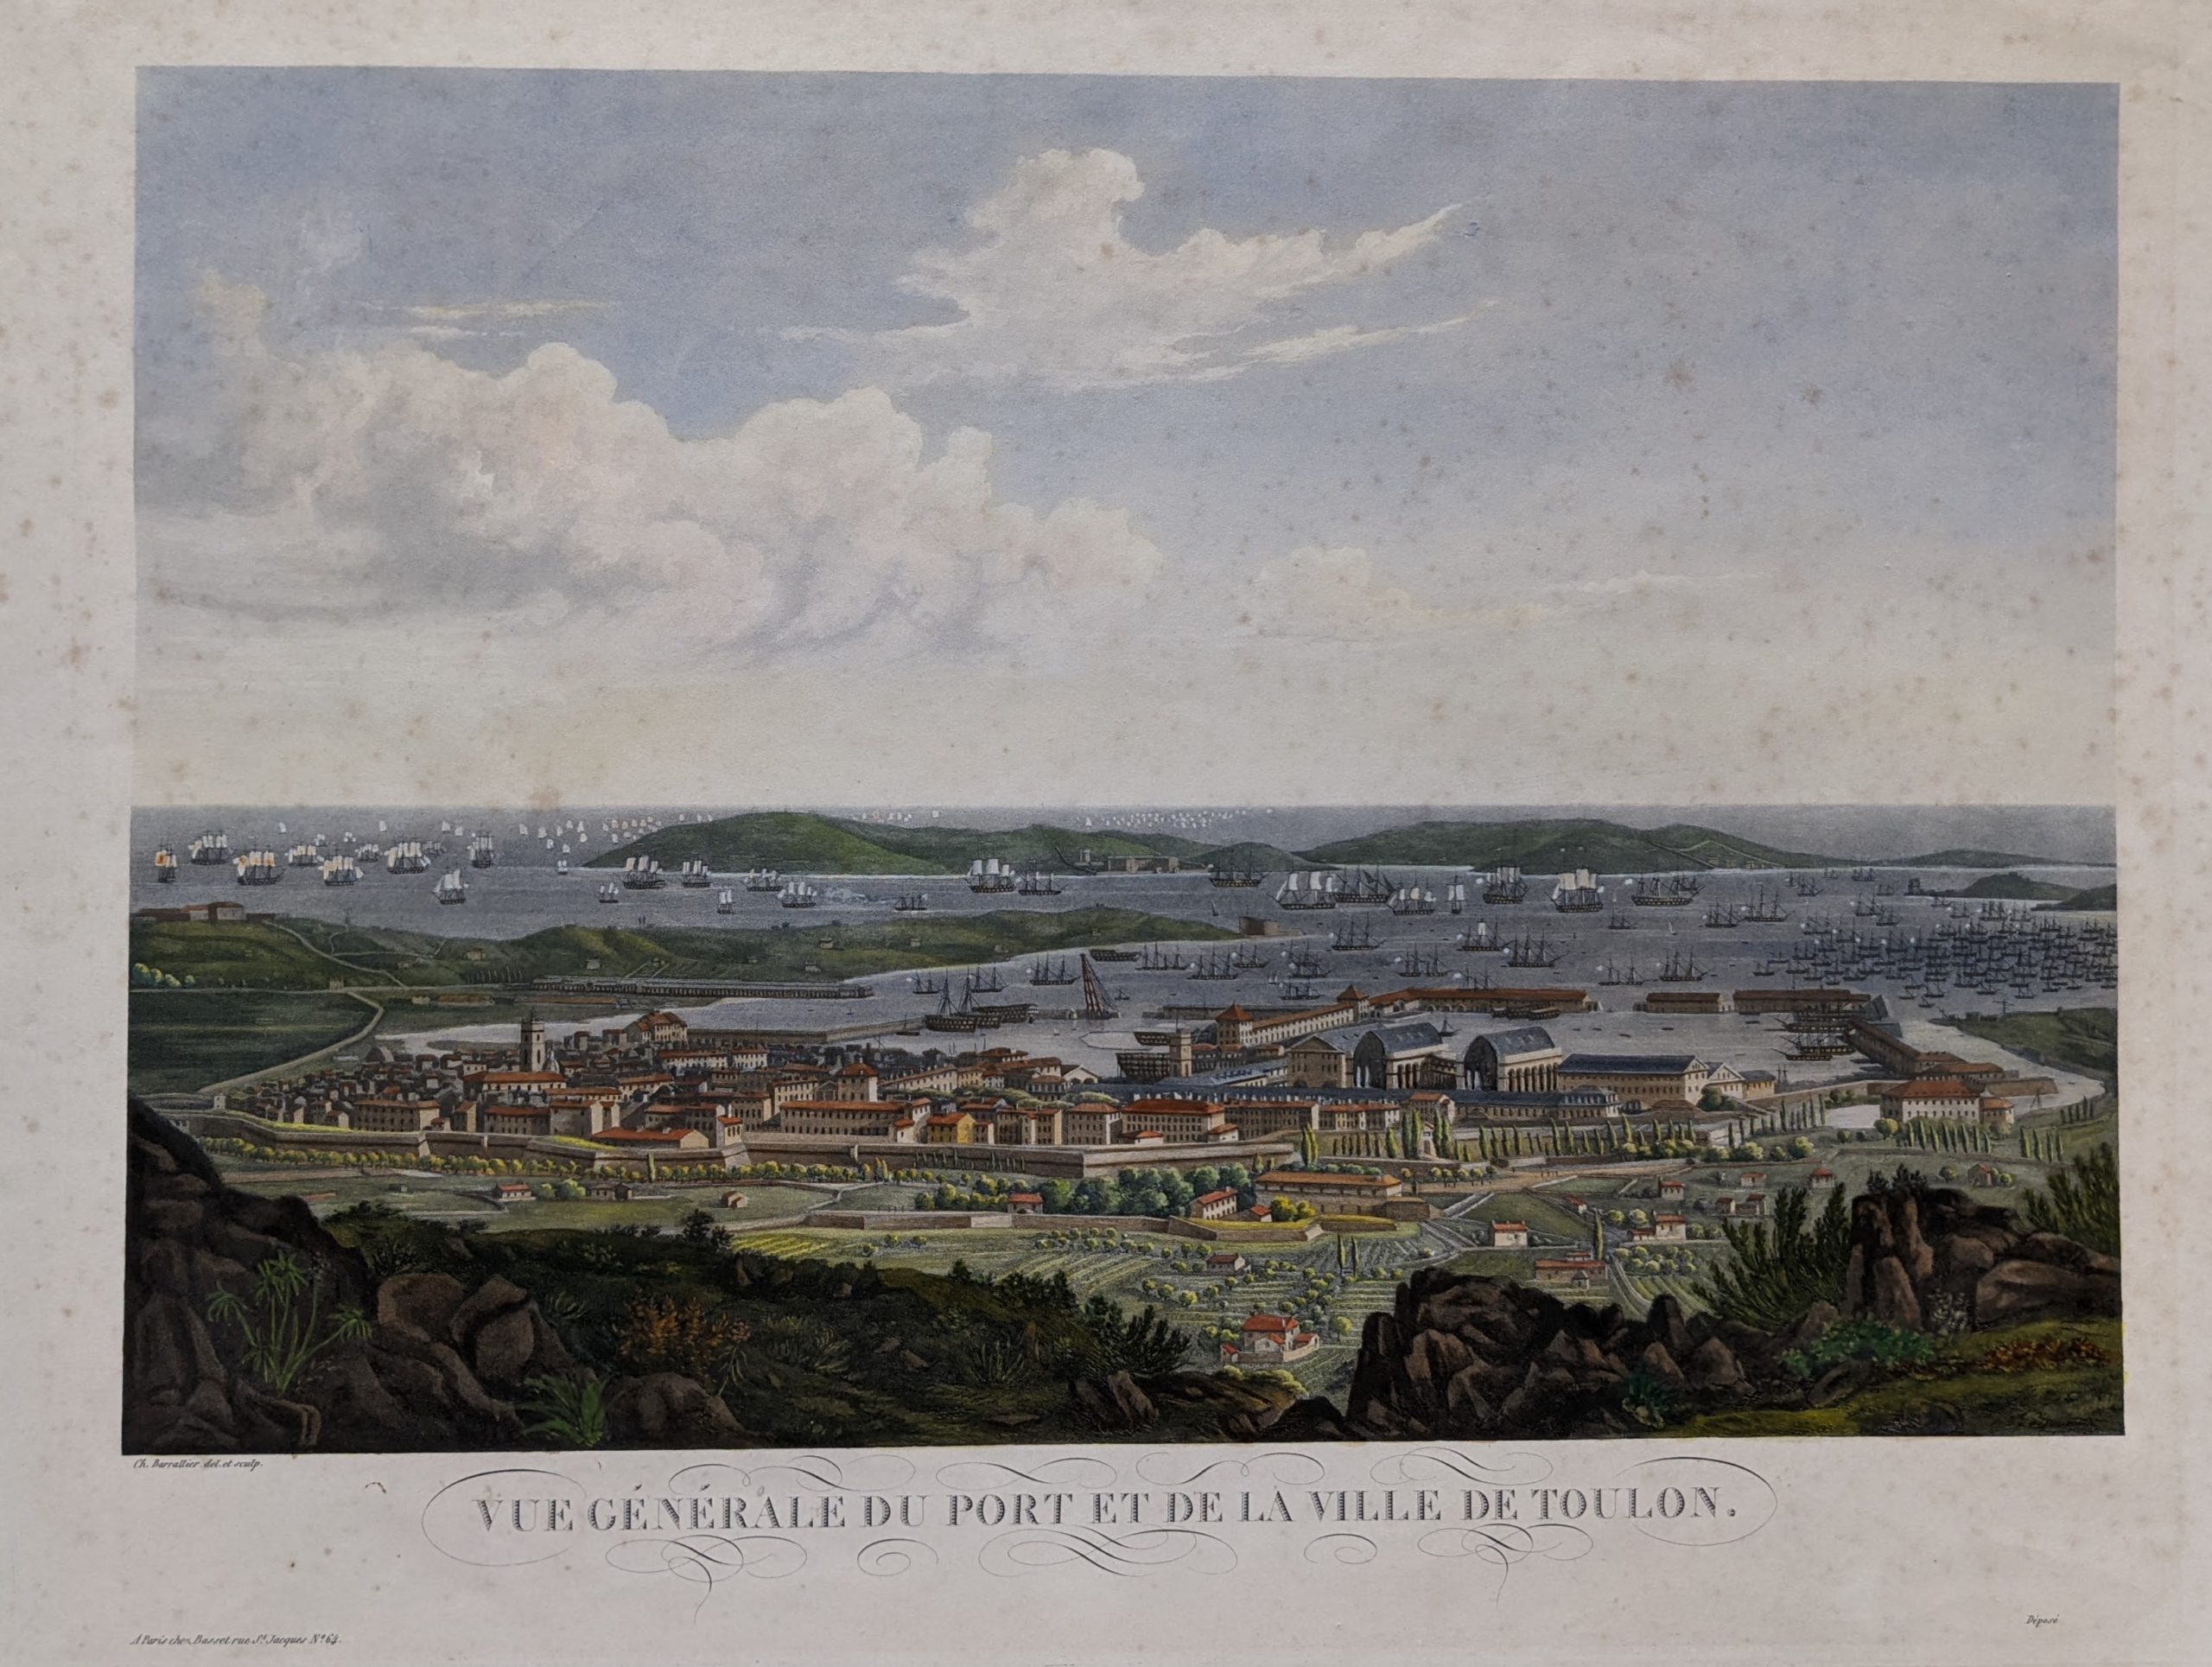
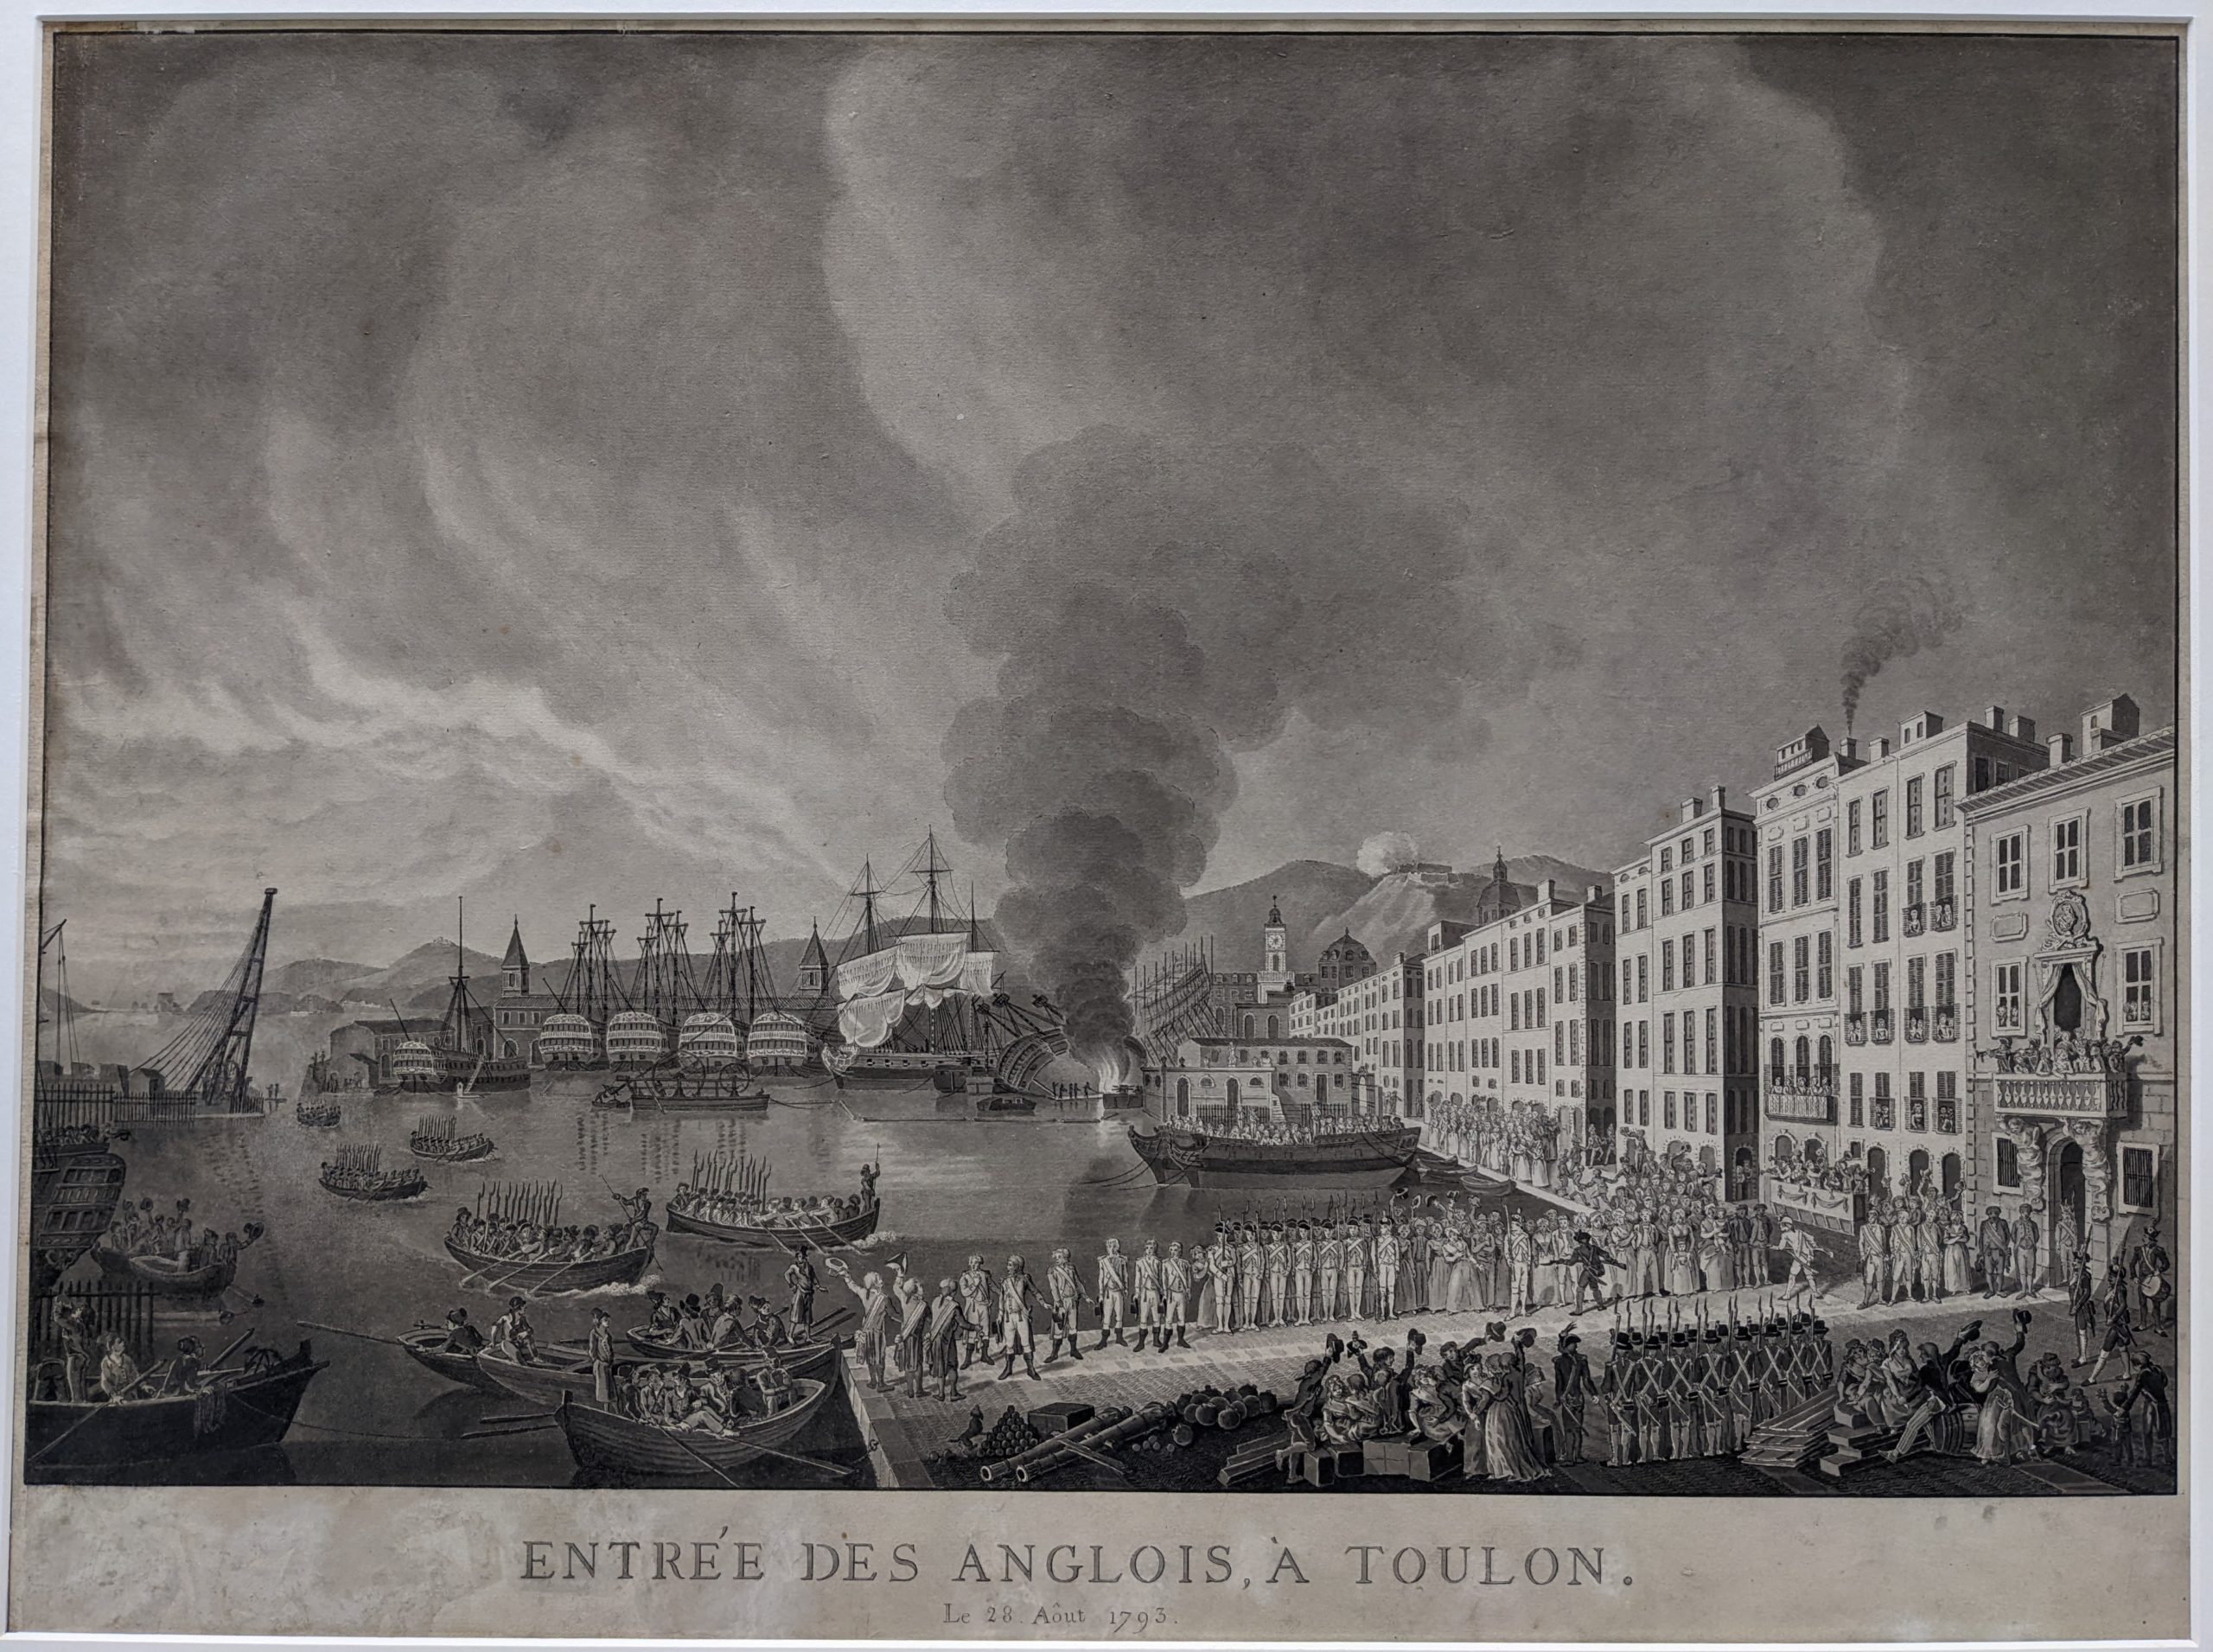
While the British fleet was assembling, pockets of resistance against the revolutionary forces broke out in cities like Marseilles, Lyon, Bordeaux, La Vendée and others. At Toulon, royalists and other counter-revolutionaries surrendered the port to the British, who landed 1,500 troops on August 28 and seized the port’s fortifications. As the crews of the French ships fled, the abandoned vessels were moved into the port’s inner harbor. The following day the British and Spanish fleets anchored in Toulon’s outer road.
Unwilling to suffer the loss of the significant arsenal and command base of the French fleet, revolutionary troops immediately began heading for the city. By September, Toulon was surrounded by 15,000 troops, and more were arriving every day. The forces holding the city included just 5,300 Sardinians, British, Spanish, and French. By mid-November, 40,000 men surrounded Toulon while the allies holding the port had 16,000, many of whom were sick or wounded. The French and allied forces continuously struggled over control of the heights around the town, but it was apparent that without significant reinforcements, the British and their allies had no hope of holding the port — especially since one of the key people organizing the French response was an ambitious young artillery officer named Napoleon Buonaparte (Yes, the same guy, AKA Bonaparte!).
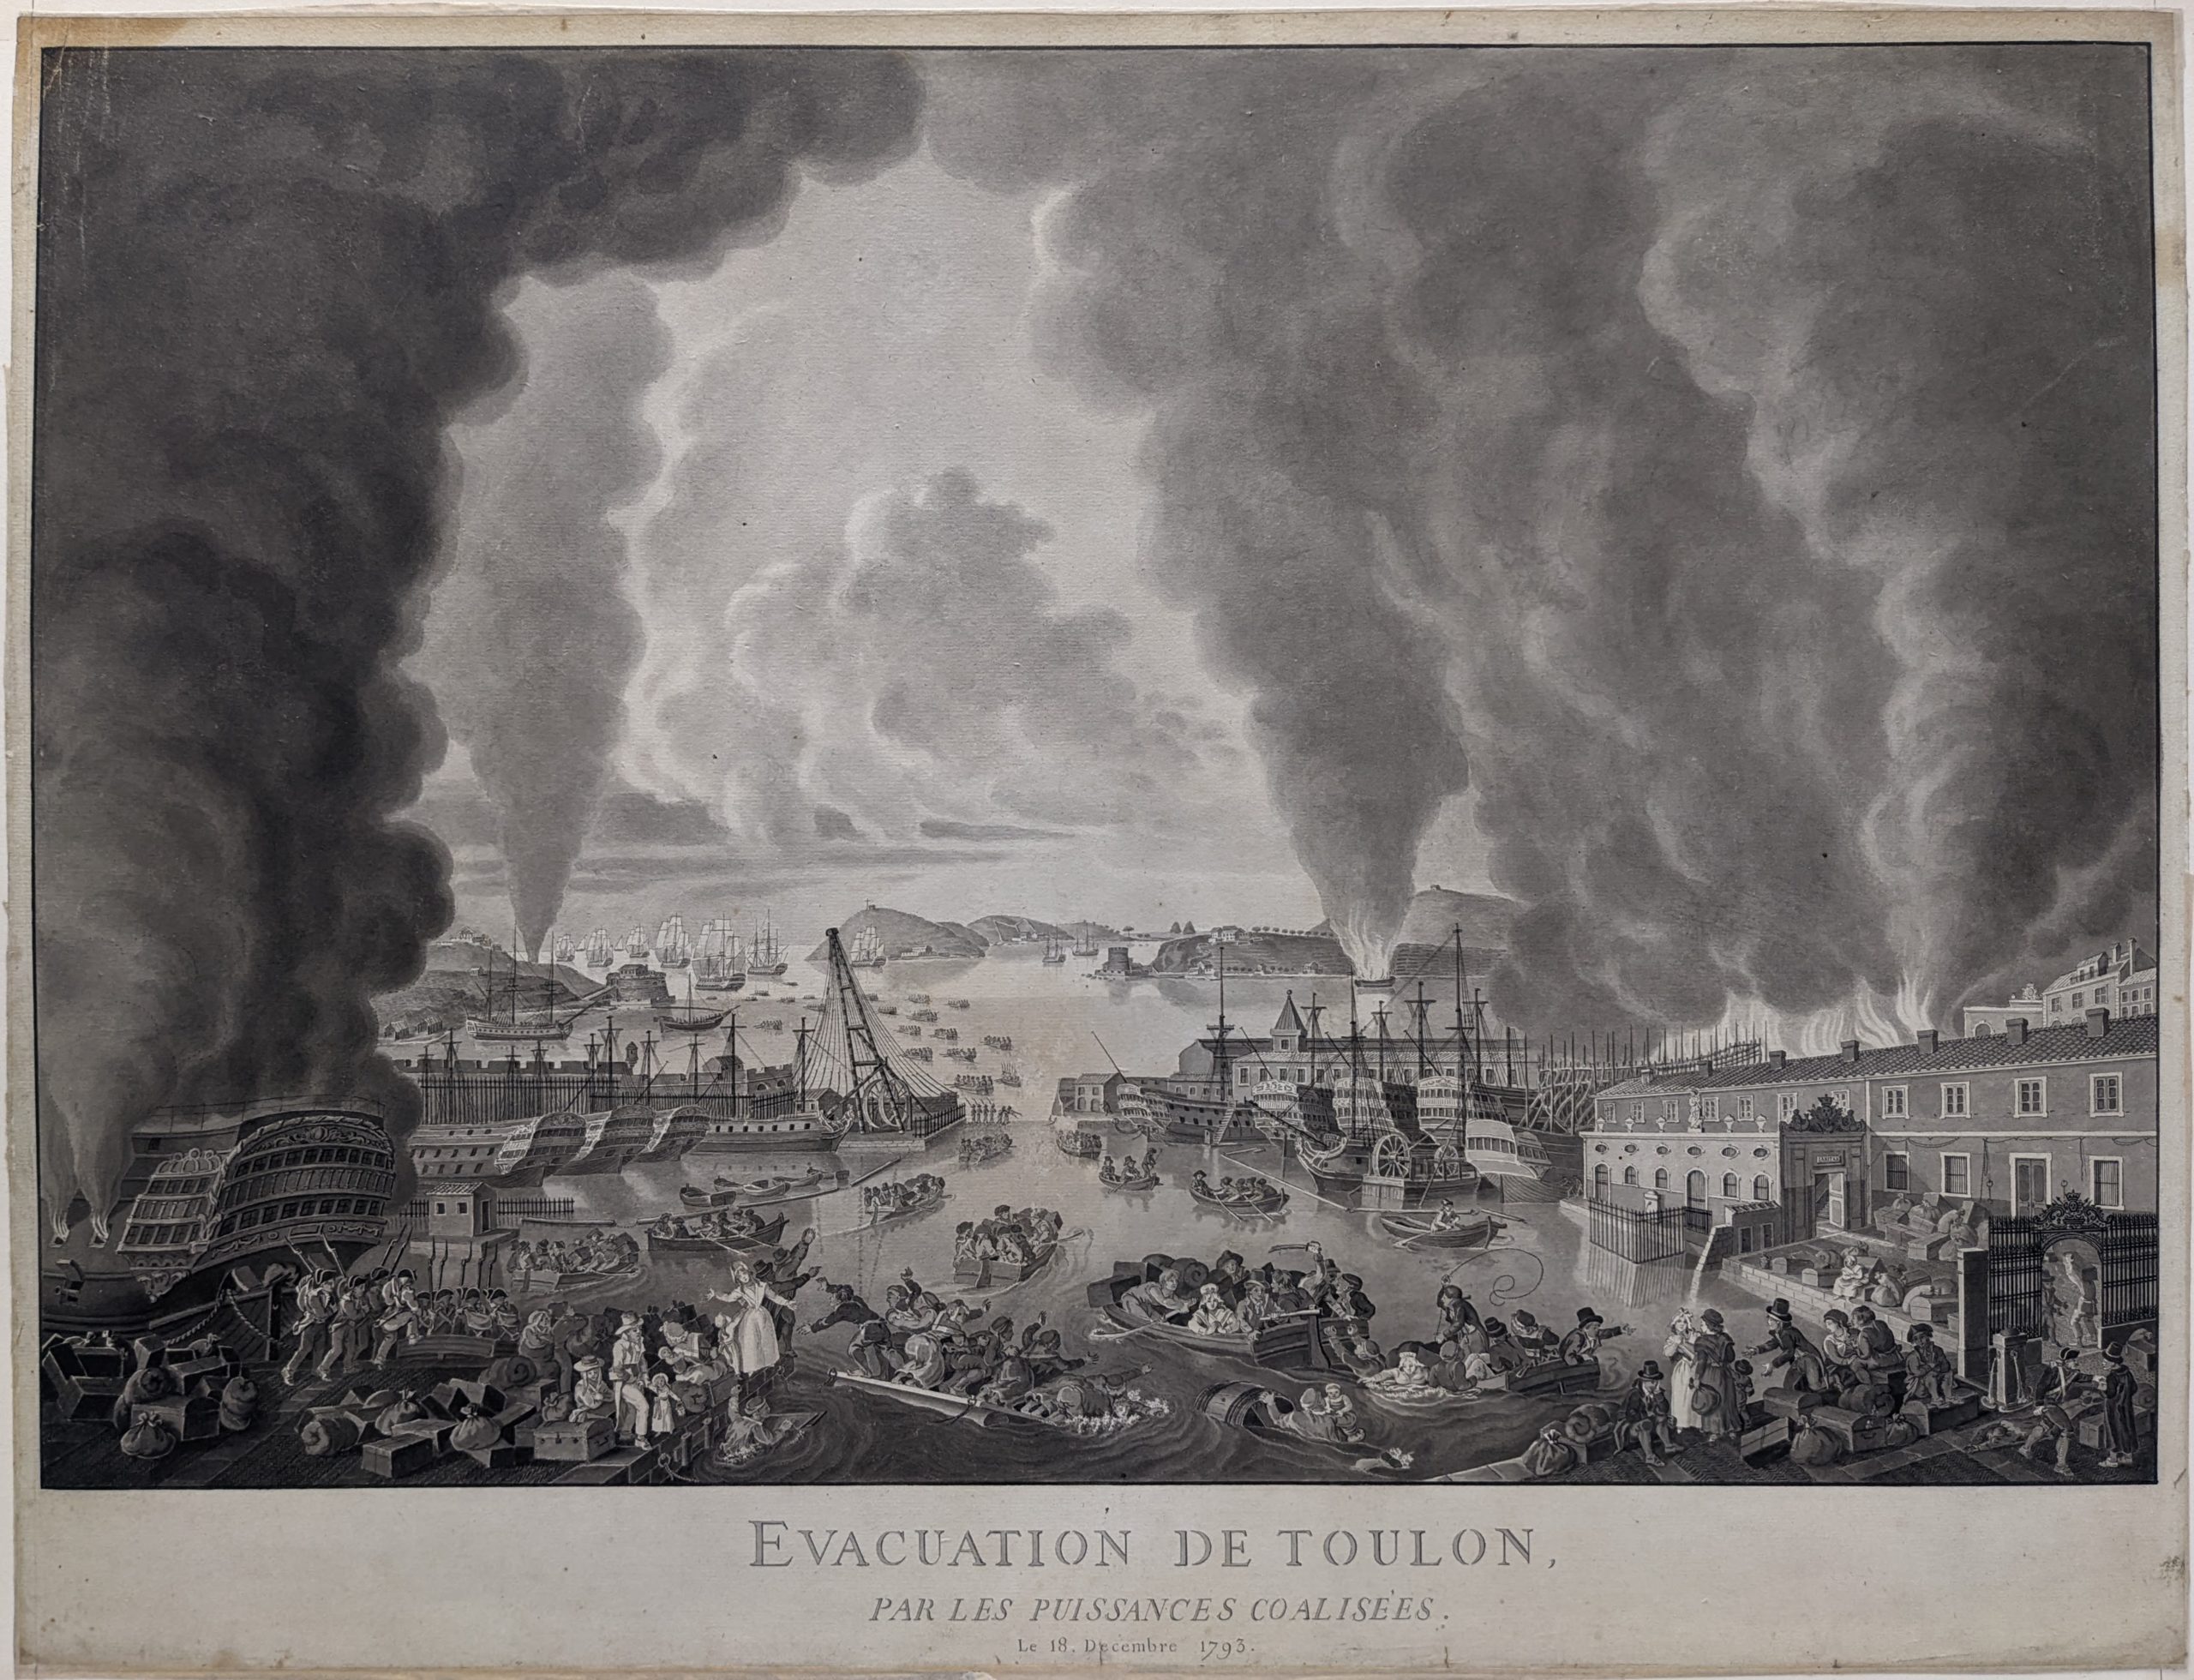
During the night of December 17, Buonaparte led a successful assault against the three forts (Fort l’Eguillette, Fort Mulgrave, and the Tour de la Balaguier) that sat on the headland guarding the western side of the port. The capture of the installations gave the French the ability to bombard the inner and outer harbors and the city of Toulon, forcing the evacuation of the port. On their way out, the British and Spanish destroyed as many French ships in the inner harbor as possible, while others were used to evacuate the royalists. Hood then moved his ships to Hyères Bay to consider his options.
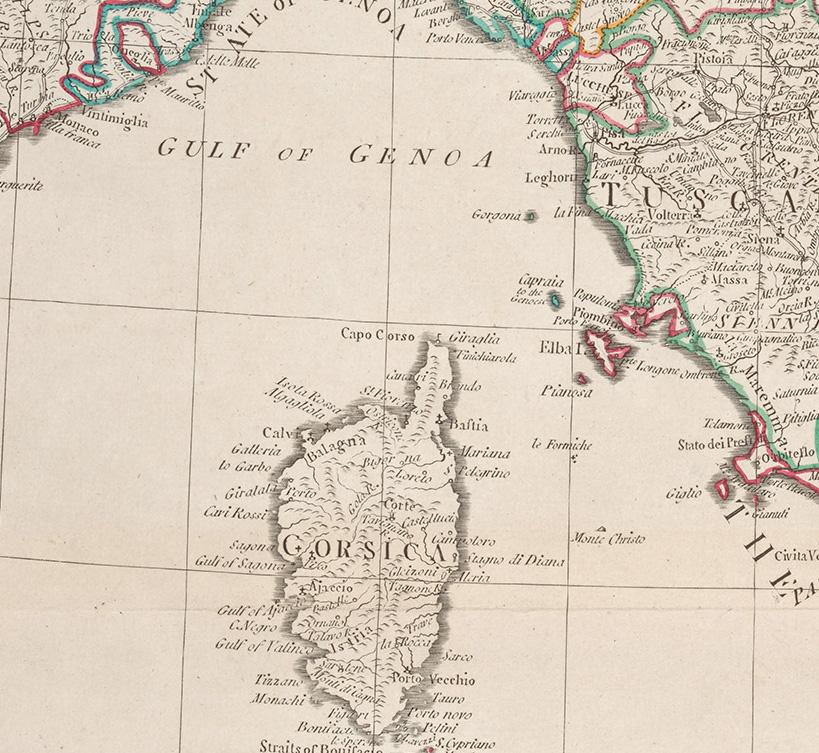
With the restoration of Toulon’s extensive naval facilities and many ships to France, the British required a new base of operations. The place needed to have extensive storage facilities as well as facilities where ships could be repaired, refit, and reprovisioned. The new base also needed to be located where it could support Austrian and Sardinian military operations. Admiral Hood chose Corsica. The island offered good harbors, easy provisioning, and plenty of timber, and was cited within easy reach of the strategically important and now vulnerable Ligurian Coast. At the time, the island was also mainly under the control of Corsican separatists led by Pasquale Paoli, who also happened to be negotiating with the British for help in dealing with the French holding the island. The British needed to capture three fortified cities: San Fiorenzo (Saint-Florent), Bastia, and Calvi to gain control.
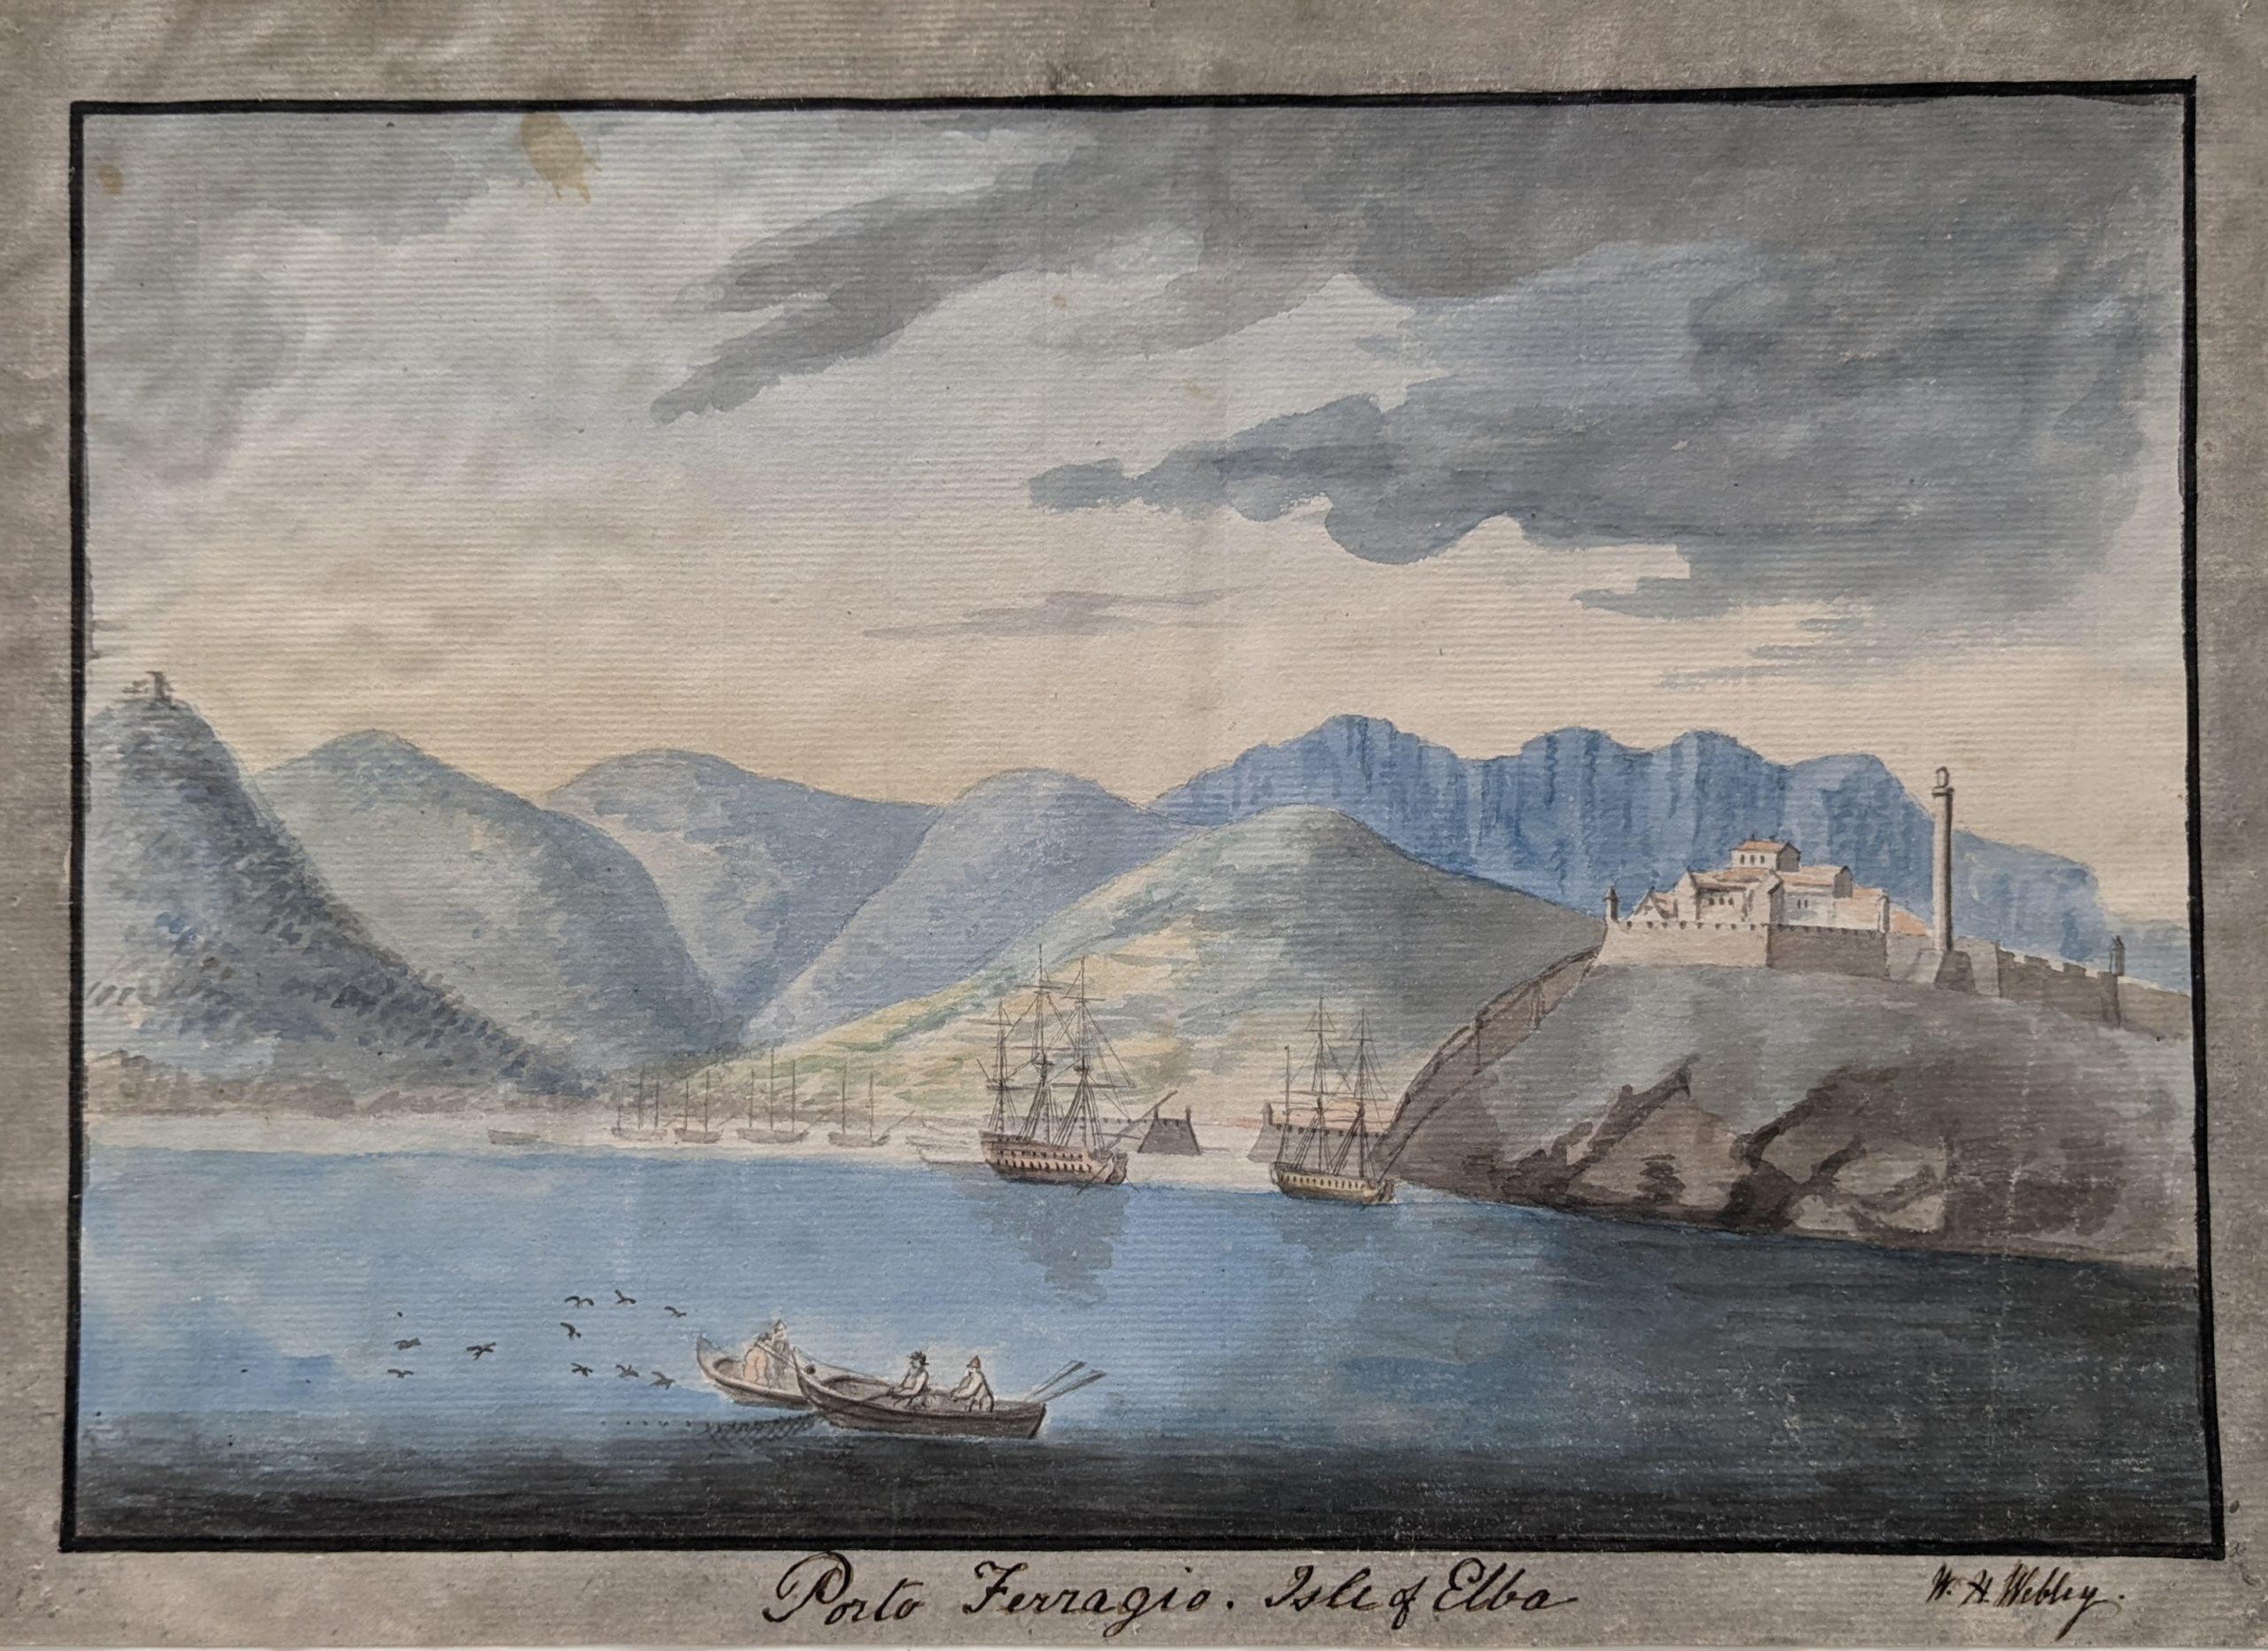
The British sailed from Îles d’Hyères for San Fiorenzo on Corsica’s northern coast on January 24, 1794. On the way, the fleet was caught by a three-day gale that pushed most of the ships past Corsica to Portoferraio on the island of Elba. On February 4, 1794, Hood dispatched the 74-gun ships HMS Alcide, HMS Egmont, and HMS Fortitude, and the 32-gun frigates HMS Lowestoft and HMS Juno, and transports carrying 1,400 British troops to Corsica to begin the siege.
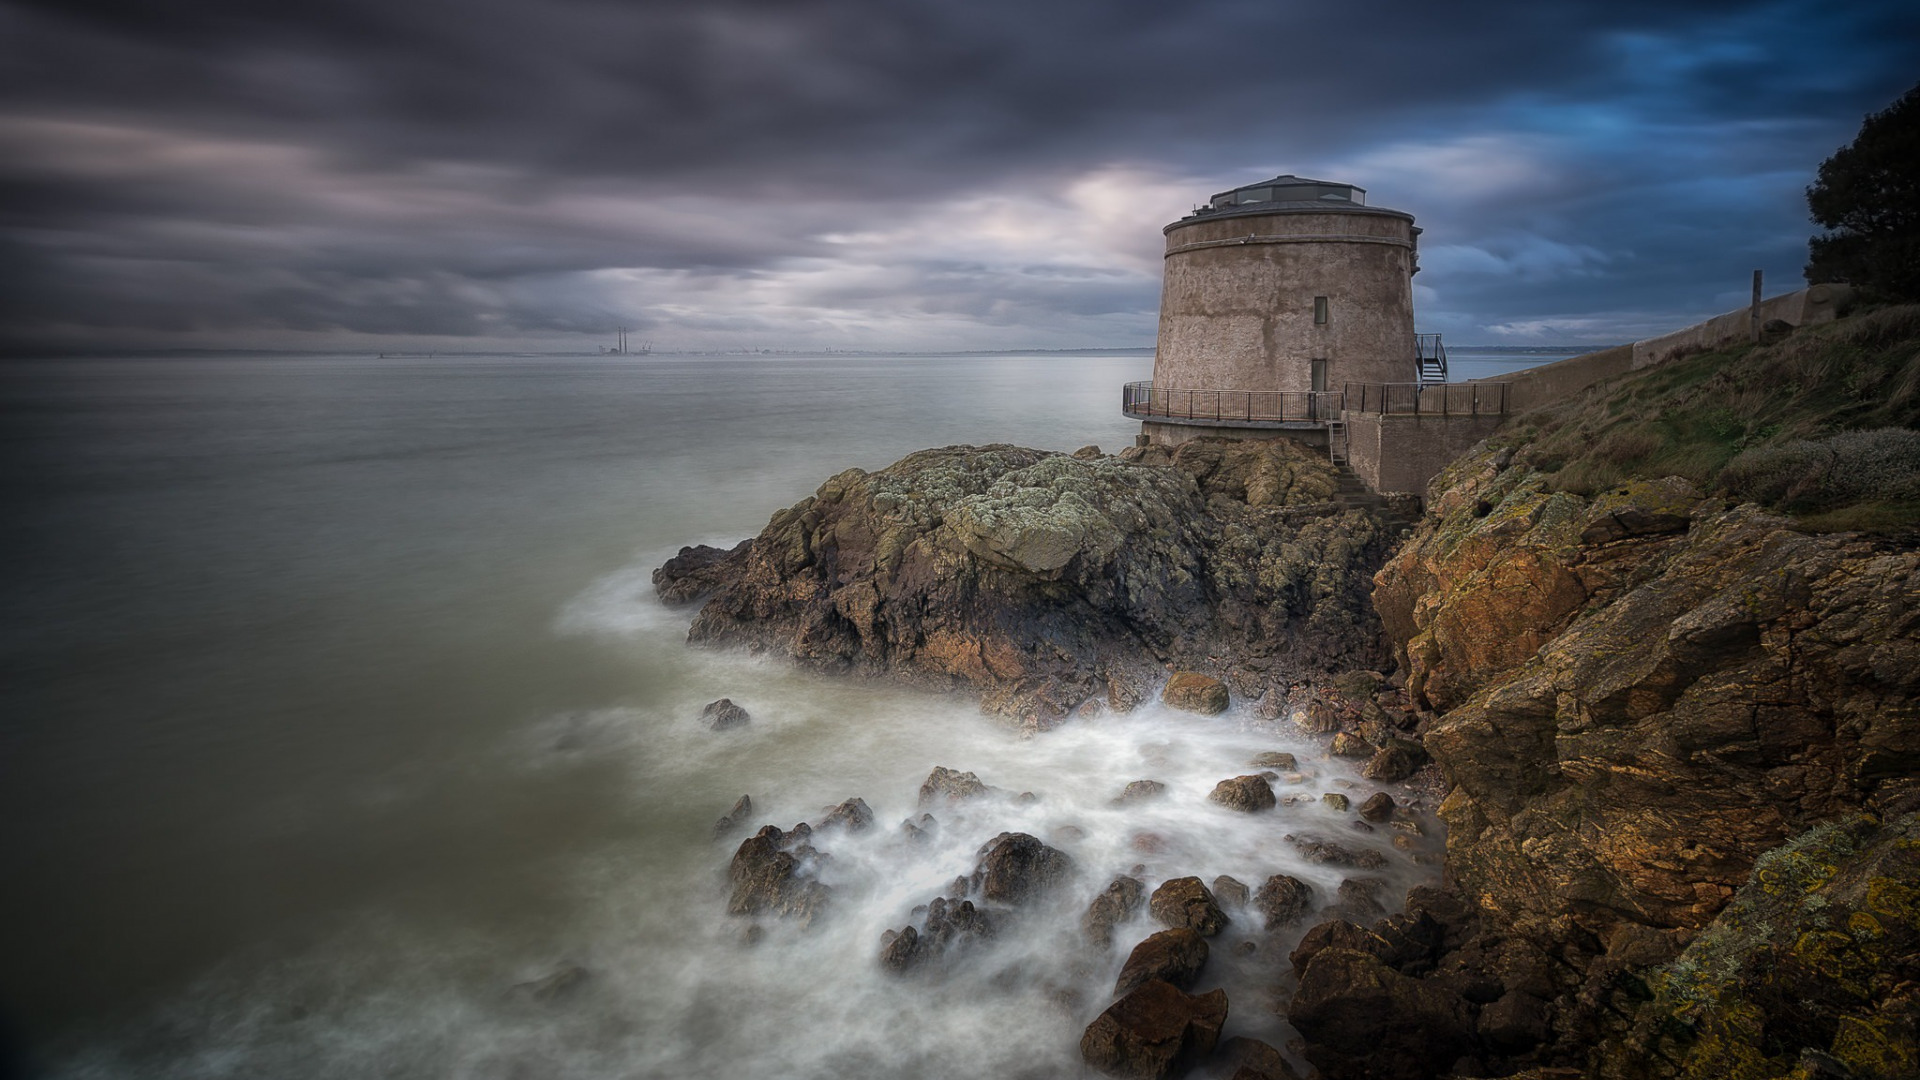
Securing the anchorage at San Fiorenzo required gaining control over two tall round fortresses, the Torra di Mortella and the Torra di Fornali, which commanded the seaward approaches to the western side of Saint-Florent bay. The heavily fortified and seemingly impenetrable tower on Mortella Point had walls fifteen feet thick and mounted one 6-pound and two 18-pound cannons. On February 8th, troops under Lt. Colonel John Moore landed on the coast west of the Torra di Mortella and marched seven or eight miles “through a rocky, desert and mountainous country, destitute of roads”2 to reach the heights overlooking the tower. With them was a detachment of sailors hauling a small howitzer and a 6-pound cannon (These things aren’t light! They can weigh several 1,000 pounds!). After establishing a small battery, the troops opened fire on the tower from a distance of just 150 yards3 but the guns had little effect on the fortress.

To assist the army, two British ships, the 74-gun Fortitude and 32-gun Juno, spent two and a half hours of arduous work bombarding the tower to little effect. It wasn’t quite the same situation for the ships on the receiving end of the tower’s fire. Two 18-pound shot significantly damaged Fortitude’s mainmast, nine shrouds were cut, large holes were battered in the ship’s side, and three guns on the lower deck were dismounted. Several heated shot lodged in Fortitude’s sides also caused fires, but these were quickly extinguished, causing little damage. Unfortunately, one red hot shot hit a powder box and caused an explosion that killed six sailors and injured another 56.
Finally, after hauling an 18-pound cannon (about 3,000-4,760 lbs, depending upon length), two 9-pound cannons (about 2,800-3,500 lbs each) and a carronade up to the heights overlooking the tower. This was an absolutely astounding feat for the sailors and one that would be repeated often throughout the Revolutionary and Napoleonic wars. With their batteries expanded, the British bombarded the Torra di Mortella for two days before the French surrendered. Incredibly, the surrender wasn’t caused by the shot, but by a fire caused when a heated shot set fire to the parapet where the 18-pound cannons were stationed. The towers were obviously quite effective as just 33 men had managed to hold off more than 700 British!

With the surrender of the Torra di Mortella, the British turned their attention to the more heavily fortified Torra di Fornali that protected two strong batteries pointing seaward. The hill behind it held the enclosed “Convention Redoubt,” equipped with 21 heavy cannons.
Again, the key to taking the fortress was by mounting heavy cannons on the heights above the redoubt. Yet again, the navy saved the day! Over the course of four days sailors from the five ships hauled four 18-pound cannons, a large howitzer, and a 10-inch mortar (5,600 lbs!) 700 feet UP a mountain to establish two batteries the army could use to rain shot down upon the French.
After two days of unremitting fire, a fifth 18-pound cannon was “brought up by the seamen”4 and a sixth was placed at another point on the shoreline to prevent two French frigates anchored in the bay from joining the action. On the night of the 17th, the British troops swarmed the redoubt and drove the French out. The French then abandoned the tower and batteries, escaping to the waiting frigates. According to Lt. General David Dundas, who had led the troops, “on the 18th the squadron anchored in perfect security in Mortella Bay.”5 The French abandoned San Fiorenzo proper and headed for Bastia the following day. It would take another six months before the whole island was under British control – but that’s a story for another day.
To the British, the towers of Mortella and Fornali had proved their worth as defensive coastal fortifications. Worried about the invasion of their home island, the British adopted the tower idea. Between 1796 and 1815, they built about 194 towers along Britain’s coast as well as others along its colonies’ shorelines. Of course, in typical British fashion of the time, the pronunciation and spelling of the word ‘mortella’ was corrupted to suit the British tongue. And these days, the towers are more well known as ‘martello’ towers.
Endnotes:
1 Robert Fulton did try to convince both the British and French that submarines were a good idea but neither country formally implemented his ideas. If you don’t know, Robert Fulton was an American inventor and engineer who is credited with developing the world’s first commercially successful steamboat. He also designed submarines, canals, and various forms of naval armament.
2From a letter dated February 21, 1794, by Lt. General David Dundas. Published in The London Gazette, March 11-15, 1794.
3After digging around in a few resources in the Museum’s Library Collection I was able to determine that the point blank range of a 6-pound cannon is 250 yards. So under normal circumstances, the power of a cannonball hitting a target from just 150 yards would have been devastating.
4From a letter dated February 21, 1794, by Lt. General David Dundas. Published in The London Gazette, March 11-15, 1794.
5 Ibid.