If you’ve been by the Clean Lab lately, you may have seen a large, strangely shaped ceramic object on one of the tables. For those wondering about it, wonder no more!
Our mystery ceramic object is called an amphora!
What is an amphora?
Amphorae are terracotta containers used for trade as their unique shape allowed them to fit snugly together in a ship’s hull. Since the Neolithic period, this shape has been in use and migrated to Europe during the first millennium BCE. Our amphora is an earlier shape, that of Dressel 1B. There are a variety of shapes that amphorae come in depending on when and where amphorae were made. This specific shape means it was likely used to transport and store wine (University of Southampton, 2014).
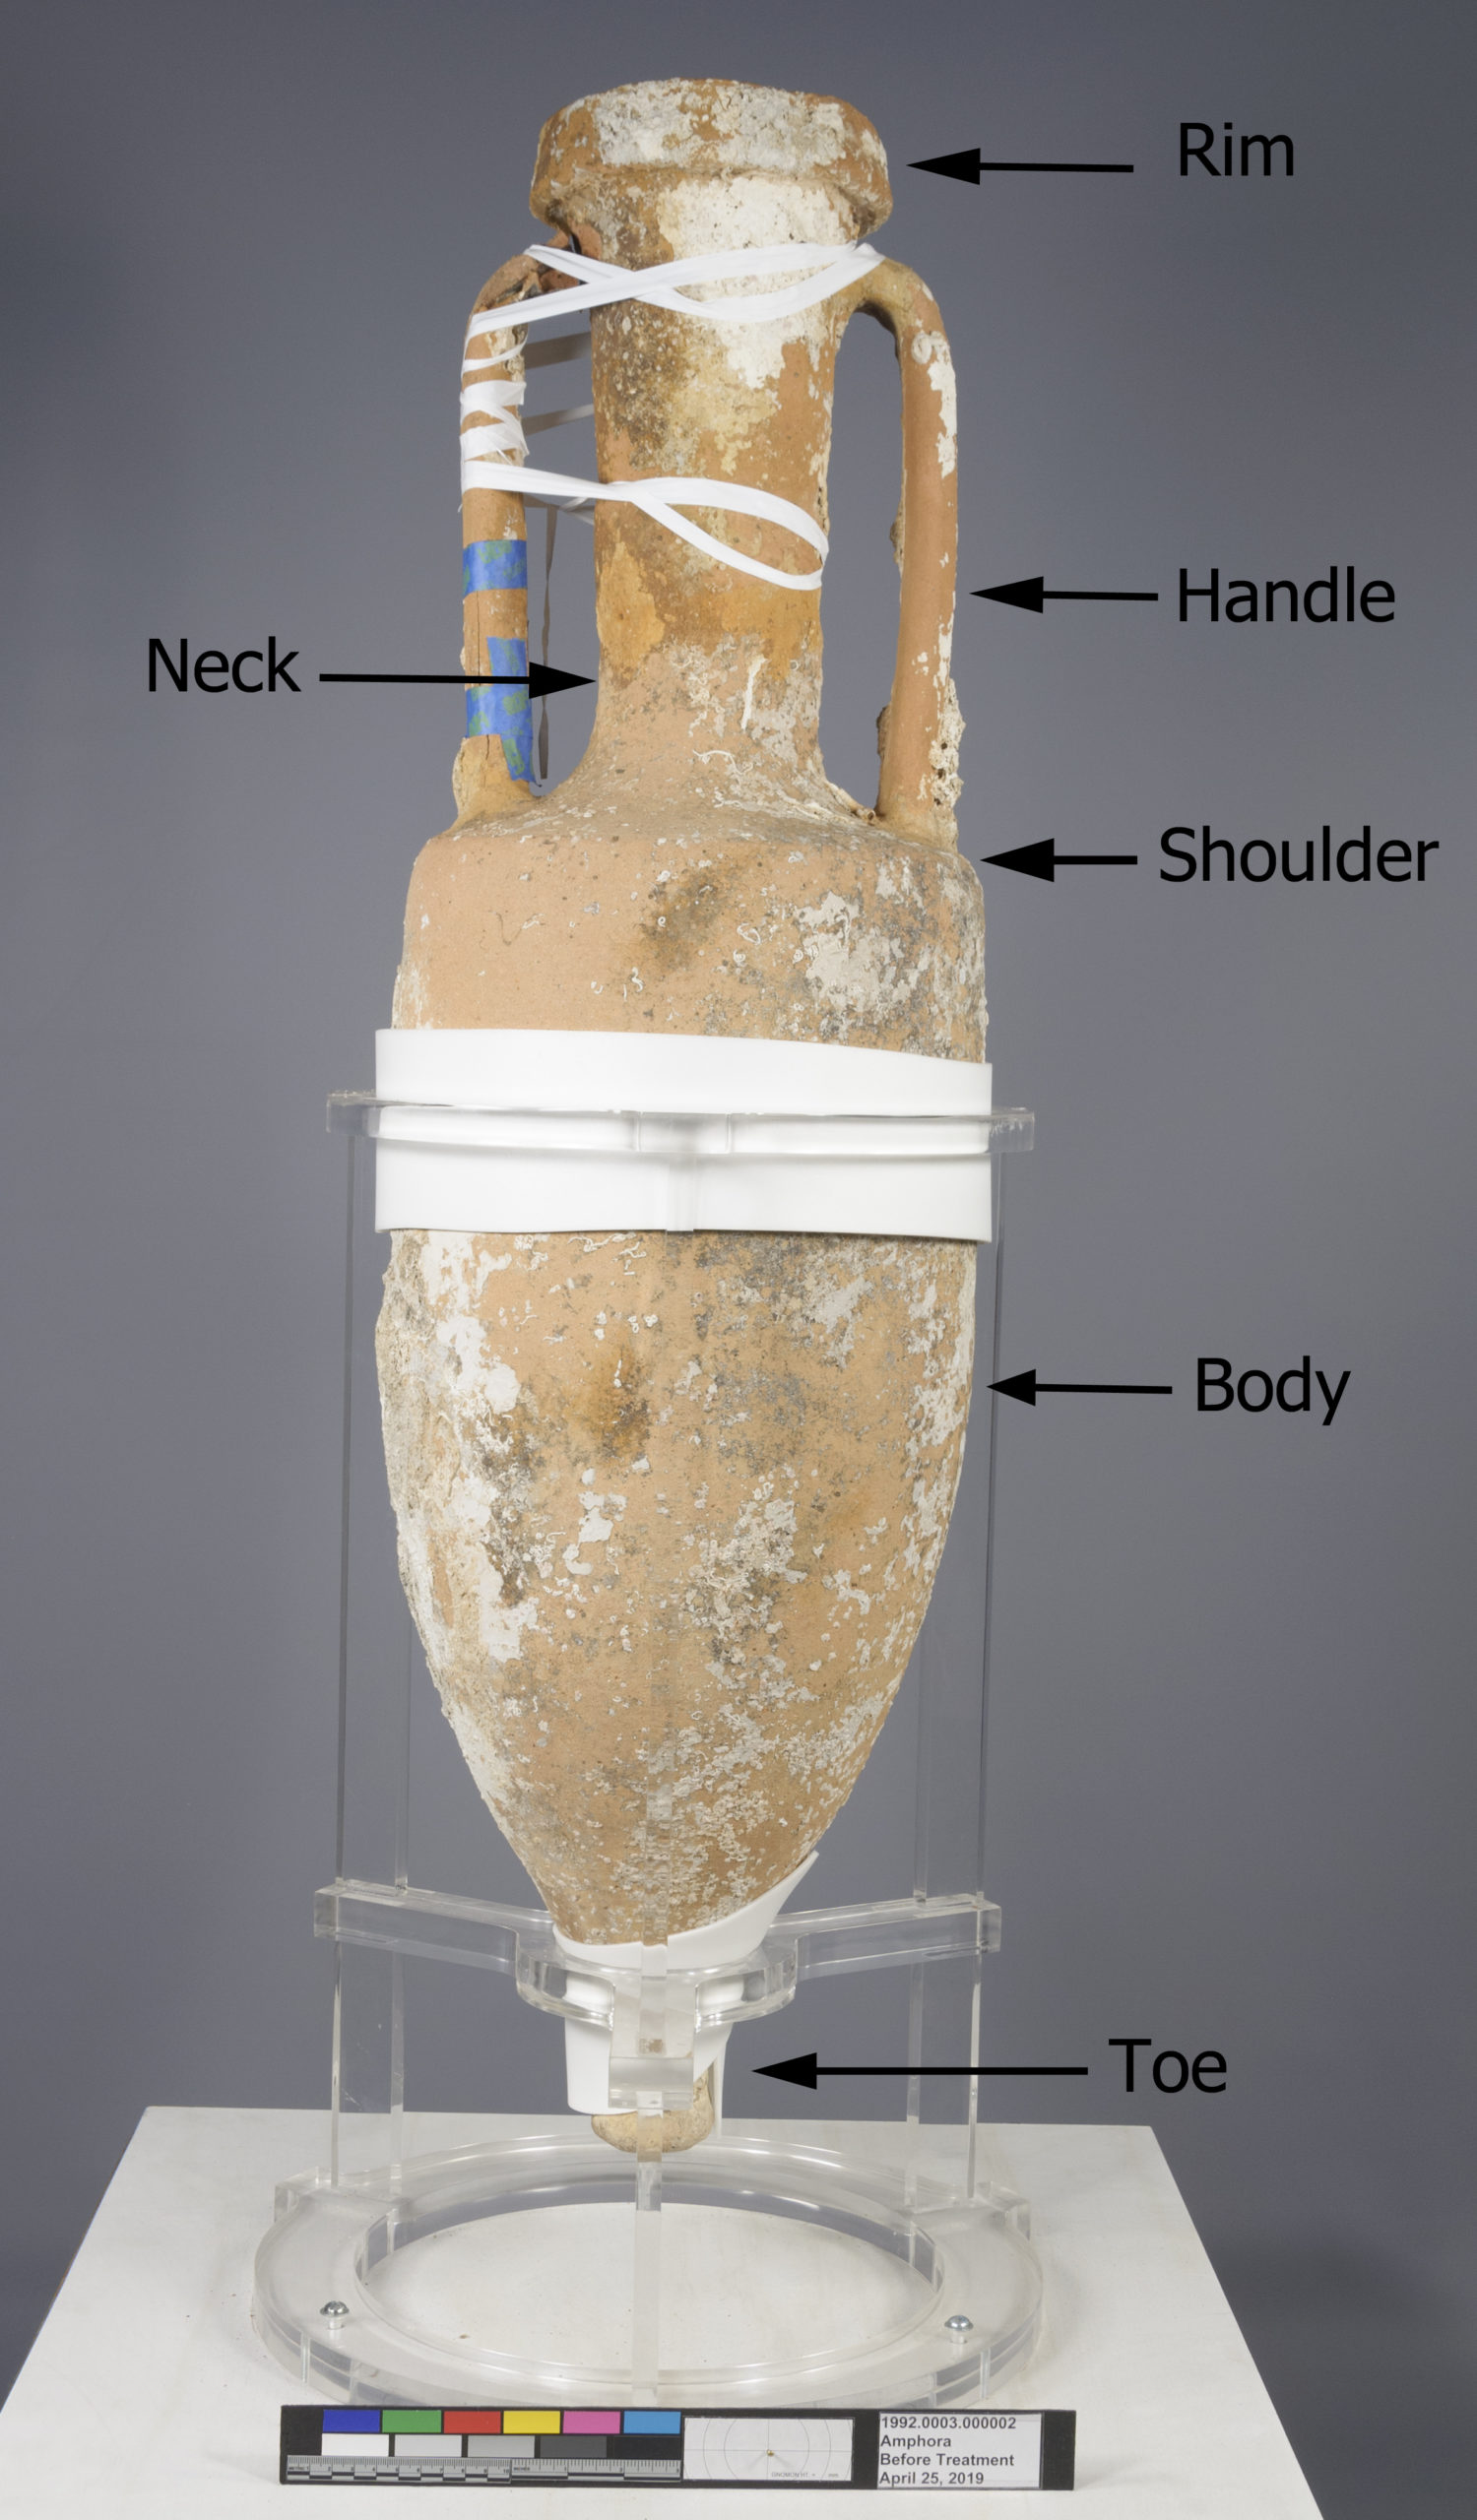
Typically, amphorae were wheel-thrown ceramics made in three separate pieces. Before firing, the pieces were joined together using clay slip at the joins to meld the clay together into one ceramic. Additionally, if the amphora was meant to hold a liquid, the inside would have been coated in a resin before being fired (Loughton, M.E., 2003).
Why is it in our lab?
The amphora arrived at The Mariners’ in 1992 alongside a smaller one. According to some documentation that came with the amphorae, they supposedly came from Marseille, France. Judging by their surfaces and the encrustations of shells and other marine growth on them, the amphorae were likely in the ocean at some point.
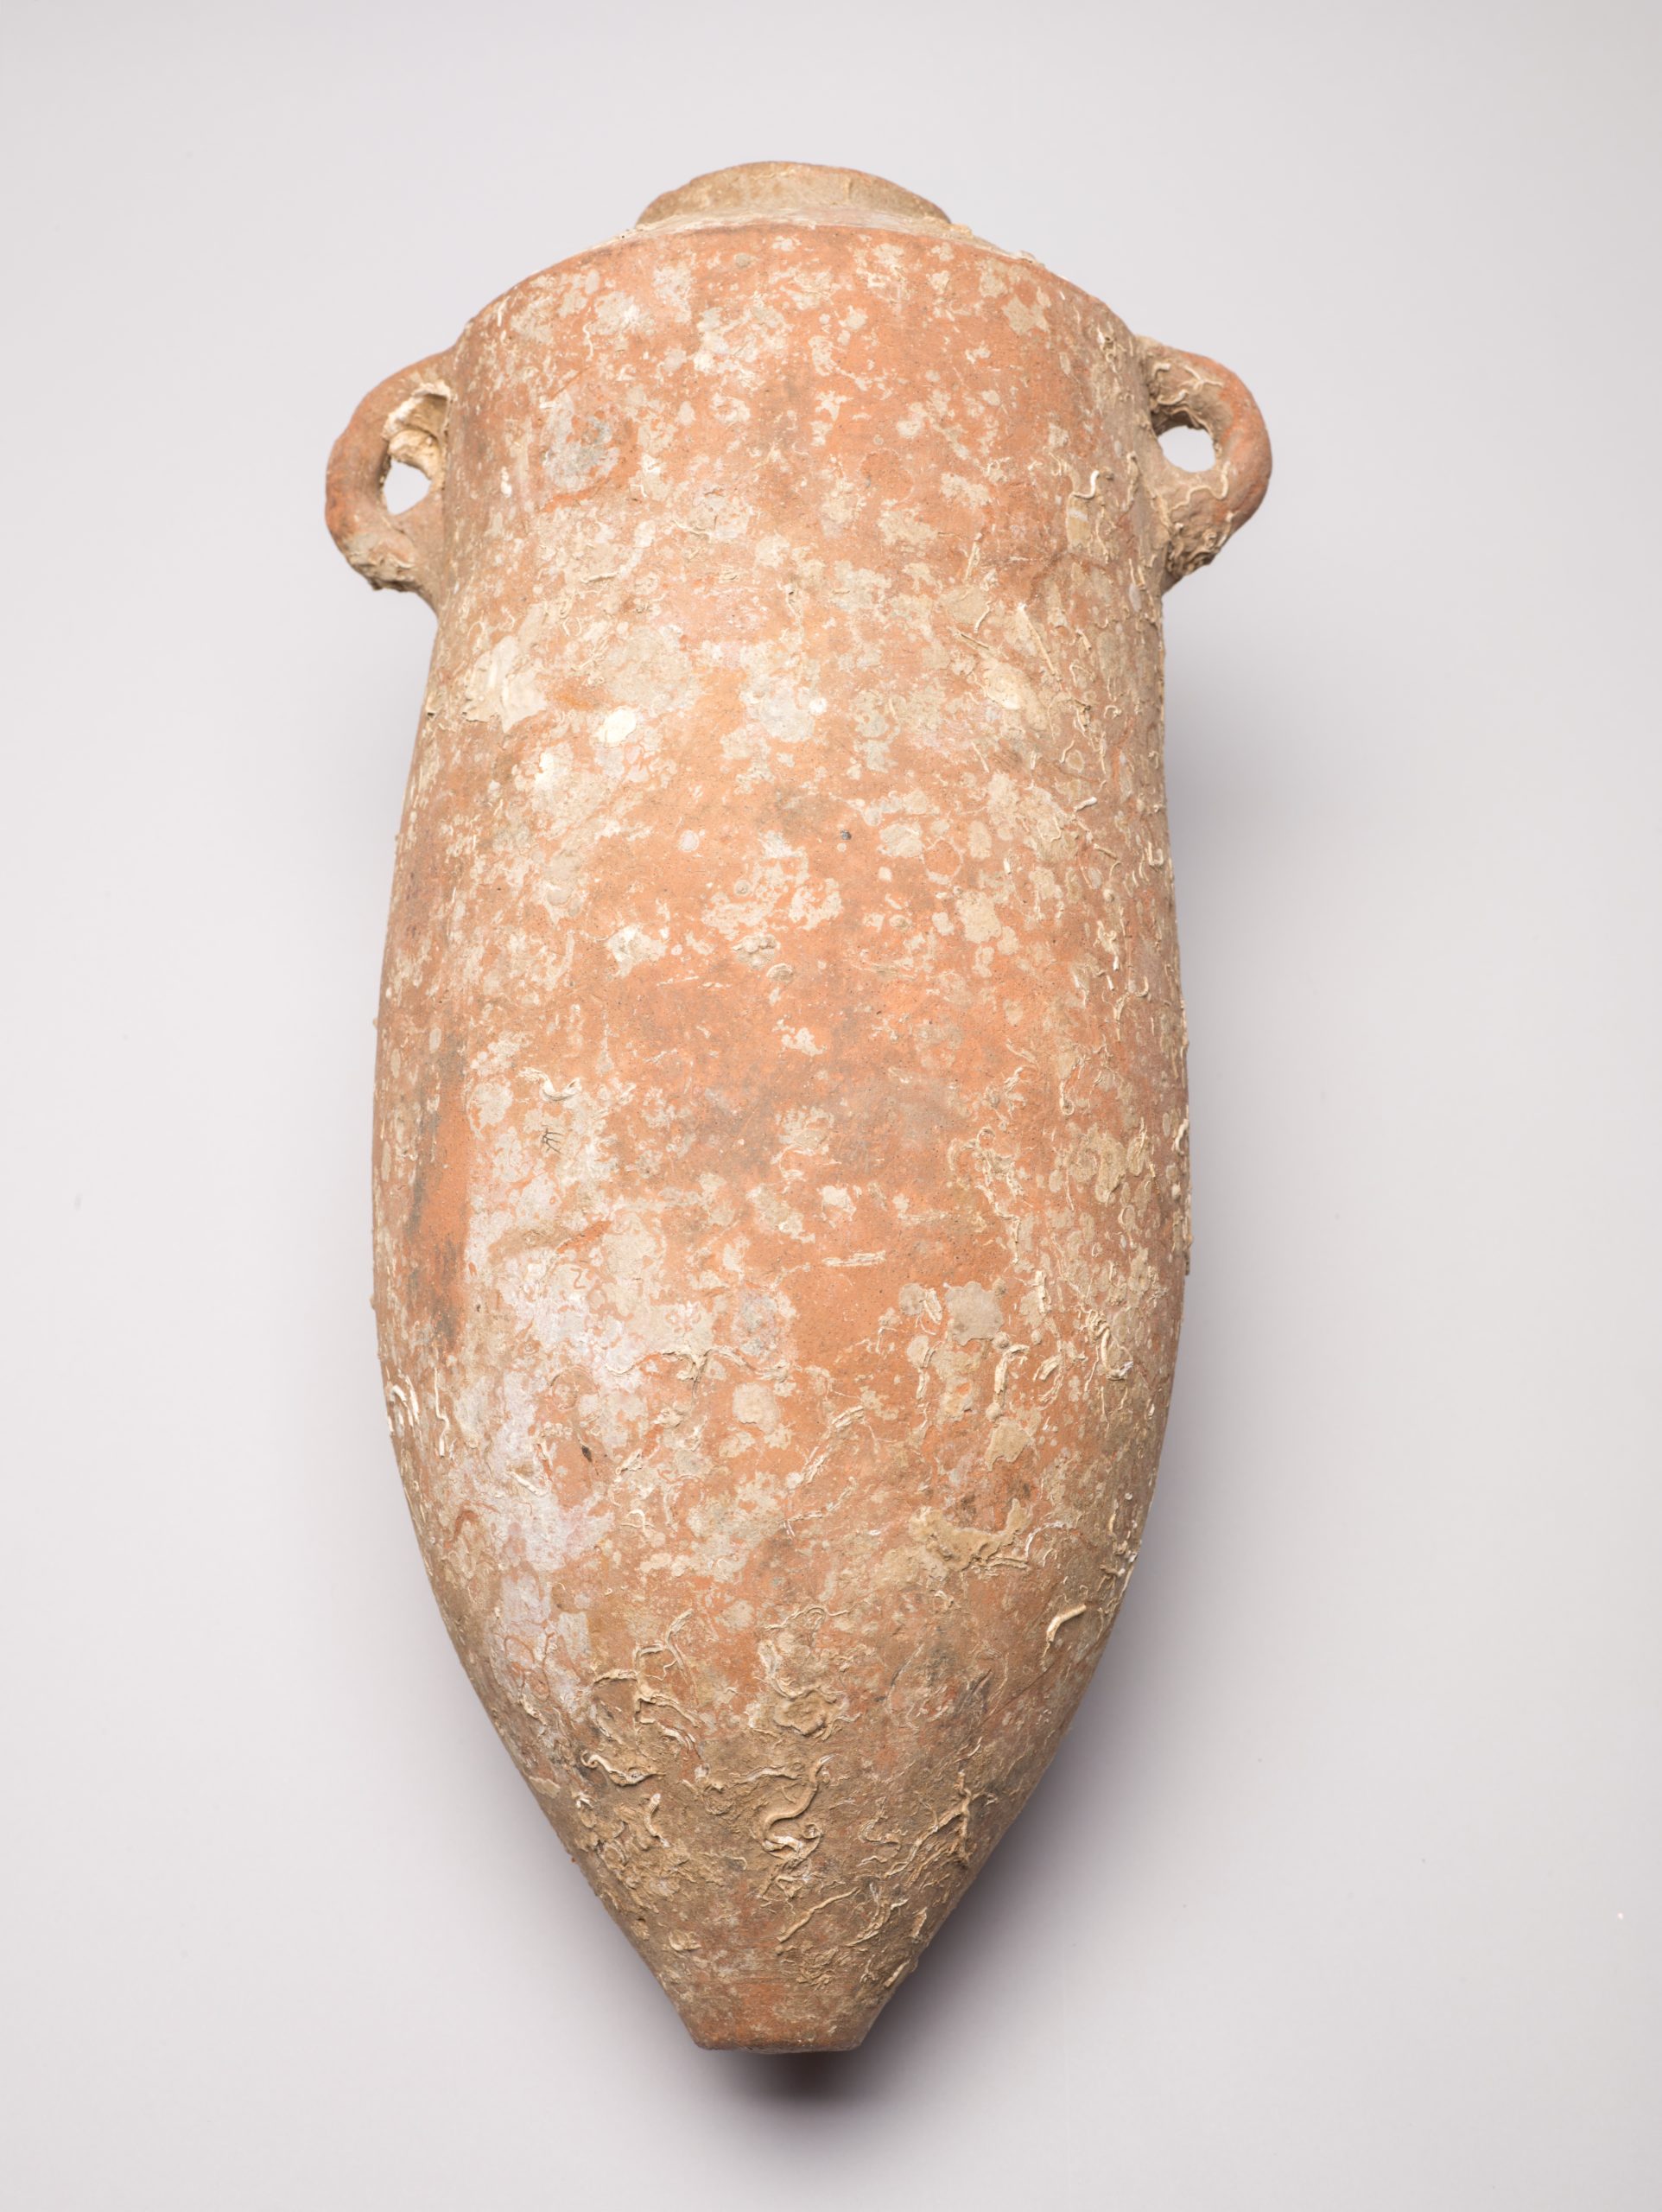
As you can see, both amphora are intact and quite different. The larger of the two is the one I’m writing about here.
In 2019, it was noticed that the amphora had begun to crack. One of its handles was cracked lengthwise. It was pulled out of storage to determine what exactly had happened. X-radiography was undertaken of the entire amphora as iron dowels were seen in the broken handle. As pictured below, dowels were found to be in both the top and bottom of the handles, connecting them to the neck and shoulders of the amphora. Additionally, there are wires in the neck and other dowels in the toe.
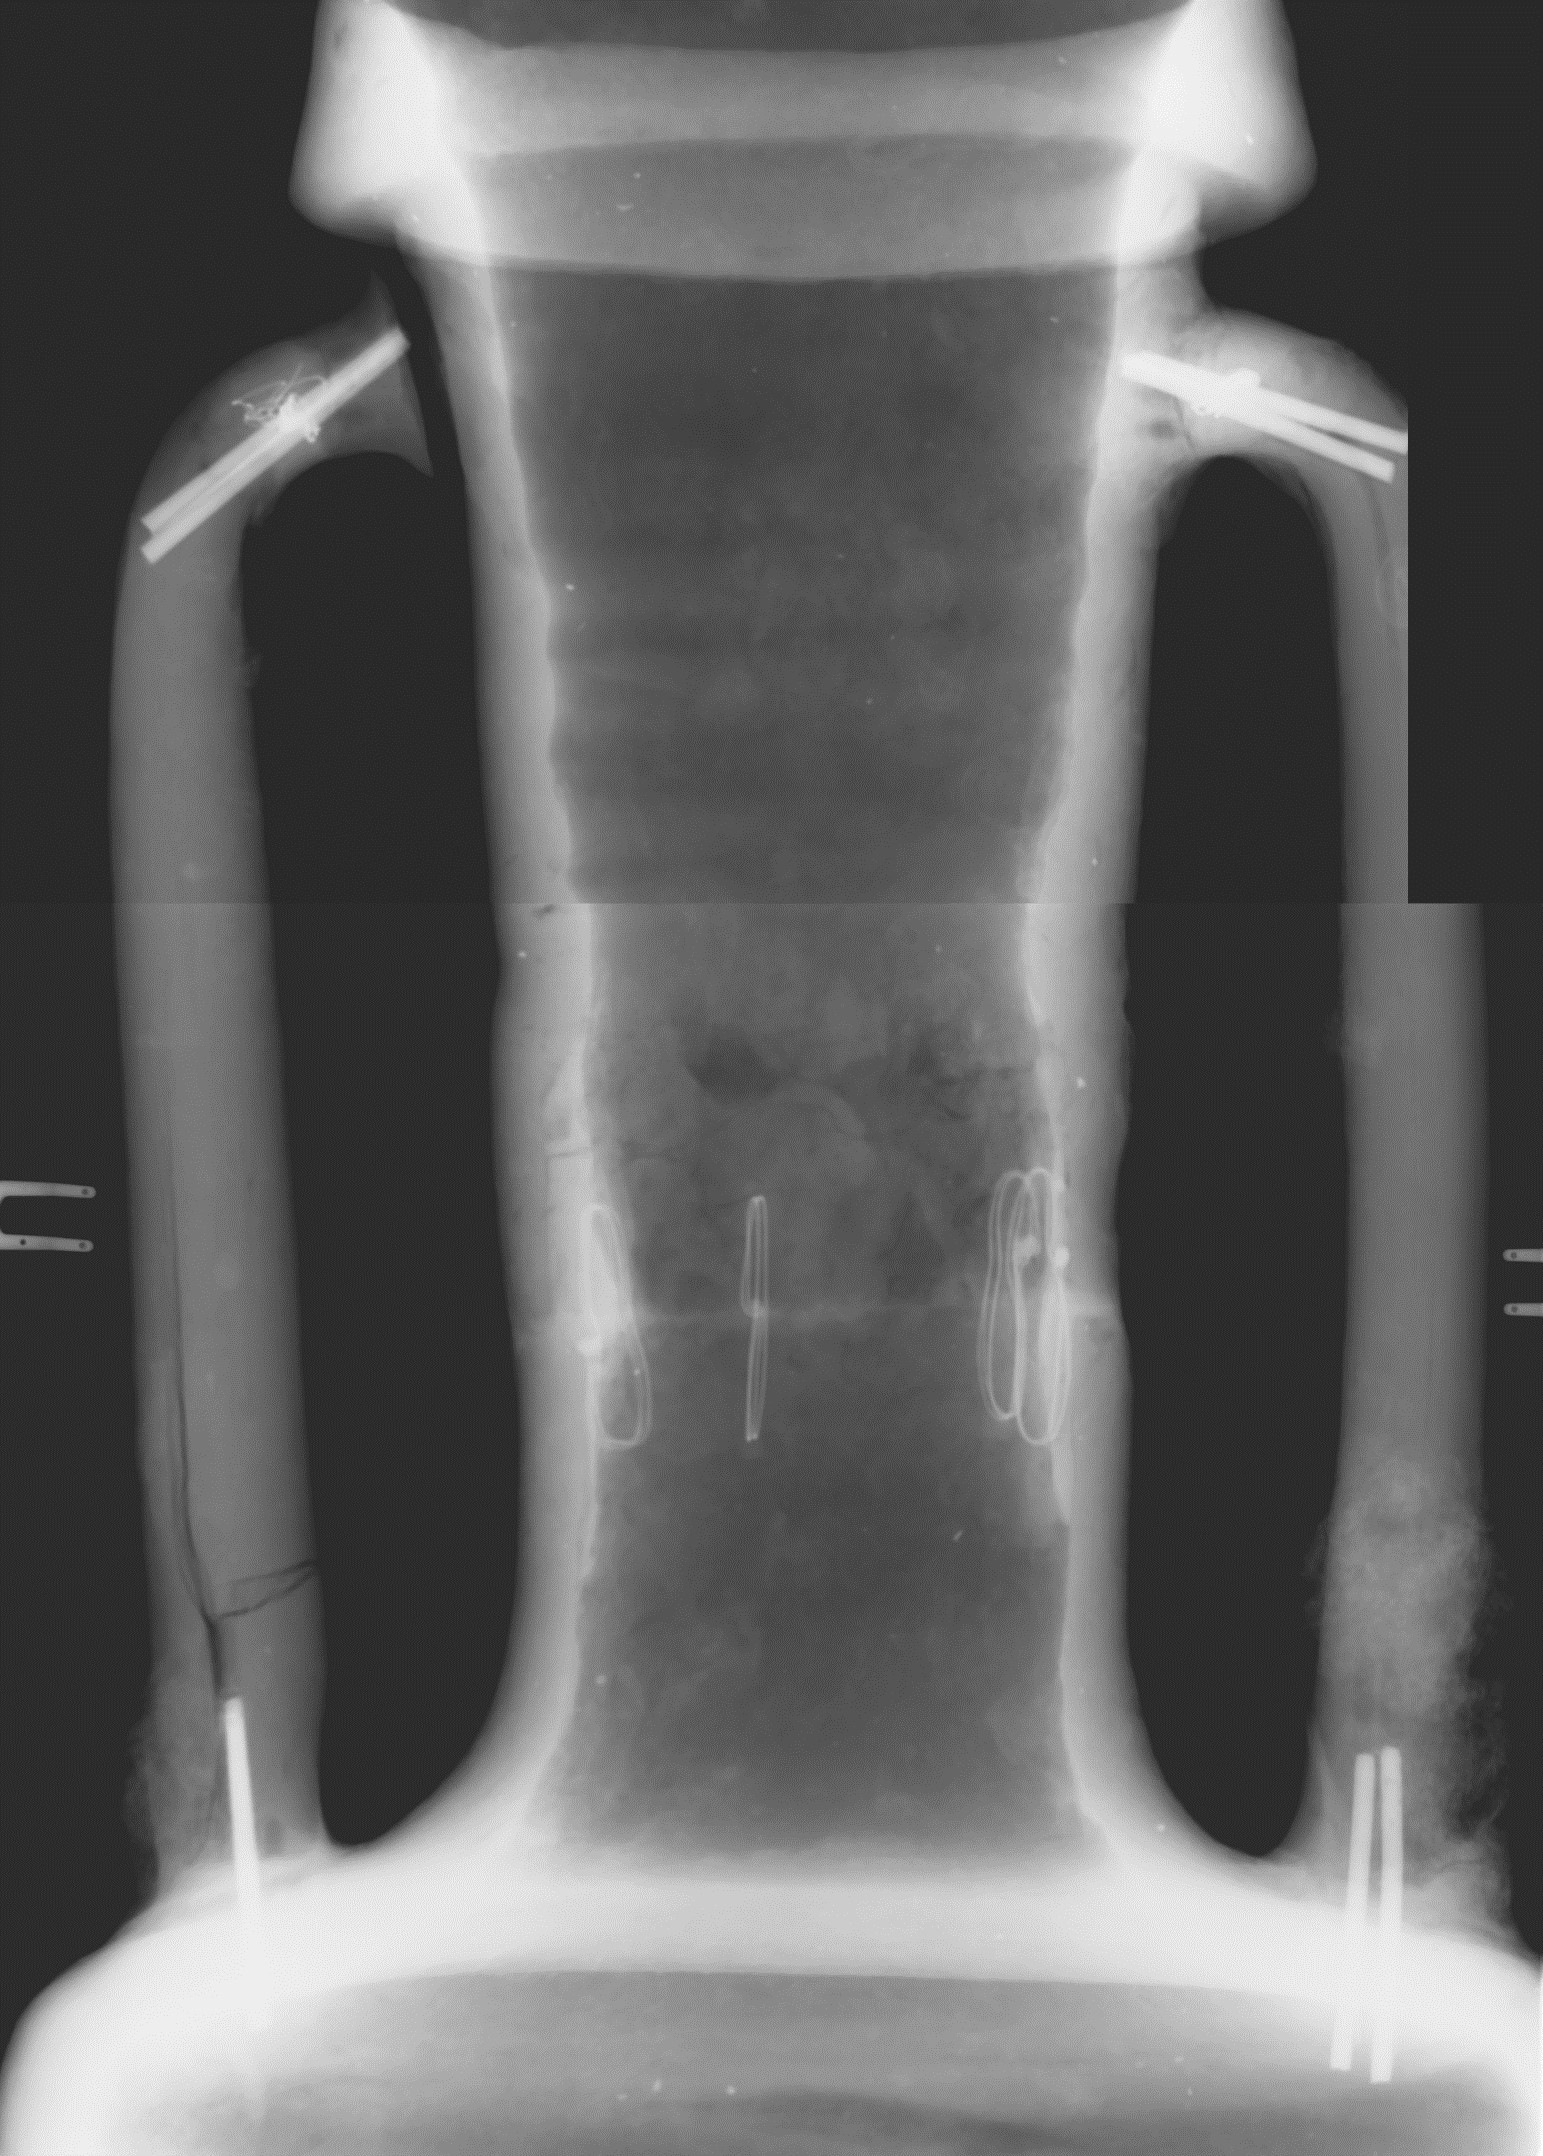
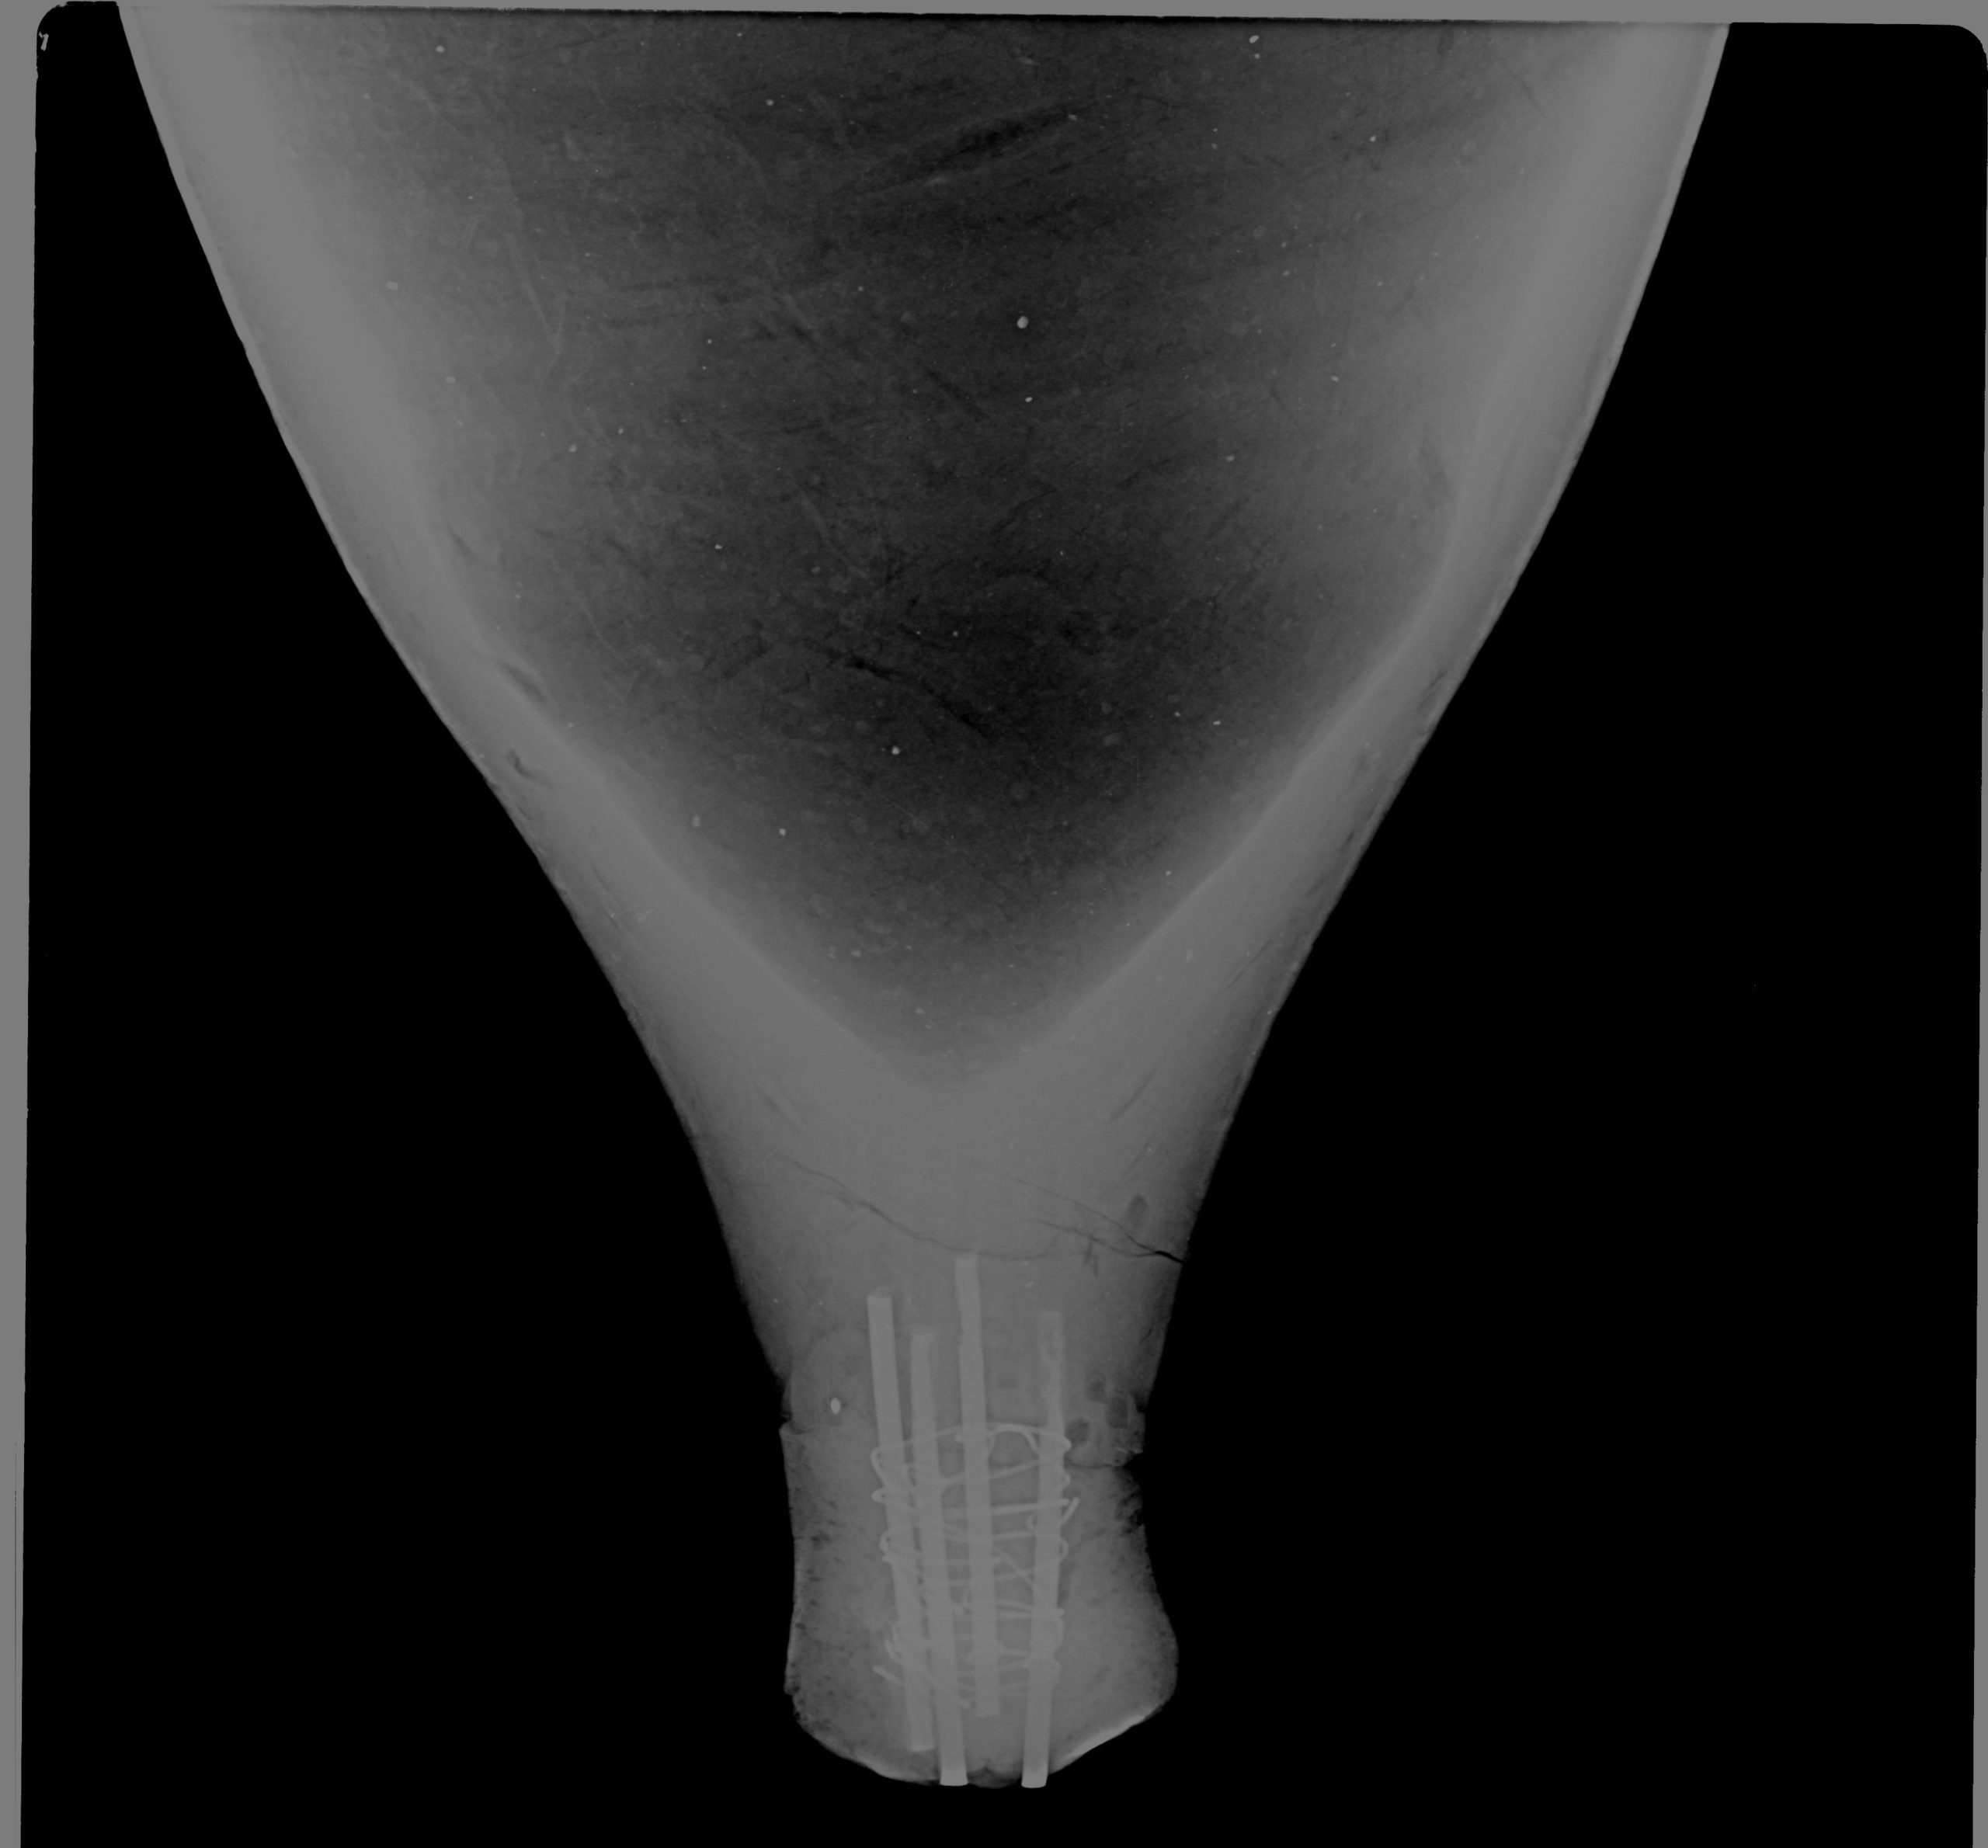
The iron had begun to corrode due to changes in the humidity. As iron corrodes, it expands and pushes the ceramic out of the way, causing it to crack. Unfortunately, the handle became unstable from the large cracks and was gently wrapped to prevent it from falling off.
The use of iron dowels is an old restoration technique used to put together large pieces of ceramic or stone. (Larney, J. 1971) Another more common technique in ceramic restoration is the use of metal staples. Neither are current conservation techniques as they are considered too invasive and clearly create long term preservation issues.
Until space opened in the Lab for treatment, the amphora was placed in a microclimate of lower humidity and monitored in our conservation workroom.
In 2021, I joined the Museum’s Conservation team and accepted the amphora as one of my projects. The vessel was moved upstairs into the Clean Lab for treatment work.
Treatment begins!
First things first: I needed to remove the amphora from its stand. Treatment can’t move forward if I can’t get to the entirety of the object. Due to how cumbersome the amphora is, I worked with two other conservators to gently lift the amphora out and place it on its side on a table. We then put foam around it to keep it from moving accidentally. Additionally, I removed the broken handle to prevent it from falling off by itself.
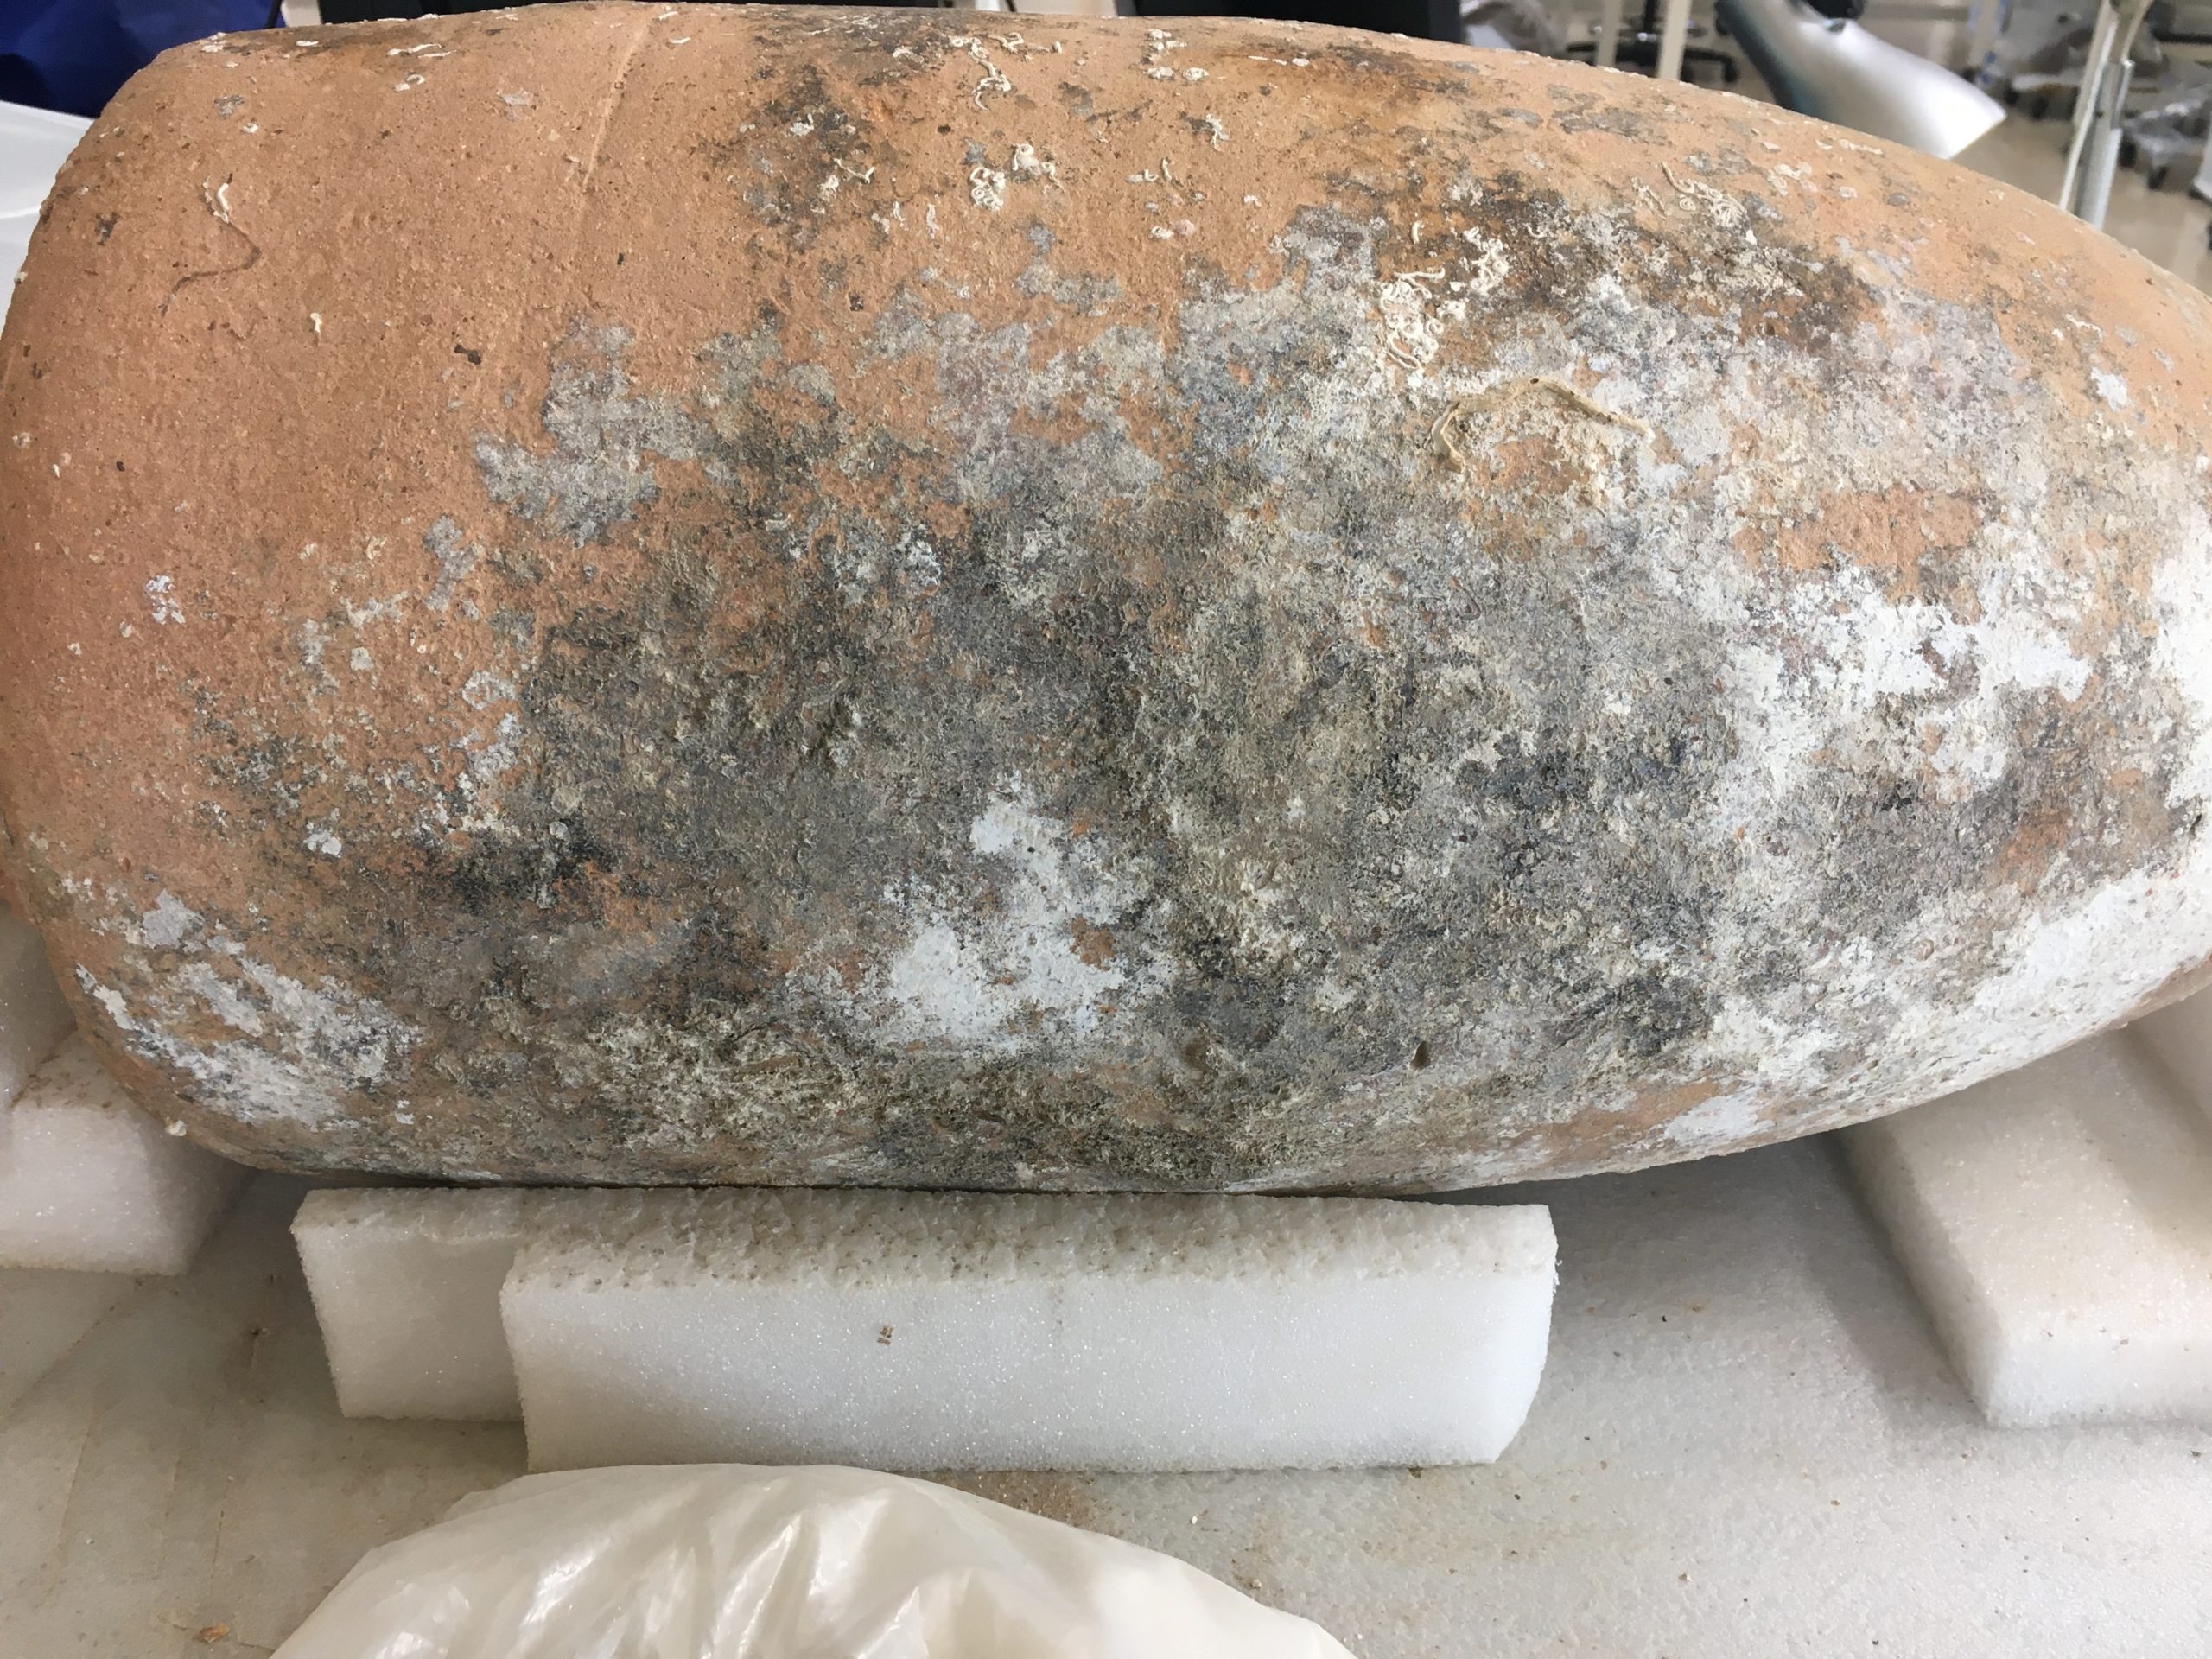
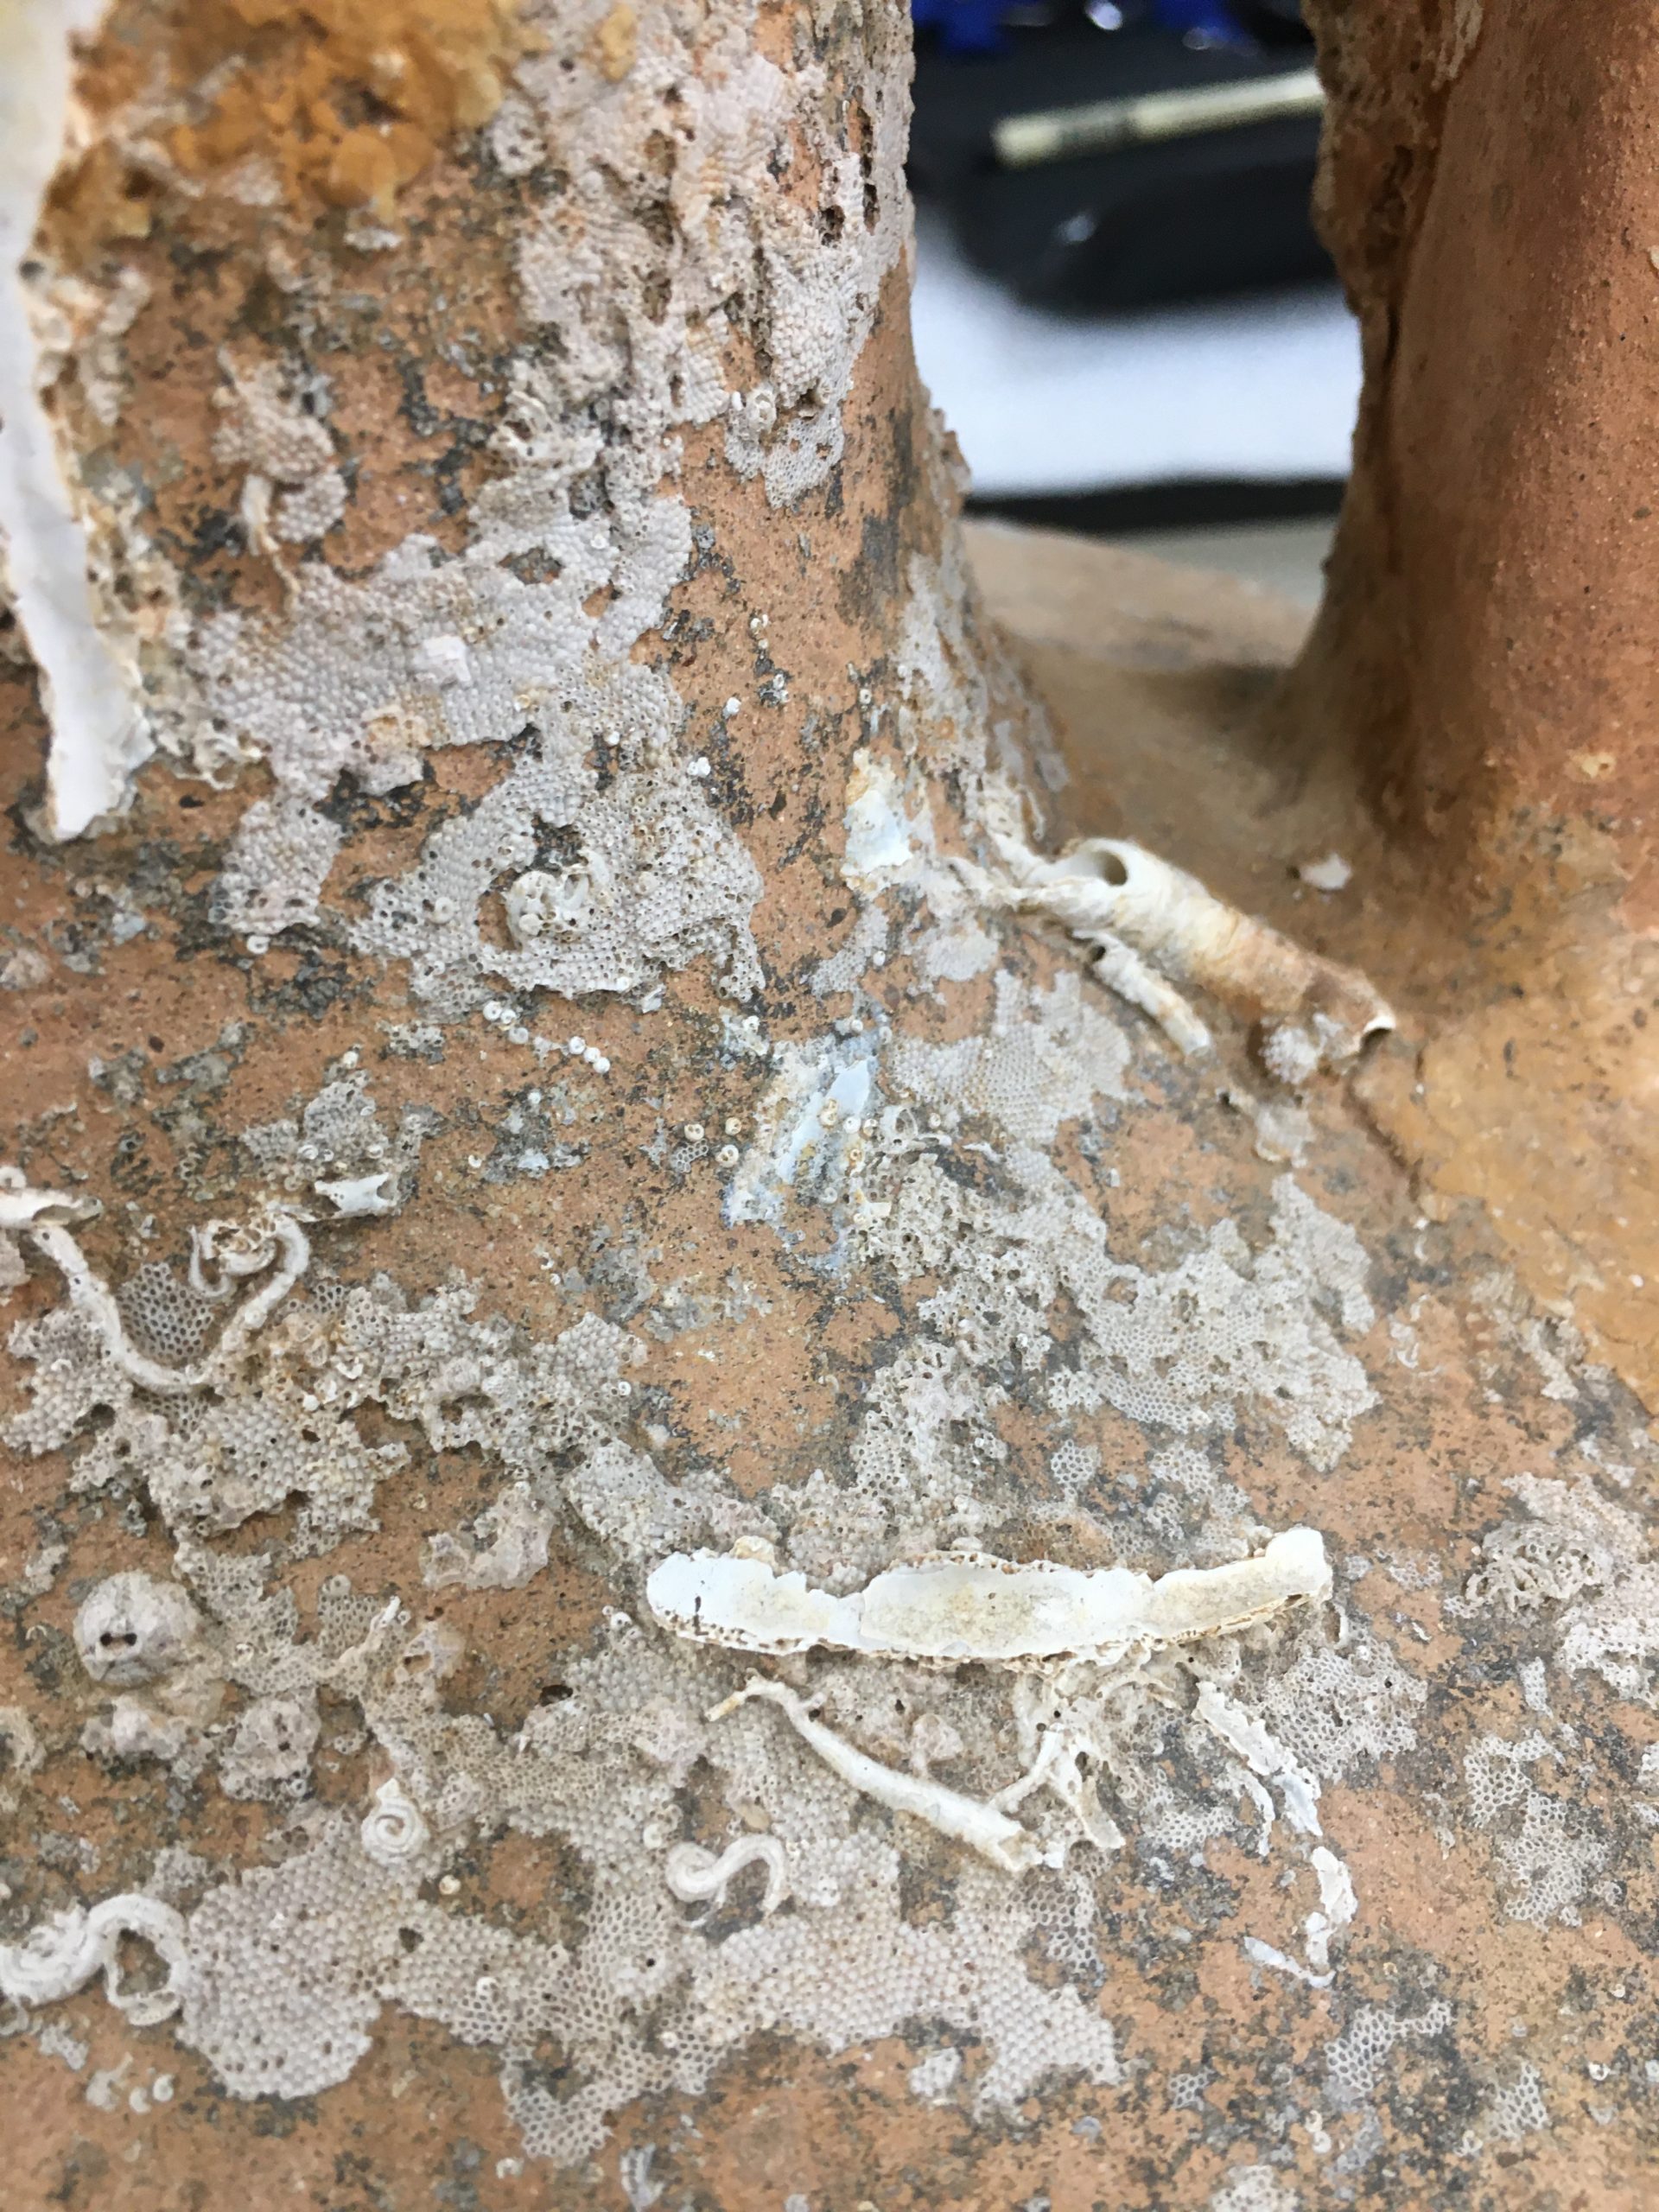
The surface was covered in a bumpy, rough build-up that seemed to contain shell, sand, and other bits. This growth was hard to the touch and difficult to remove. In addition, there were old restoration layers such as paint and plaster atop the surface. Generally, these covered the iron dowels and wire and the connection points of the handles along with the toe.
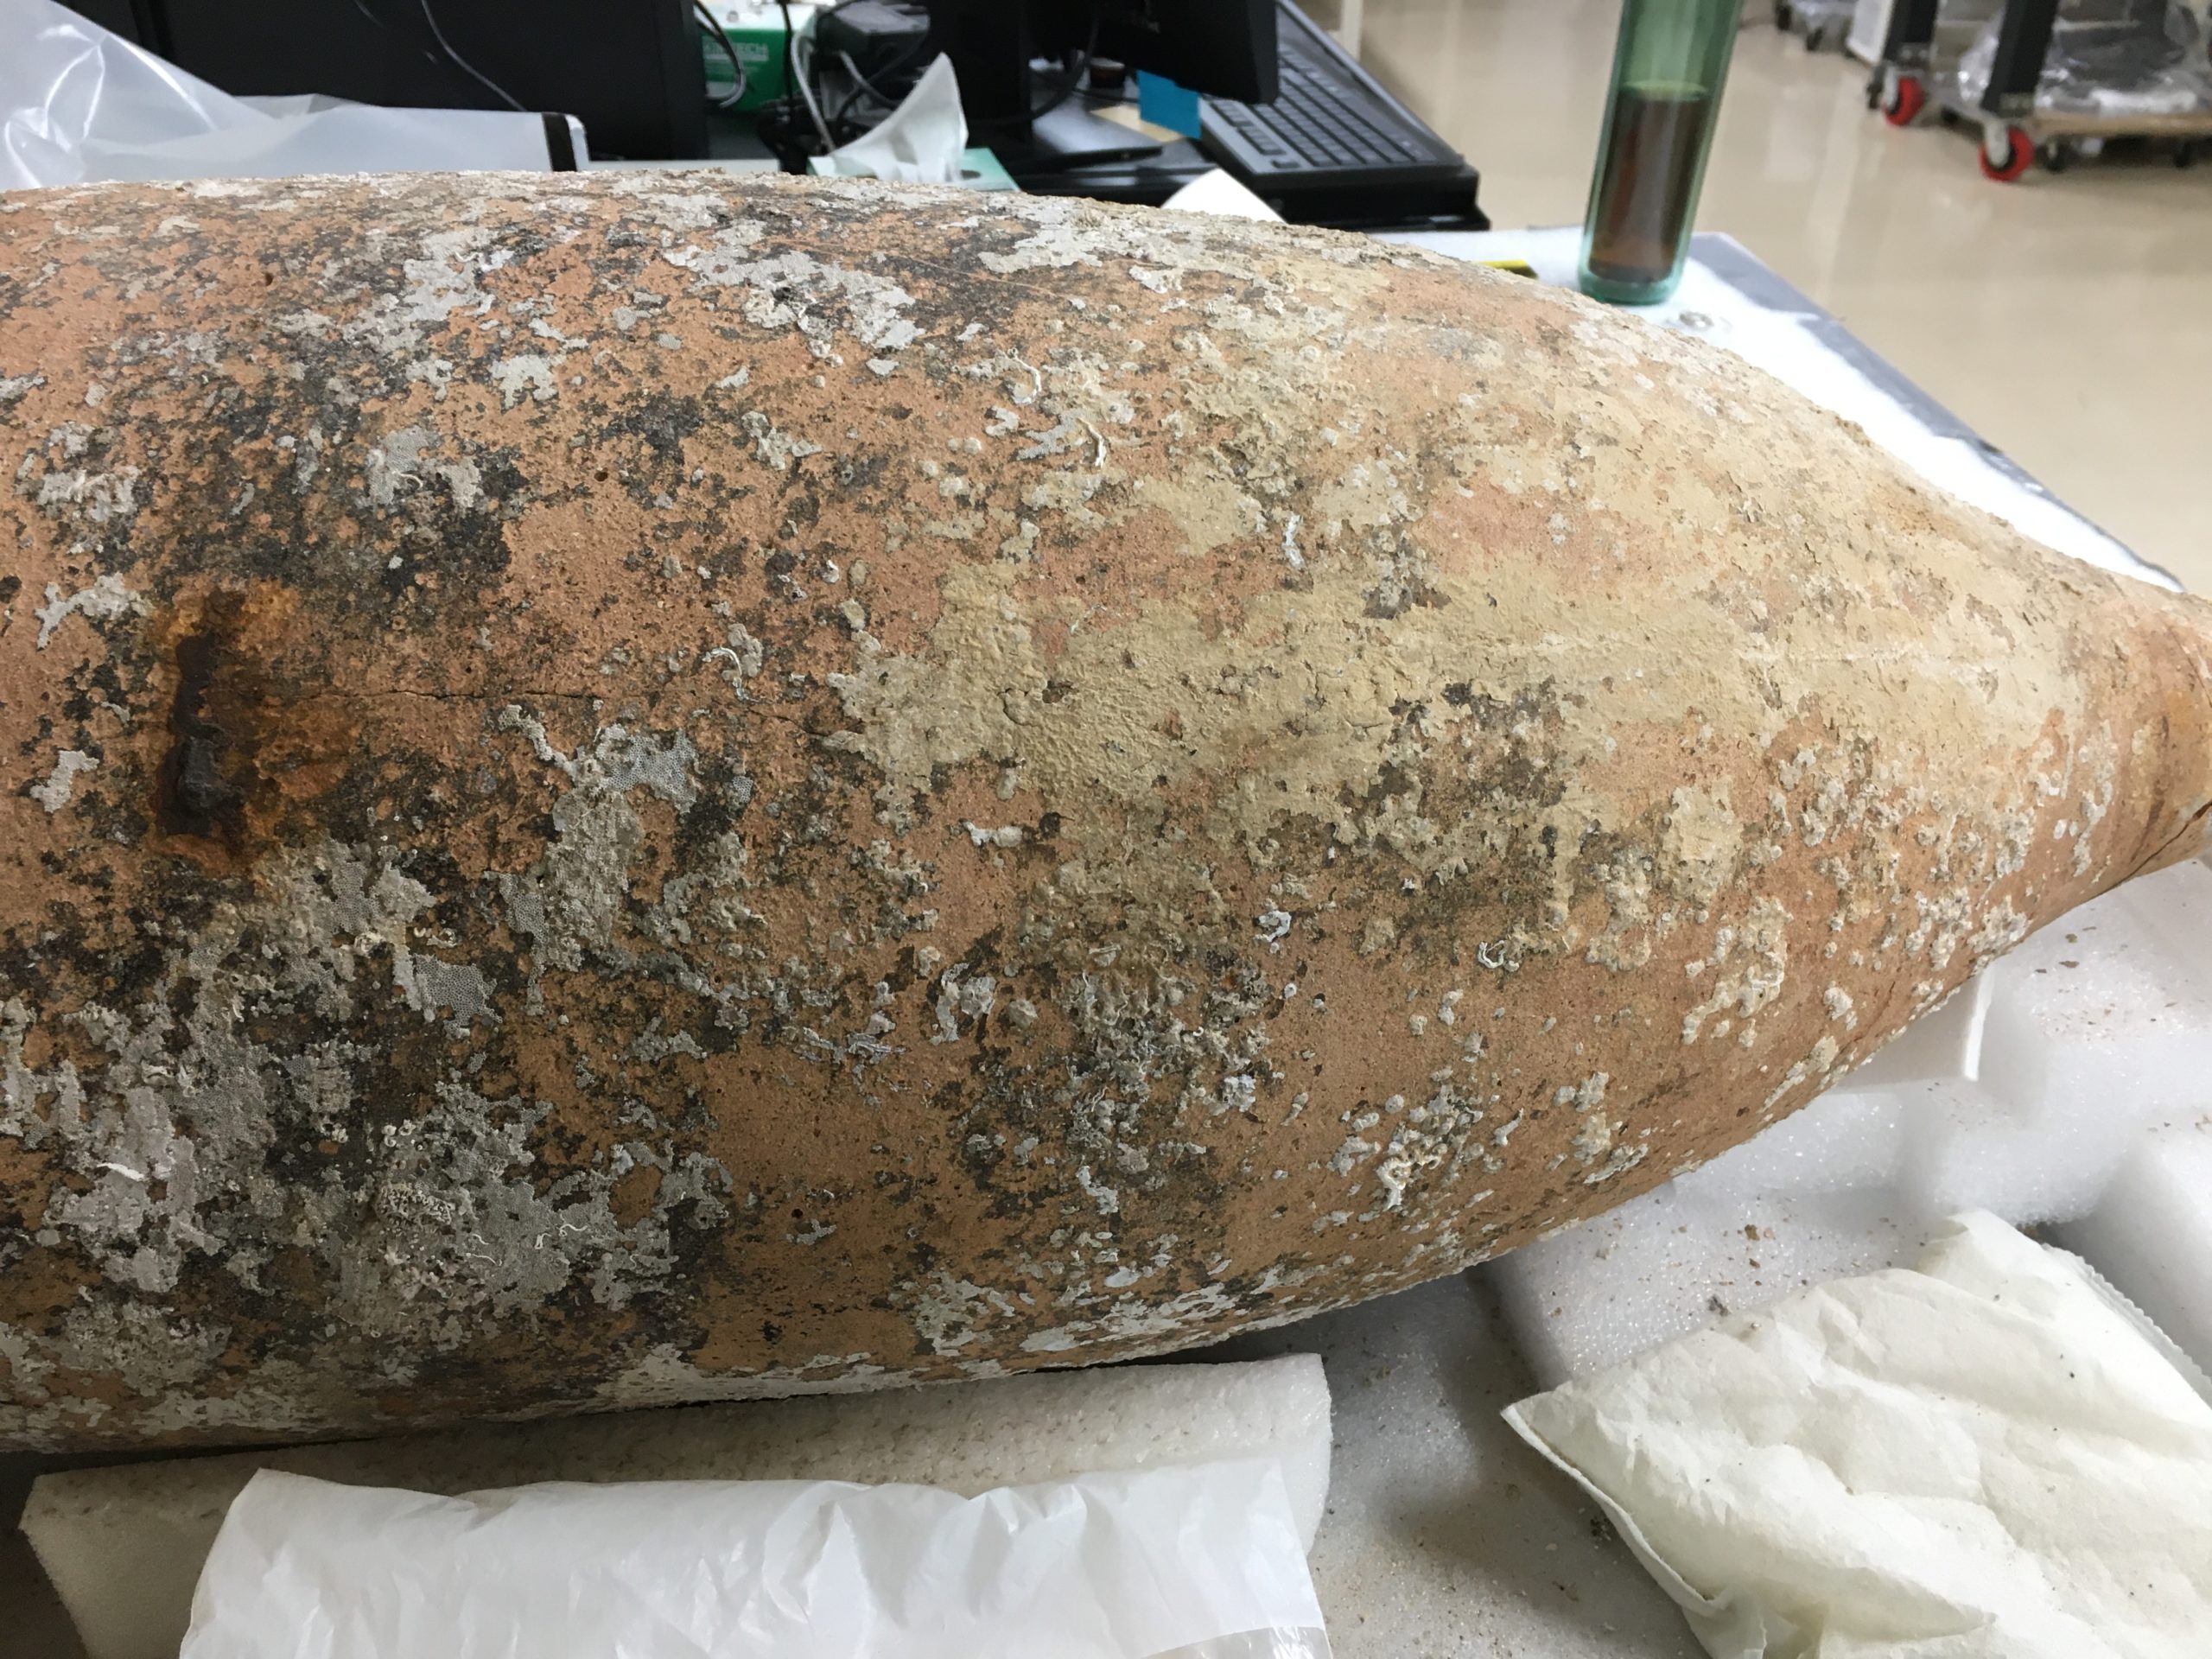
To remove the surface marine growth, I used a variety of scalpels and other small hand tools. It came off in layers and chunks to reveal the ceramic underneath. I focused first on the body as it held the most and bulkiest of the growth. Beneath it, I found the clay body in very good shape, with one exception: on one side, there was a rather long crack down one side of the body. Thankfully, X-rays showed that it is only on the surface and doesn’t go any further. There are also some marks that look like rust. They are likely from a previous mounting system that corroded while in contact with the amphora. The marks come off with a scalpel, but I’ve left them for now.
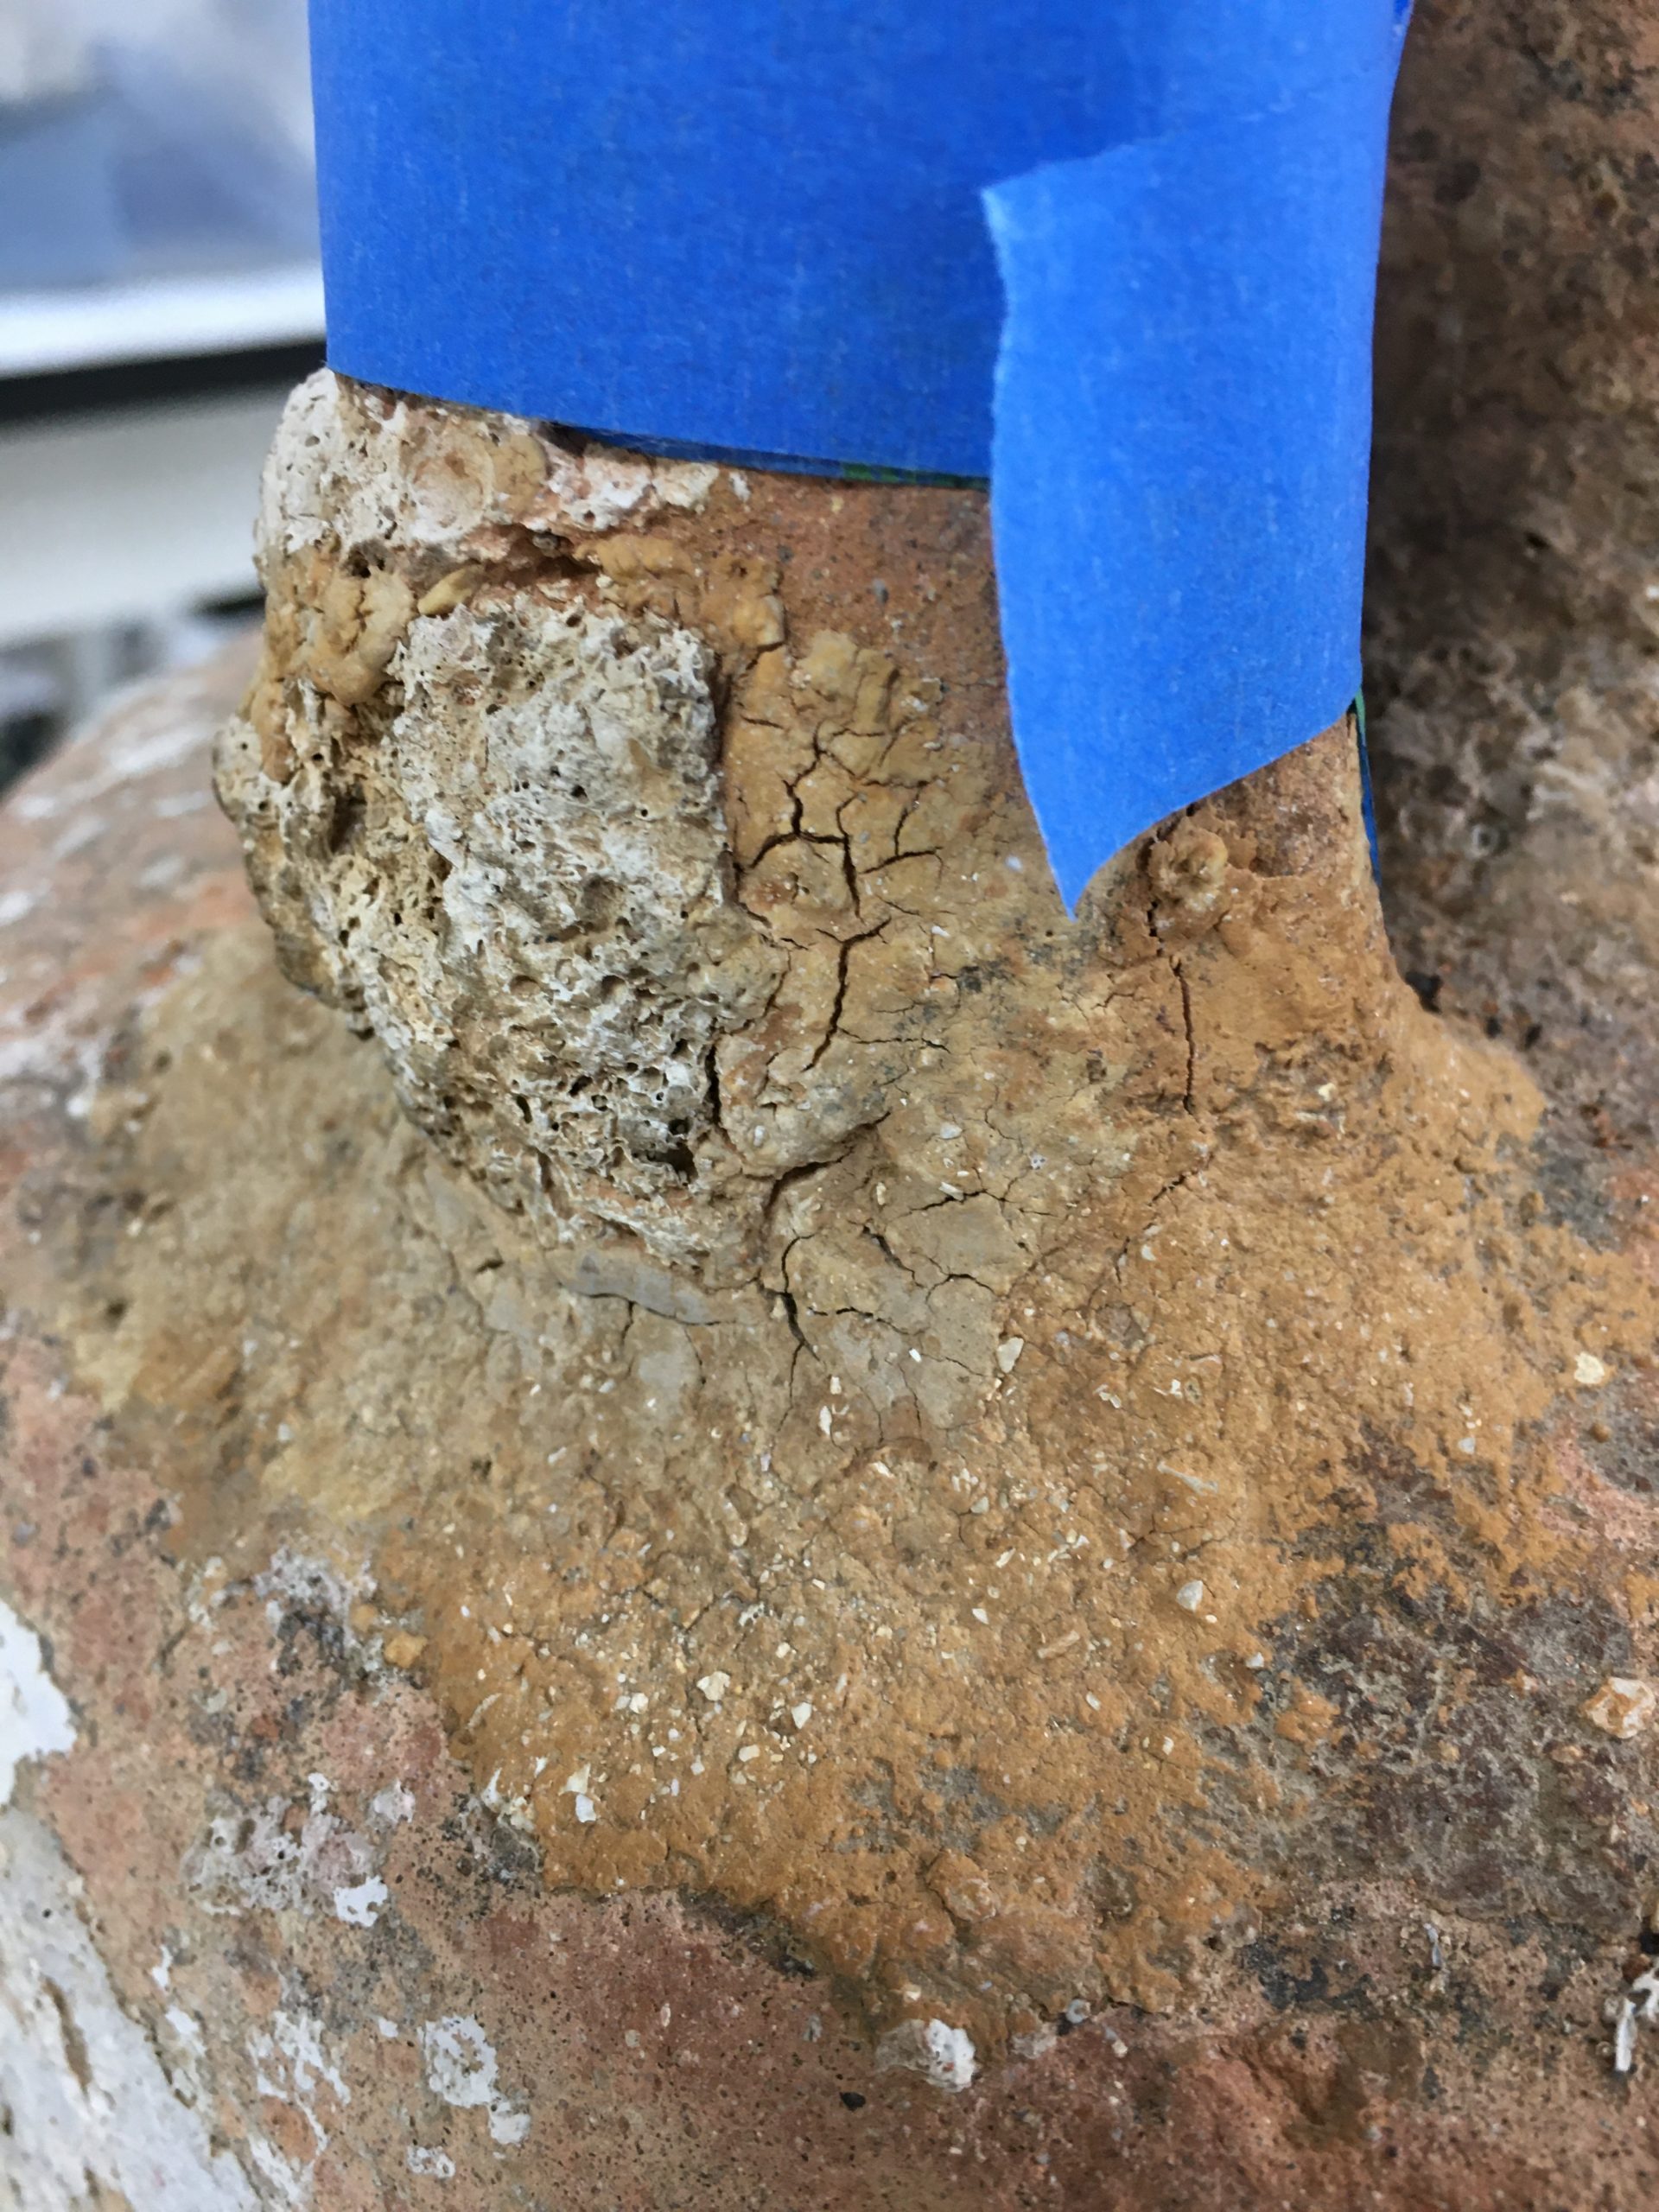
Once I was happy with the body, I moved on to the neck and rim. There was quite a lot of previous repair material around the entire neck. Slowly removing it showed that distinct line found in the X-ray. I talk more about this in the section below. In removing the old repair material on the neck and the rim, I found that the handles were not whole. At the point where they connect to the neck and body were large fills made of a different clay from the rest of the amphora.
After removing a good amount of old repair materials, I decided to pause. The old repair is a plaster-type material that can be hard to remove, especially so close to the surface. Due to its location atop the wire holding the neck together, I will need to strategize how best to continue without damaging the ceramic underneath.
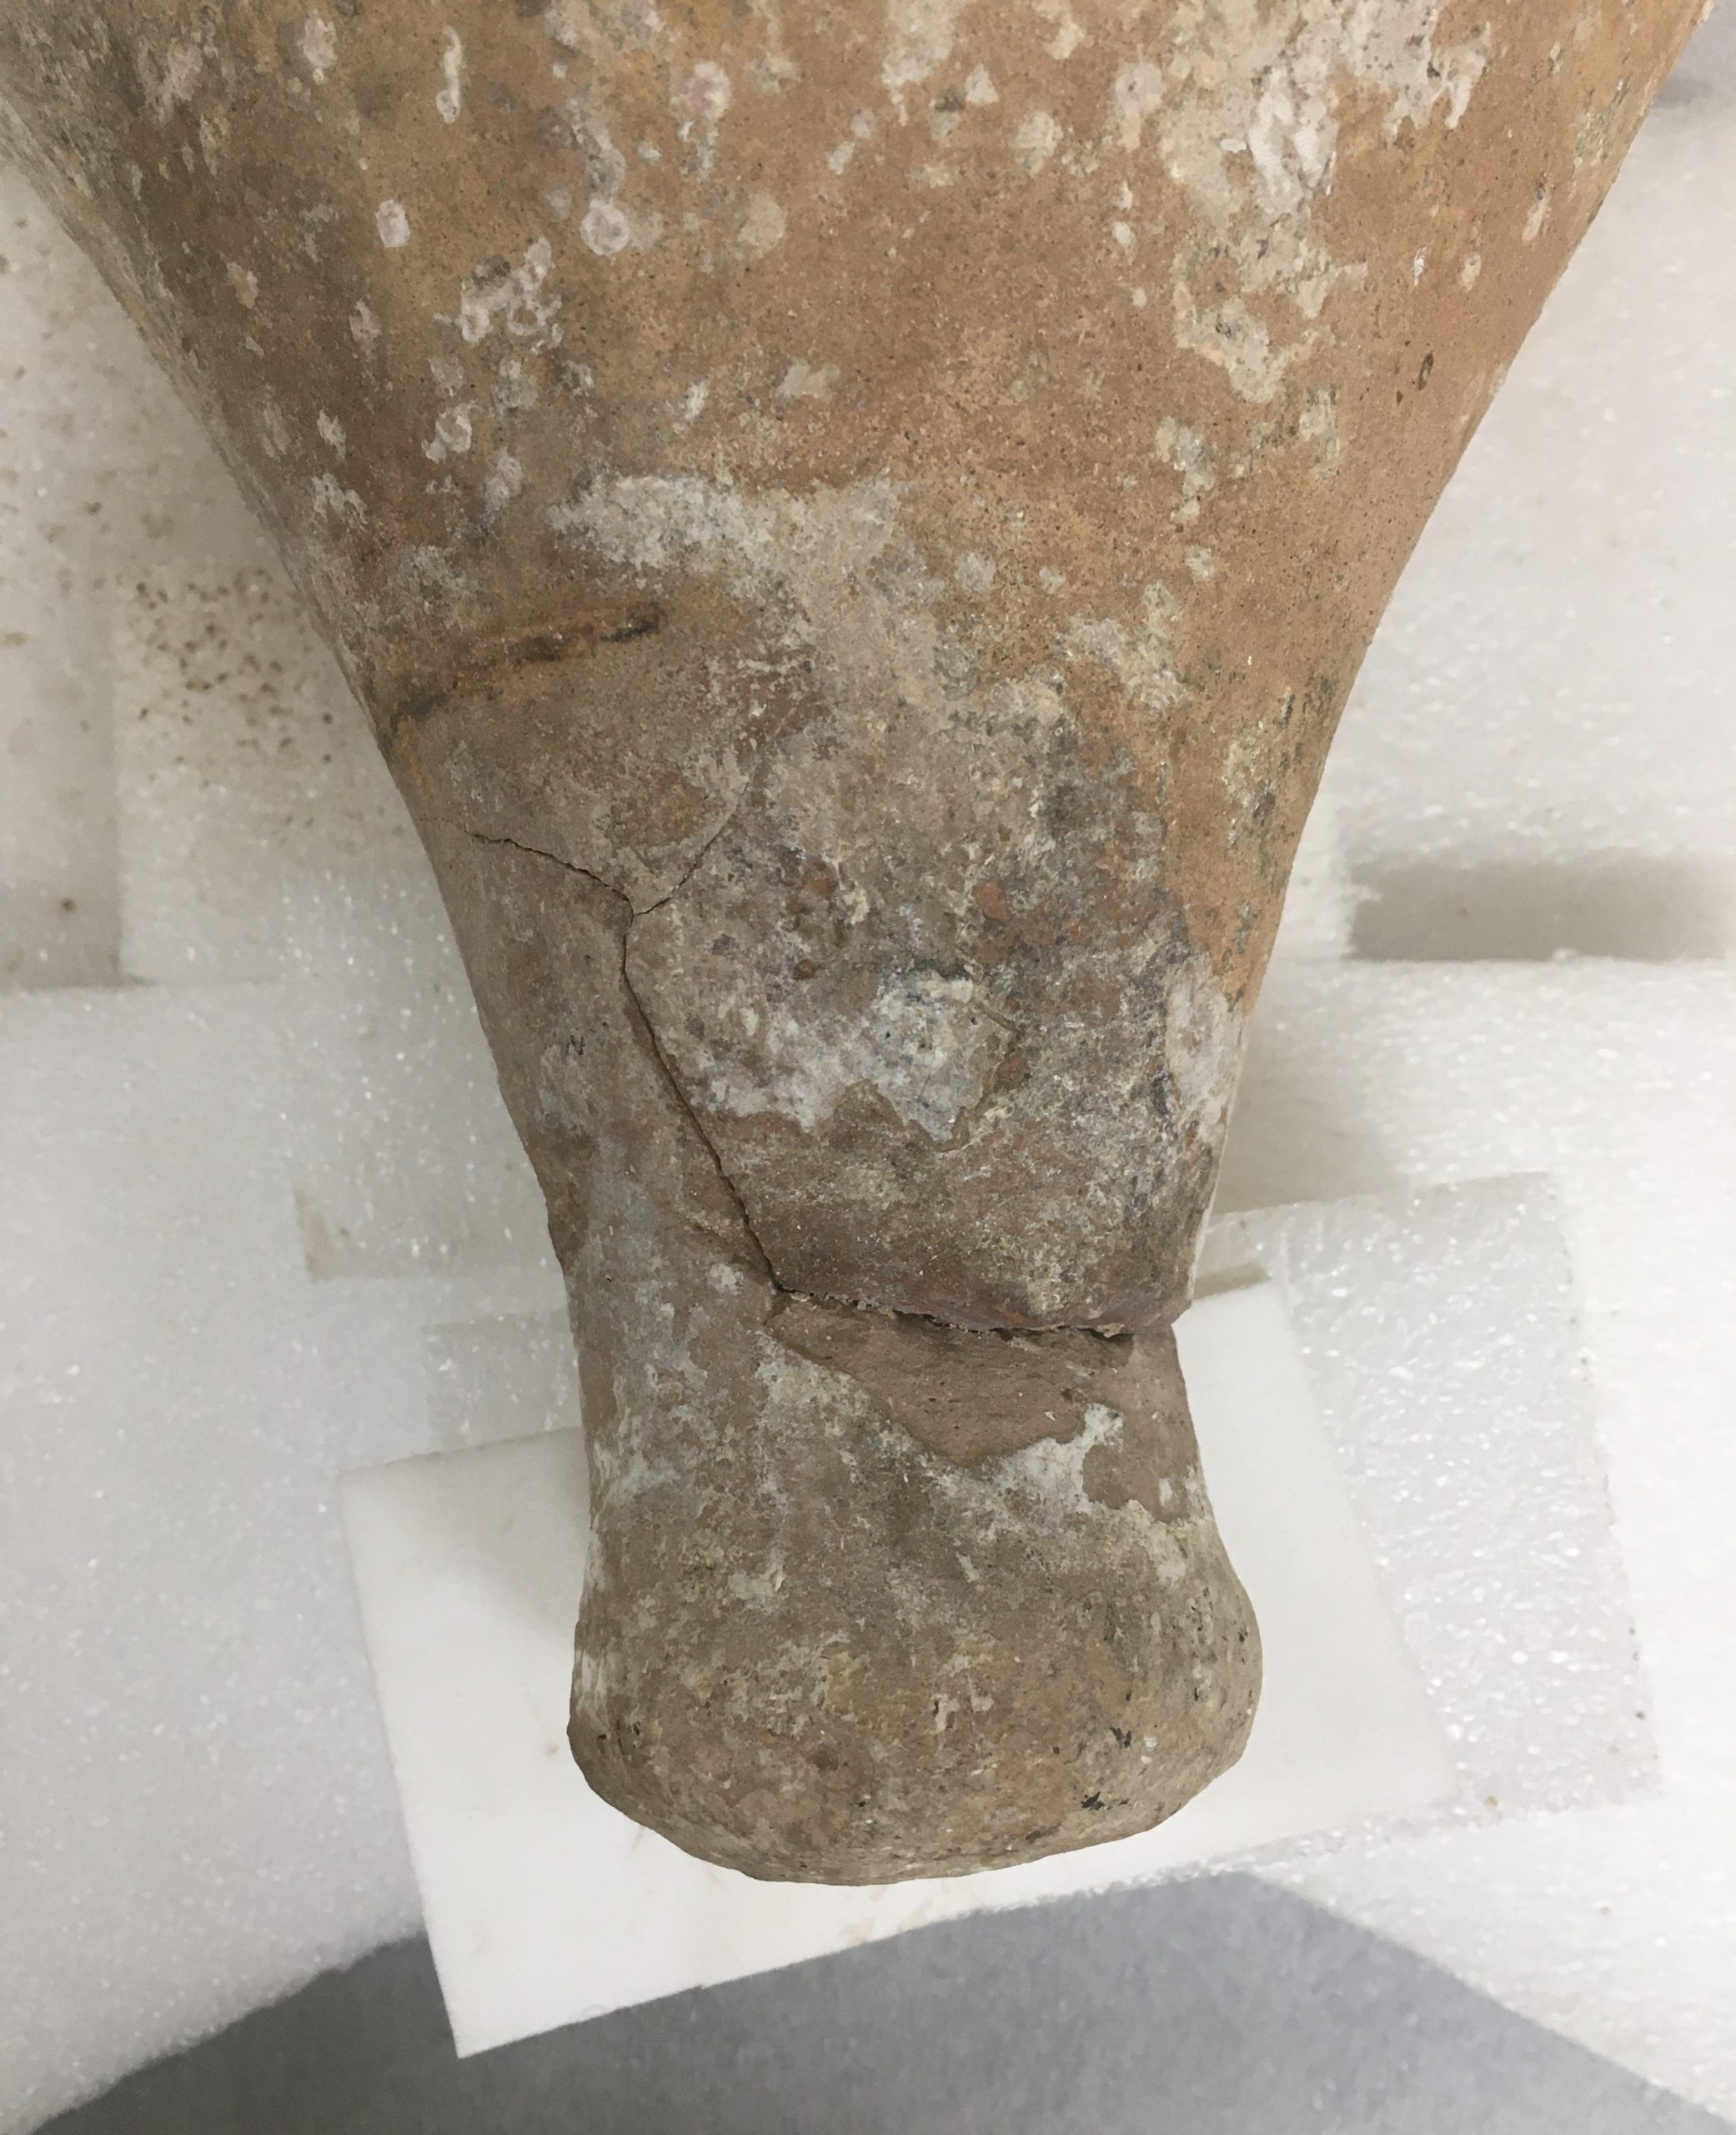
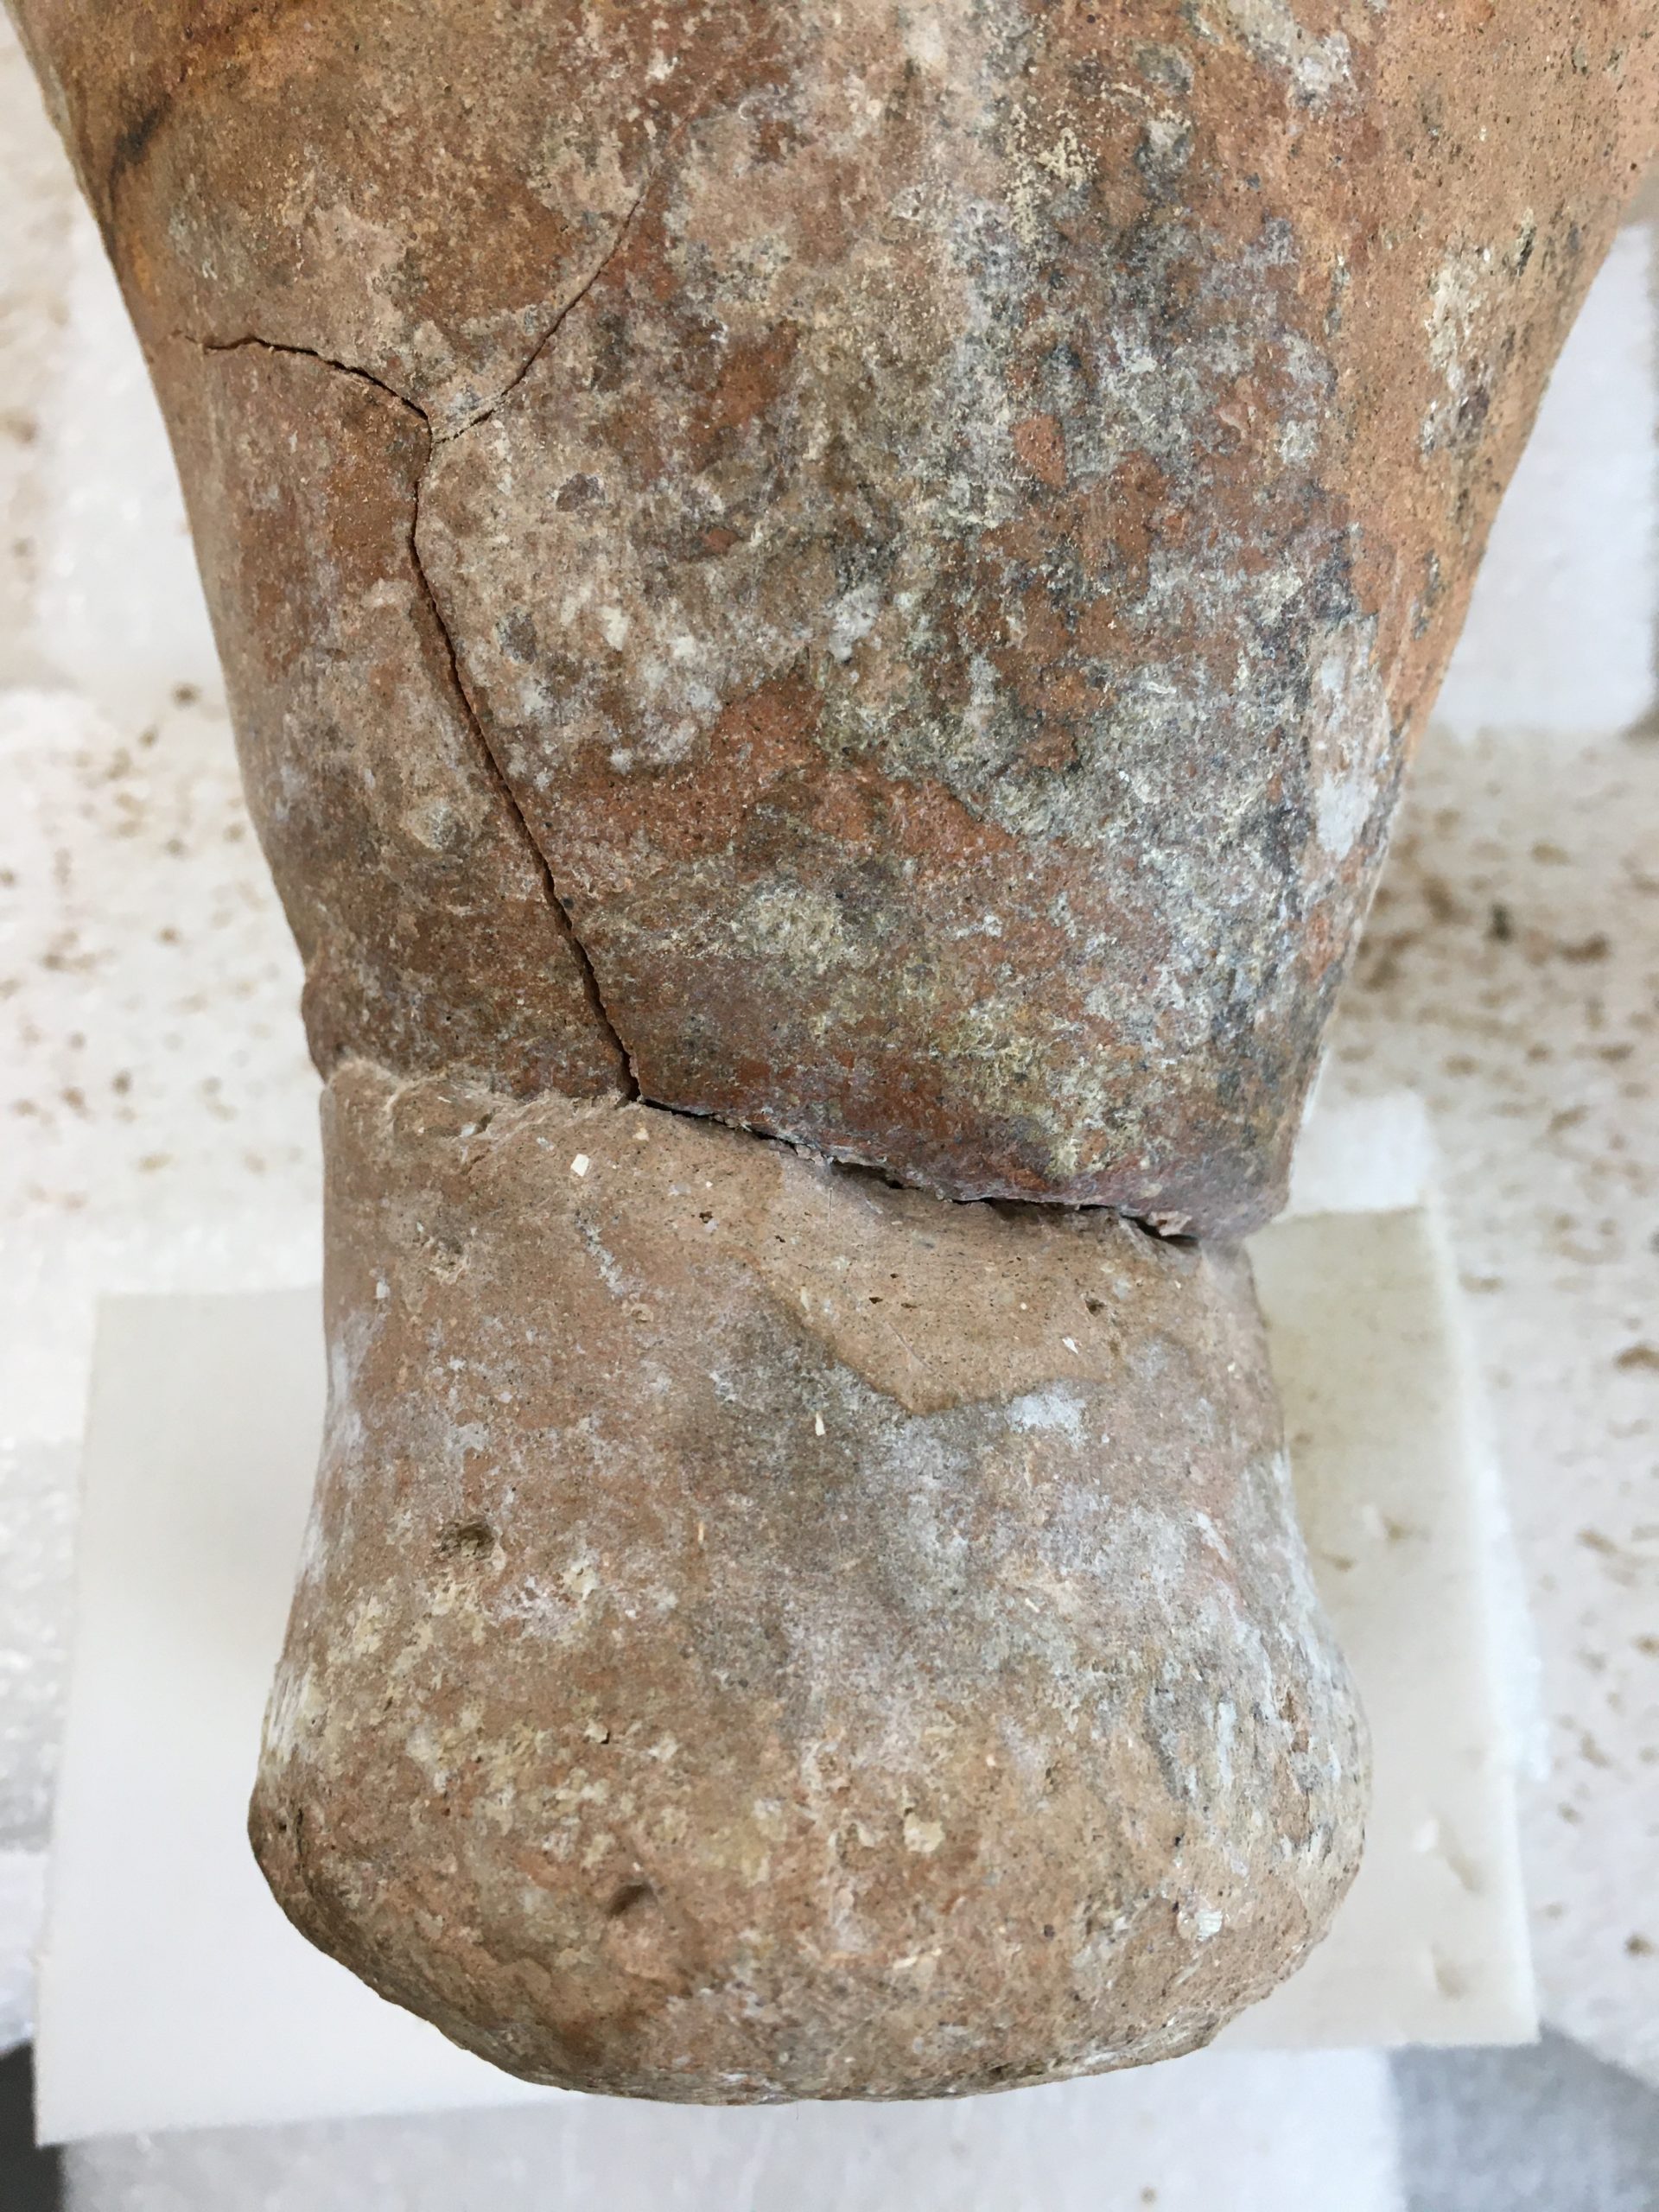
The last area to be cleaned, at least partially, is the toe. Based on the X-rays the toe could be a replica attached to the original body as the iron dowels were inserted throughout. Visual observations supported this suspicion: because the clay body is a completely different color than the toe.
Using scalpels, I removed repair material until I found the lip of the replica. The breakpoint between replica and original is not even, and there are multiple cracks stemming from the edge due to the iron dowels. In order to prevent further degradation of this section, the replica and dowels will be fully removed and replaced. I’ll follow up with another blog for this part of the conservation process.
Discoveries about the amphora’s past
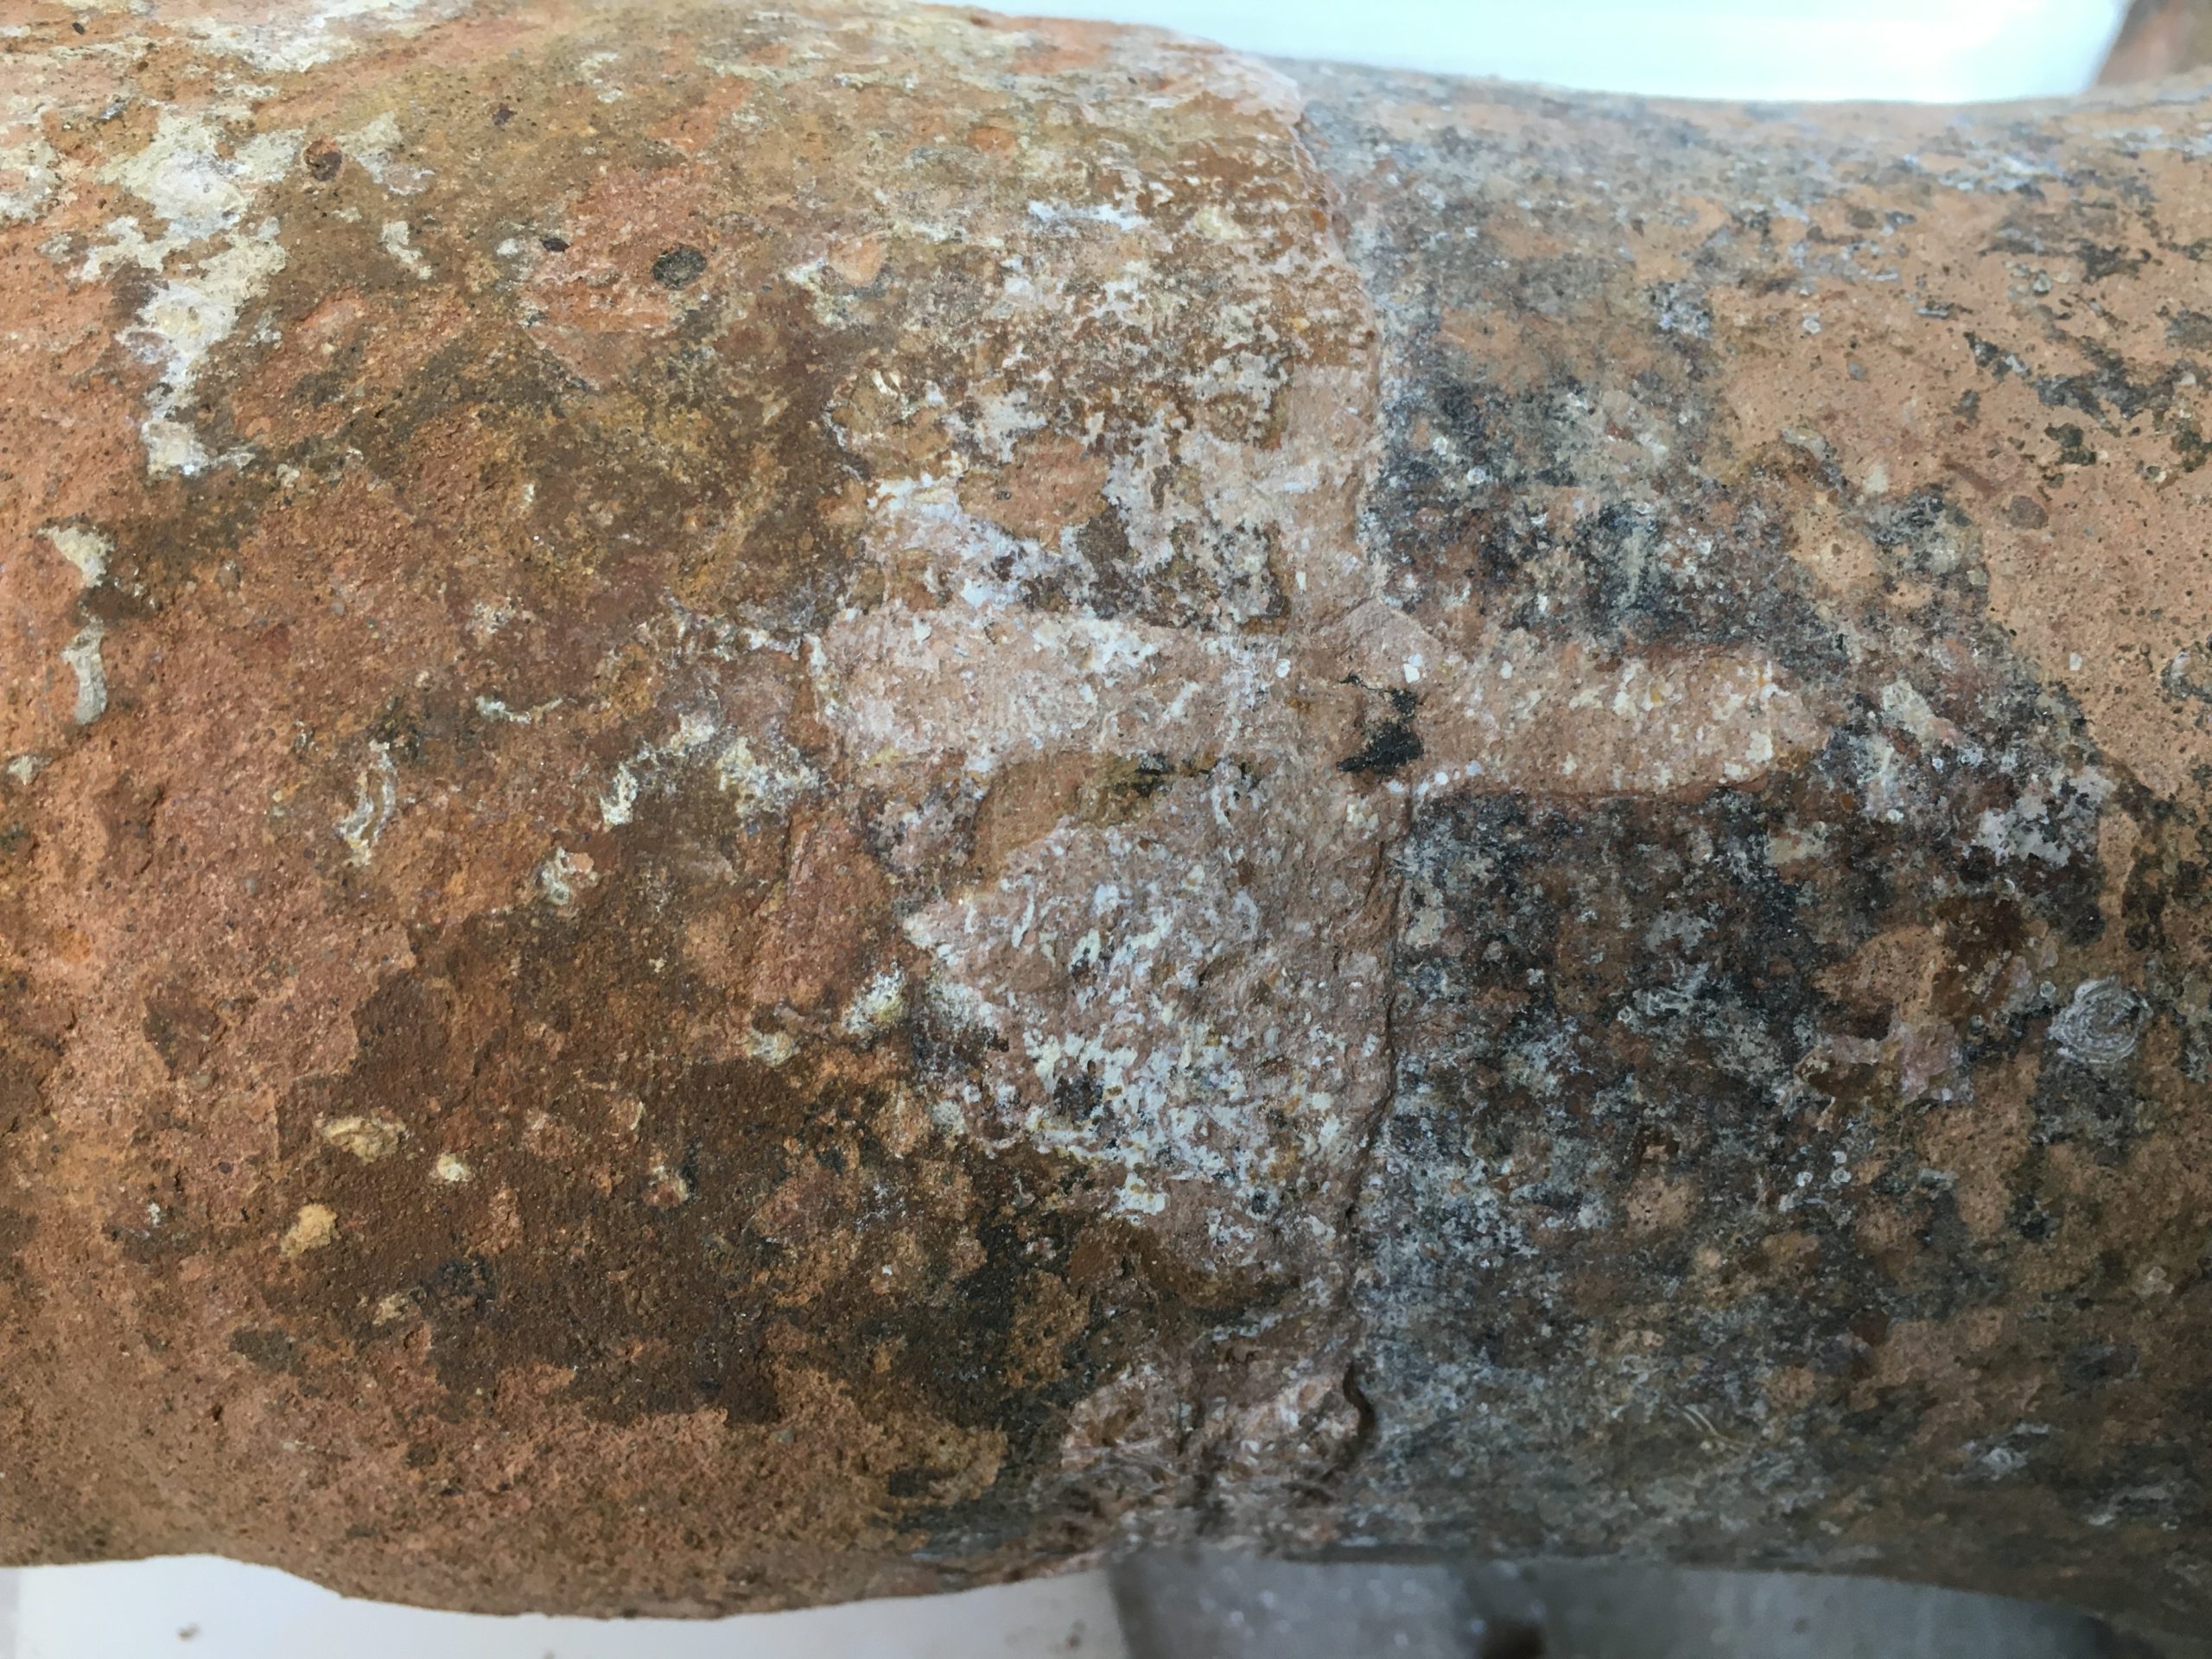
As I began documentation for the amphora and looked over the previous X-rays, I noticed some discrepancies between the body and the neck/rim of the amphora. In the X-radiography, a distinct line can be seen in the neck where the wire is. As I continued to take measurements and look over the object, I noticed a difference in clay color between the body and the neck.
Admittedly, this made me pause. While the addition of the iron dowels already showed previous restoration to the amphora, the changes in clay color pointed to the possibility that the amphora was made of more than one type. But how is this possible?
Combining similar ceramics wasn’t exactly uncommon in the late 1700s and early to mid 1800s. It has been seen with decorative painted amphora where the rim was broken, and another was put in its place (Thornton, J. 1998). In other instances, several pieces have been pieced together to create one “whole” ceramic.
I continued studying the amphora and started some investigative surface cleaning. There were clear patches of old repair, especially around the neck where the wires are as well as around the toe. I quickly confirmed that the toe itself is a replica! The clay body does match the two others and appears more cohesive than the others.
Further investigative cleaning revealed a distinct lip between the neck and body alongside exposing the clay bodies and the repair surrounding the wires. This further cemented the theory of this amphora being made of at least two, hence being called a Frankenphora!
Future steps
At the moment, I have paused treatment on this object. Before removing the toe, I want to take a mold of the replica. This will help me recreate a new one, as removal of the replica will likely destroy it. I will be using a dremel tool to remove the toe and expose the iron dowels. Once I can better see the iron dowels without the plaster material, I can then decide on how best to remove them without causing damage to the amphora.
Following removal of the toe and cleaning of the handles, I’ll begin work on reconstructing the broken handle and creating a new toe.
Keep an eye on the Clean Lab and the blog for further updates!
Sources:
Koob, Stephen. “Obsolete fill materials found on ceramics.” Journal of the American Institute for Conservation 37, no. 1, 1998: 49-67.
Larney, J. “Ceramic restoration in the Victoria and Albert Museum.” Studies in conservation 16, no. 2, 1971: 69-82.
Loughton, Matthew E. “The distribution of Republican amphorae in France.” Oxford Journal of Archaeology 22, no. 2, 2003: 177-207.
Mibach, E. T. G. “The restoration of coarse archaeological ceramics.” Studies in Conservation 20, no. sup1, 1975: 55-61.
Paterson, Jeremy. “‘Salvation from the sea’: Amphorae and trade in the Roman west.” The Journal of Roman Studies 72, 1982: 146-157.
Peacock, David. “Roman amphorae: typology, fabric and origins.” Publications de l’École Française de Rome 32, no. 1, 1977: 261-278.
Portell, Jean D. “Prior repairs: when should they be preserved?.” Journal of the American Institute for Conservation 42, no. 2 (2003): 363-380.
Thornton, Jonathan. “A Brief History and Review of the Early Practice and Materials of Gap-Filling Inthe West.” Journal of the American Institute for conservation 37, no. 1, 1998: 3-22.
https://archaeologydataservice.ac.uk/archives/view/amphora_ahrb_2005/info_intro.cfm University of Southampton. “Roman Amphorae: a digital resource”. York: Archaeology Data Service, 2014 https://doi.org/10.5284/1028192