Last month, we were able to complete one of the last major steps in the conservation of USS Monitor’s two XI-Inch Dahlgren shell guns: boring concretion out of the barrels. Material Culture Specialist Hannah recently showed off what we found in this process (coal is, indeed, cool), but why clean the gun bores to begin with? And how do you actually go about doing that, anyway?
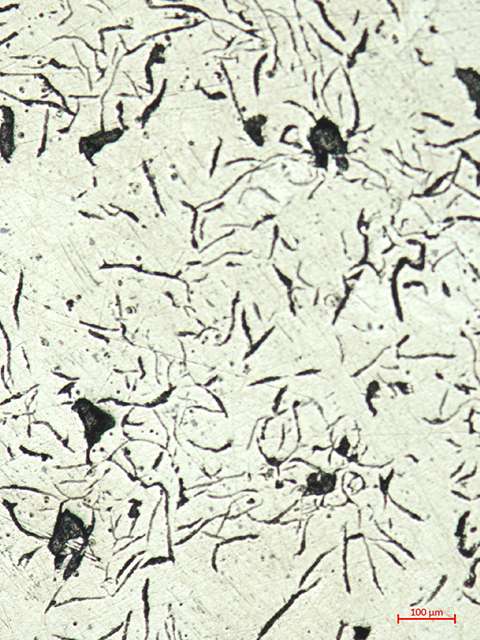
The ‘why’ has a few pieces to it. There are benefits to our archaeological knowledge of the wreck, but our primary concern was keeping the guns in good condition. Monitor’s guns are made of iron, and specifically are made of grey cast iron. Grey cast iron is not 100% pure iron; it contains about 4% carbon, and that carbon exists as flakes of graphite locked in by the metal surrounding it – picture little shavings of pencil lead and you won’t be that far off.
When grey cast iron is immersed in salt water, it corrodes – rusts – and a couple things happen. First, as the iron corrodes it dissolves out of the surface, and combines with calcium and other materials in the water to form “concretion.”
And second, as the iron moves out of the gun, the graphite is left behind. So the guns as you see them now do still have a solid metal core, but the outer surface is mostly graphite down to about ¼ inch in depth.
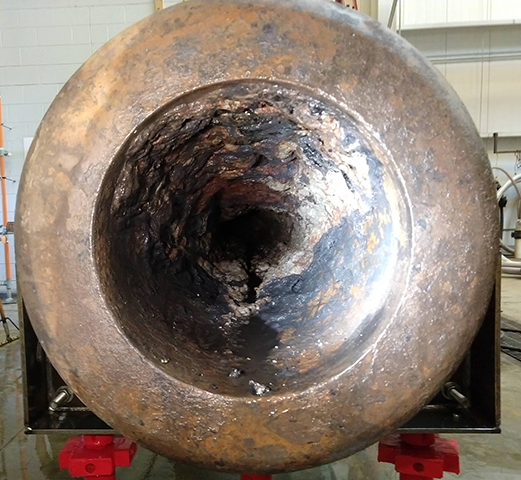
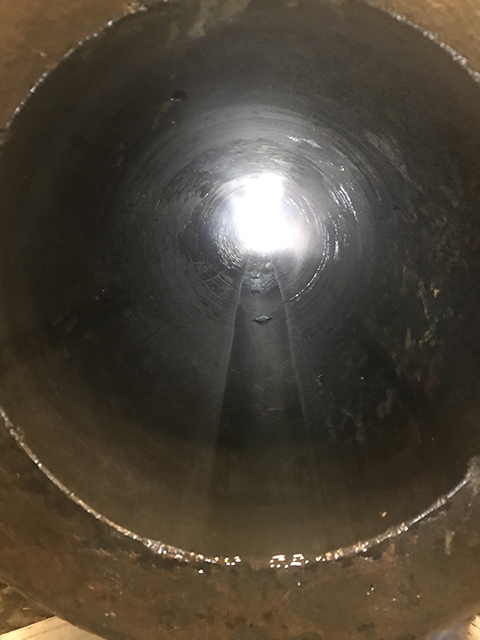
Now… how does all of this play into the conservation of the guns specifically? Our primary goal for all Monitor objects is to remove ocean salts (specifically chlorides), since these make the material unstable and will destroy the object if they’re not removed. Grey cast iron is more difficult to remove salt from than other metals. The salt exists mostly at the metal surface underneath the graphite, so there is an extra ‘layer’ that salt needs to travel through to get back out. If you have concretion on top of graphite on top of salt, that’s two extra layers. The graphite is very porous, so it is possible to soak salts back out through it. The concretion… not so much; it is a much denser, harder material, and it becomes virtually impossible to get enough salt out of iron that is still covered in concretion. So the entire surface of a cast iron object – like an XI-Inch Dahlgren – must be cleaned to remove concretion, or else it won’t be possible to get all the salt out and stabilize the material. And the entire surface, in this case, includes the 11-feet-long interior of the gun bore, not just the outside. We’re all pretty talented with a chisel around here, but 11 feet is a little bit beyond our reach!
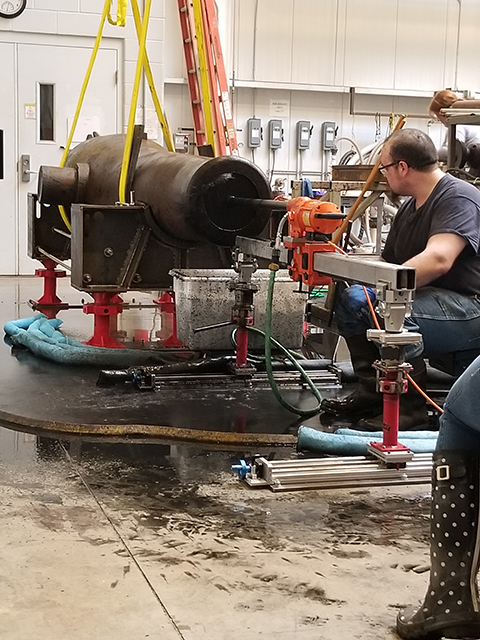
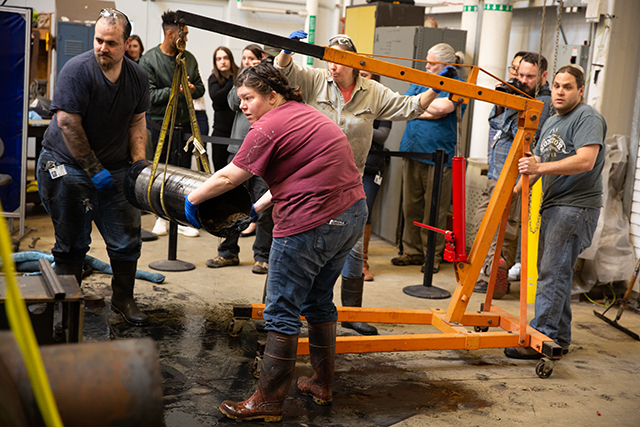
And that brings us to how do you go about boring a Dahlgren, especially one where the outer surface has turned into fragile graphite. After a lot of research and design work, we decided to use a custom horizontal coring drill system. This let us use a series of different drill bits to clear concretion out of the gun bores, all the way to the back of the gun!
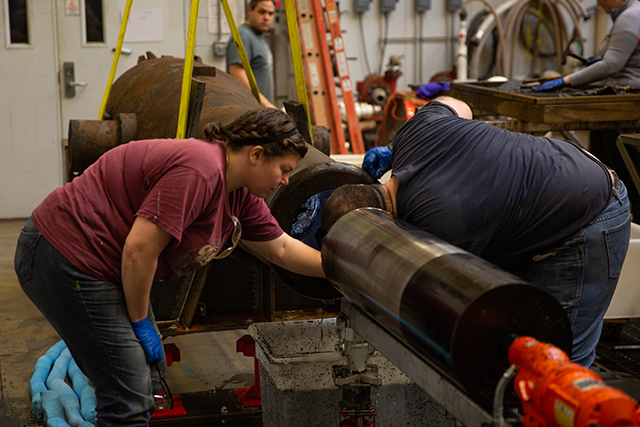
The first step in drilling is to make sure that the coring bit is going to travel exactly down the center of the gun. And I mean EXACTLY; otherwise you could start cutting little ledges into the bore, and nobody wants that. The easiest way to get started is actually to clean a short distance into the gun by hand. So the first thing we did for each gun was just that – we cleaned as far in with a hammer and chisel as we could get.

From there it’s a matter of correctly setting up the coring drill, slowly aligning it with the bore, and beginning to drill. We only go in a few inches at a time, before taking the drill back out to remove concretion and make sure the drill isn’t straying off path. The first drill bit we used was a custom-made coring bit. It’s basically a cylinder of pipe with abrasive cutting teeth at the front, made with a diameter of exactly 10.9 inches. The guns have an 11” bore diameter, so a tiny bit of concretion will remain (temporarily)… but using an 11” drill bit in an 11” hole would mean there is absolutely zero room for error, and that any additional abrasive action from loose concretion will start to wear into the gun’s surface. The goal is to get as close as possible, but to leave just enough room to avoid damaging the gun.


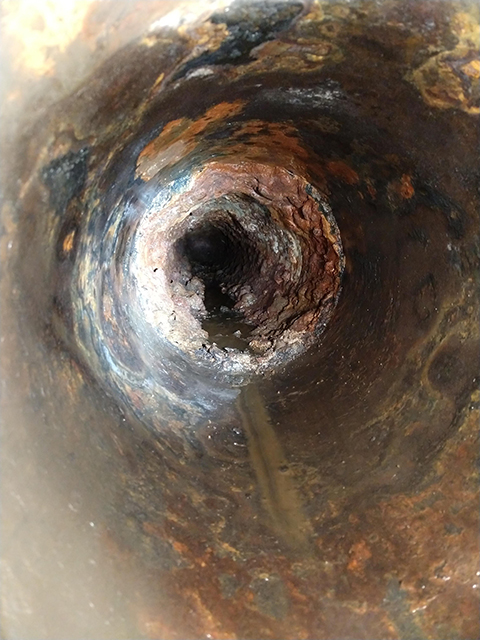
Once we were near the back of the gun, we needed to change things up a little bit. From the front of the barrel to a depth of 10 feet, the gun bores have a diameter of exactly 11 inches. But the last few inches of the bore form a curved gunpowder chamber, and a cylindrical coring bit can’t be used to clean it. Normally when cleaning a gun with a curved powder chamber, using a drill is impossible; you have to use (very) long chisels. However, if you’ve had the opportunity to research and measure an identical gun… well, that gives some other options!
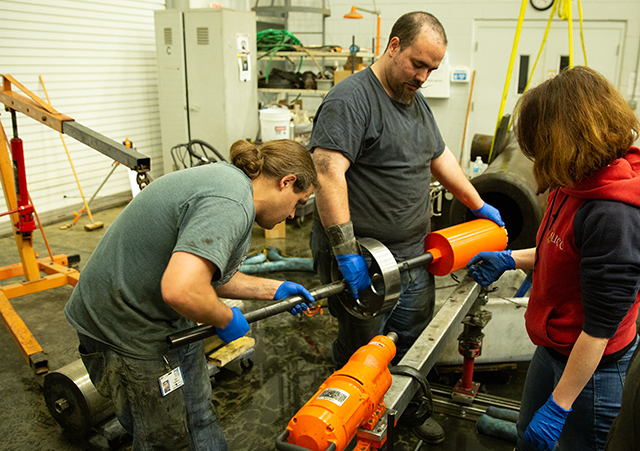
We decided to use some more new drilling technology to clean the powder chambers. First, we used a couple of smaller coring drills to remove the bulk of the concretion.

We were then able to use a giant spade bit, custom made to the exact shape of the powder chamber (but, like the coring bit, 0.1” smaller) to remove the remaining concretion. Once that was done, all bulk concretion had been removed from the bore – success!

(All images by staff of The Mariners’ Museum and Park)